10 Tiny Balcony Storage Ideas for Apartment Renters
 Save
10 Tiny Balcony Storage Ideas for Apartment Renters
My old apartment had a balcony the size of an ironing board. I measured it once out of spite: four feet deep, nine feet wide, and a sliding door that ate half the depth every time it opened. For the first year I treated it as outdoor decoration — a dead plant, a rusty chair, and the vague feeling that I was wasting square footage I was paying for.
Then I did the math. In my city, that little slab of concrete was worth roughly $80 a month in rent. And I was using it as a plant graveyard.
So I spent a summer turning it into an actual room — storage for the gardening stuff, the cushions, the cleaning supplies, the shoes that didn’t fit in the entryway — without drilling a single hole. My lease said “no alterations to exterior surfaces,” which sounds scary until you realize almost everything useful on a balcony is freestanding, clamp-on, or tension-fit anyway. No drilling required. No landlord drama. And when I moved out, the whole thing came inside in about forty minutes.
Everything below is renter-safe, weatherproof where it needs to be, and sized for balconies that are genuinely tiny — the 4-by-8-foot kind, not the rooftop-terrace kind. Real prices, real measurements, and the mistakes I made so you don’t repeat them.
Step Zero: Read Your Lease First (The 2-Minute Balcony Rules Check)
Before you buy a single planter, spend two minutes on your lease. Balconies are the one part of a rental where the rules get weirdly specific, and “I didn’t know” doesn’t save your deposit.
Here’s what leases and HOAs commonly restrict:
- Visible storage. Some buildings don’t allow anything visible above the railing line or stacked against it. A deck box is fine; a leaning tower of bins is not.
- Railing-mounted items. Hanging planters, rail tables, anything clamped to the rail — many HOAs require approval first or ban them outright. This is the rule most people trip over.
- Grills and open flames. Almost universally banned on apartment balconies. Not storage, but worth knowing before you plan a “grill station” corner.
- Weight and anchoring. Some leases cap what you can put out there, especially on older buildings. Nothing in this list is heavy, but it’s worth knowing the rule exists.
How to check in two minutes: search your lease PDF for “balcony,” “patio,” and “exterior.” If it’s silent, send your property manager one short email: “Am I allowed freestanding storage furniture and clamp-on planters on my balcony? No drilling involved.” Get the yes in writing. I did this at my second apartment and the manager replied “freestanding is fine” in under an hour — that one sentence covered my entire setup.
If your building says no to railing-mounted anything, skip ideas 3, 4, and 10 below. The other seven still give you a fully functional balcony.
Measure Before You Buy: 4 Numbers That Matter
The number-one balcony storage mistake is buying the box before measuring the balcony. A 50-gallon deck box looks reasonable online and absolutely devours a 4-foot-deep balcony in person. Get these four numbers first — it takes ten minutes with a tape measure.
1. Usable depth, minus a 36-inch walkway. Measure from the building wall to the railing, then subtract 36 inches for the path from the door to the rail. Whatever’s left is your storage depth. On my 4-foot balcony, that left 12 inches — one slim box, not two. This single subtraction prevents 90% of oversized purchases.
2. The door swing arc. Open your sliding or swinging door all the way and mark where it travels. Nothing tall goes in that arc. I watched a neighbor’s storage cabinet get clipped by their own door every windy day for a year. Mark the arc with painter’s tape before you shop.
3. Drain location. Most balconies have a drain or a scupper gap at one corner. Never block it with a flat-bottomed box sitting directly on the concrete — standing water rots everything and annoys the downstairs neighbor. Plan to keep the drain corner clear or use something with feet.
4. Railing width and profile. If you want saddle planters or a clamp-on rail table (ideas 3 and 4), measure the exact width of your railing top and note the shape — flat wood cap, round metal bar, wide concrete ledge, glass panel. Brackets that fit a 4-inch wood rail will not fit a 6-inch concrete one, and glass rails need rubber-coated clamps so the metal doesn’t scratch or slip.
Write the four numbers on your phone. You’ll reference them in every store aisle.
Weatherproofing 101: What Survives Outside (and What Doesn’t)
A balcony is not an indoor room with a nice view. It’s a room that gets rained on, sun-bleached, and wind-tunnelled. Storage that isn’t weatherproof doesn’t just look bad in six months — it rots, rusts, or blows into the parking lot. Here’s the short version of what actually lasts out there.
Materials that survive: Heavy-duty resin/plastic — the workhorse. UV-stable resin deck boxes and cabinets shrug off rain and sun for years. This is what most balcony storage is made of, and it’s the safest default. Powder-coated aluminum or steel — rust-resistant as long as the coating stays intact. Check the feet and joints once a season for chips. Teak and acacia — naturally weather-resistant hardwoods. They’ll silver with age unless you oil them, which is cosmetic, not structural. The IKEA acacia pieces in this list fall here. Solution-dyed acrylic fabrics — the only outdoor fabric worth buying. The color goes all the way through the fiber, so it doesn’t fade, and it resists mildew. Regular polyester cushions will fade and funk out in one season.
What NOT to store outside: Anything fabric without a UV/mildew rating — it fades, then it mildews, then it smells. Unsealed or soft wood (pine, MDF, particleboard) — swells and crumbles with one good rain. Paper and cardboard — obvious, but people still stash moving boxes of “temporary” stuff out there. Don’t. Anything you couldn’t bear to lose to a windstorm. If a gust could take it, assume a gust eventually will.
Three weatherproofing habits that matter more than materials: 1. Lids on everything. An open bin on a balcony is a rainwater collection project. Every container outside needs a lid that actually closes. 2. Feet or a raised base. Boxes sitting flat on concrete trap water underneath. Raised bases, feet, or even a cheap pallet underneath keeps air moving and prevents the slow rot. 3. Secure the light stuff. Before a storm, the rolling cart comes inside (idea 8 exists for exactly this reason), cushions go in the deck box, and anything under 5 pounds gets a home with a lid.
With that handled, here are the ten ideas.
1. The Slim Deck Box That Doubles as a Side Table
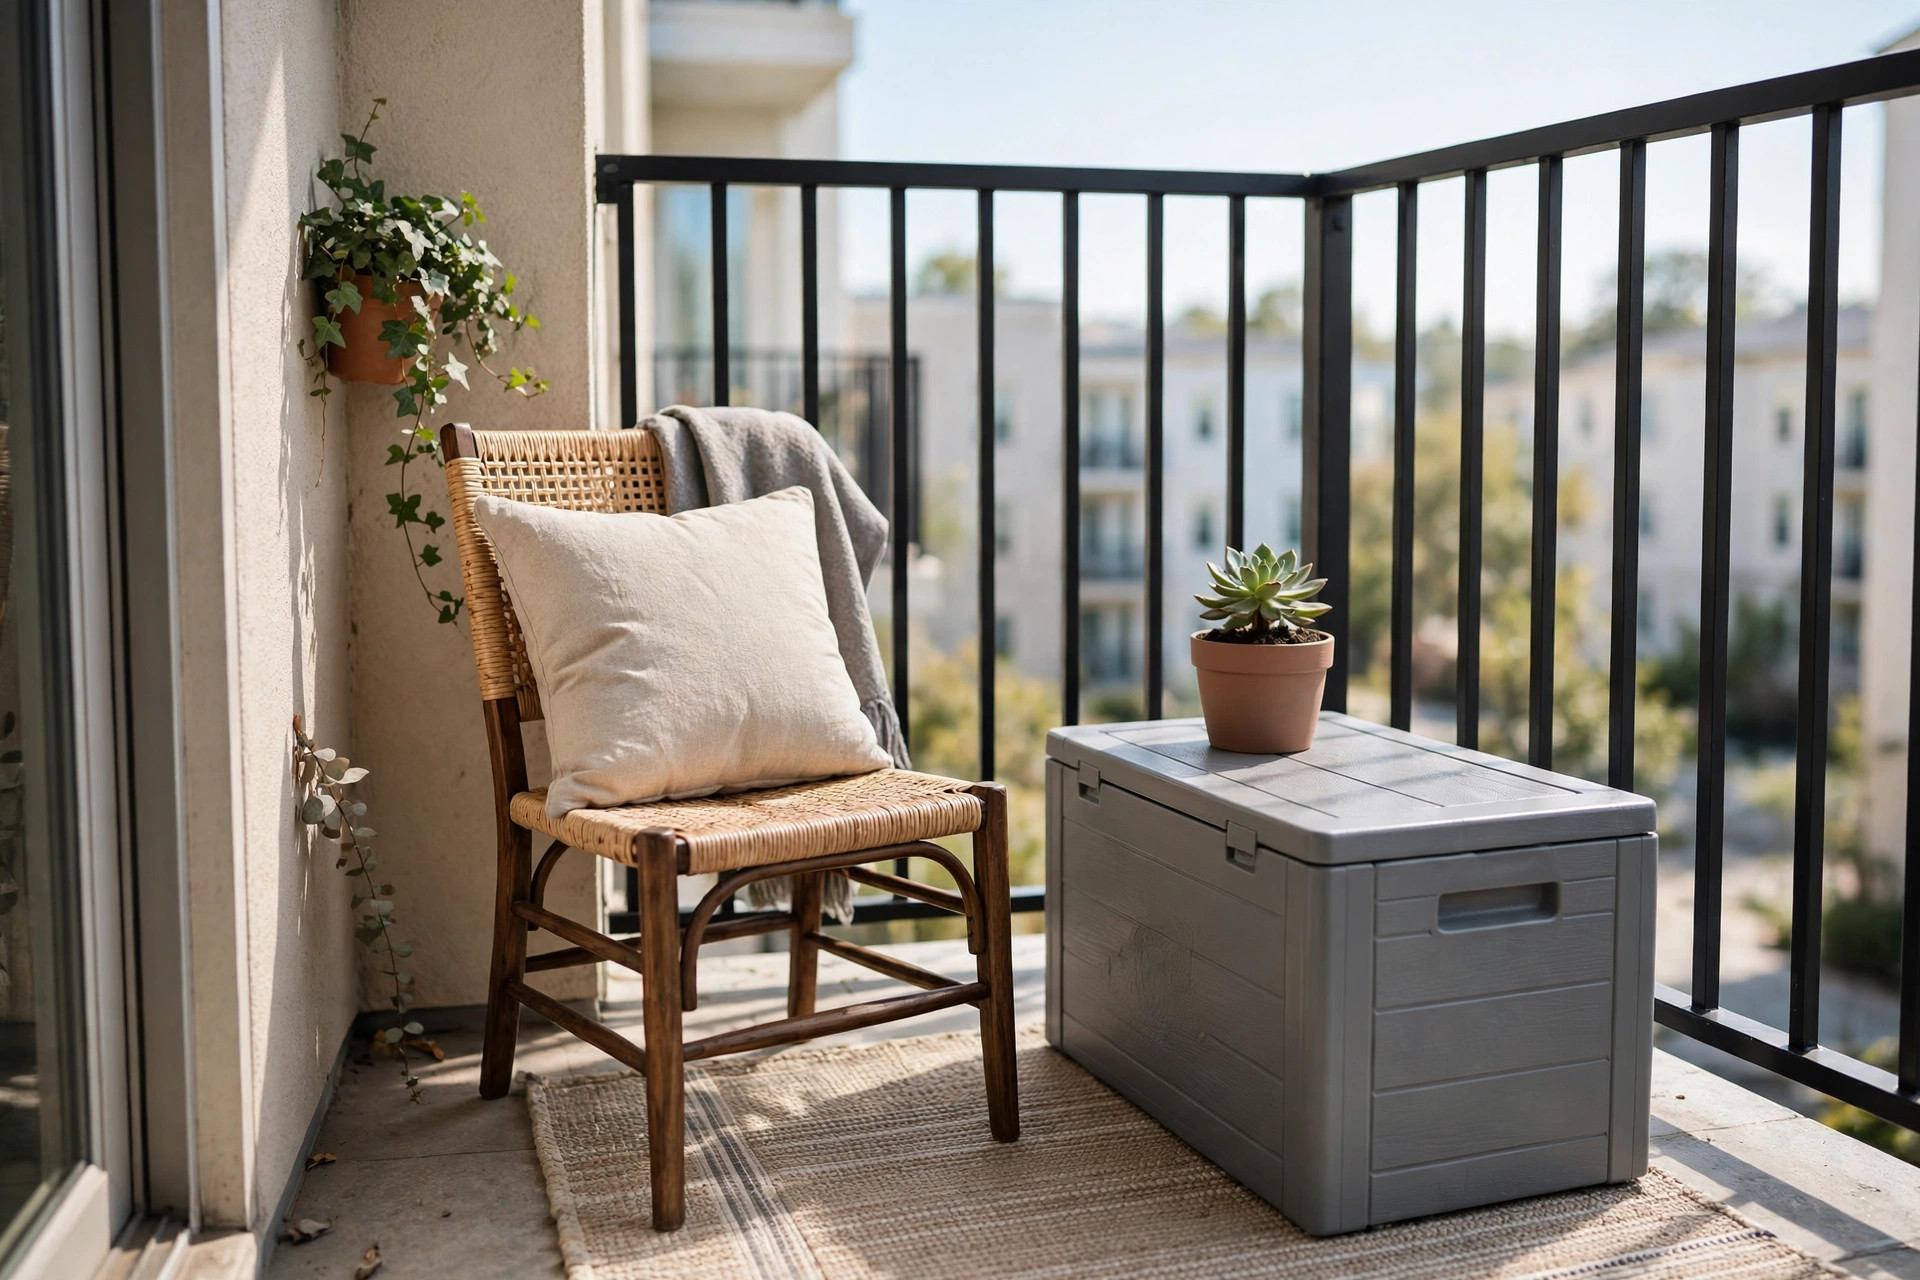
If you buy one thing for your balcony, make it this. A 30-gallon resin deck box is the single most-recommended balcony storage unit across every source I read while researching this post, and after two years with one, I agree. Mine holds the outdoor cushions, a folded throw, the citronella candles, and the bag of potting soil — and the flat lid holds my morning coffee.
The trick is getting the right size and the right lid. A 30-gallon box is roughly the footprint of a large side table, which is why it works on tiny balconies where a 50-gallon would eat the walkway. Look for UV-stable resin with a lid that latches or sits heavy enough to stay put in wind.
What to look for: a flat, sturdy lid (you’ll use it as a table daily), a waterproof seal or at least a tight-fitting lid, and feet or a raised base so it’s not sitting in puddle water. Check whether the lid is sit-rated before you treat it as a bench — the Keter City’s lid, for example, is explicitly not for sitting, while some reinforced lids handle 300+ pounds. Know which one you’re buying.
Real prices: the Walmart EasyUp 30-gallon runs about $25.99, the Clihome 30-gallon is $35 to $43, the Keter City 30-gallon is roughly $45 to $90, and the EAST OAK 31-gallon (raised base, reinforced lid) is $90 to $110. The Suncast 50-gallon at $86 to $99 is the move if your balcony has the depth for it — measure first.
My mistake: I bought the bigger box first. It fit, technically — and left me a 14-inch walkway I had to sidle through like a crab. Downsized to the 30-gallon and suddenly the balcony felt twice as big. Depth discipline matters more than capacity.
2. A Storage Bench Against the Building Wall
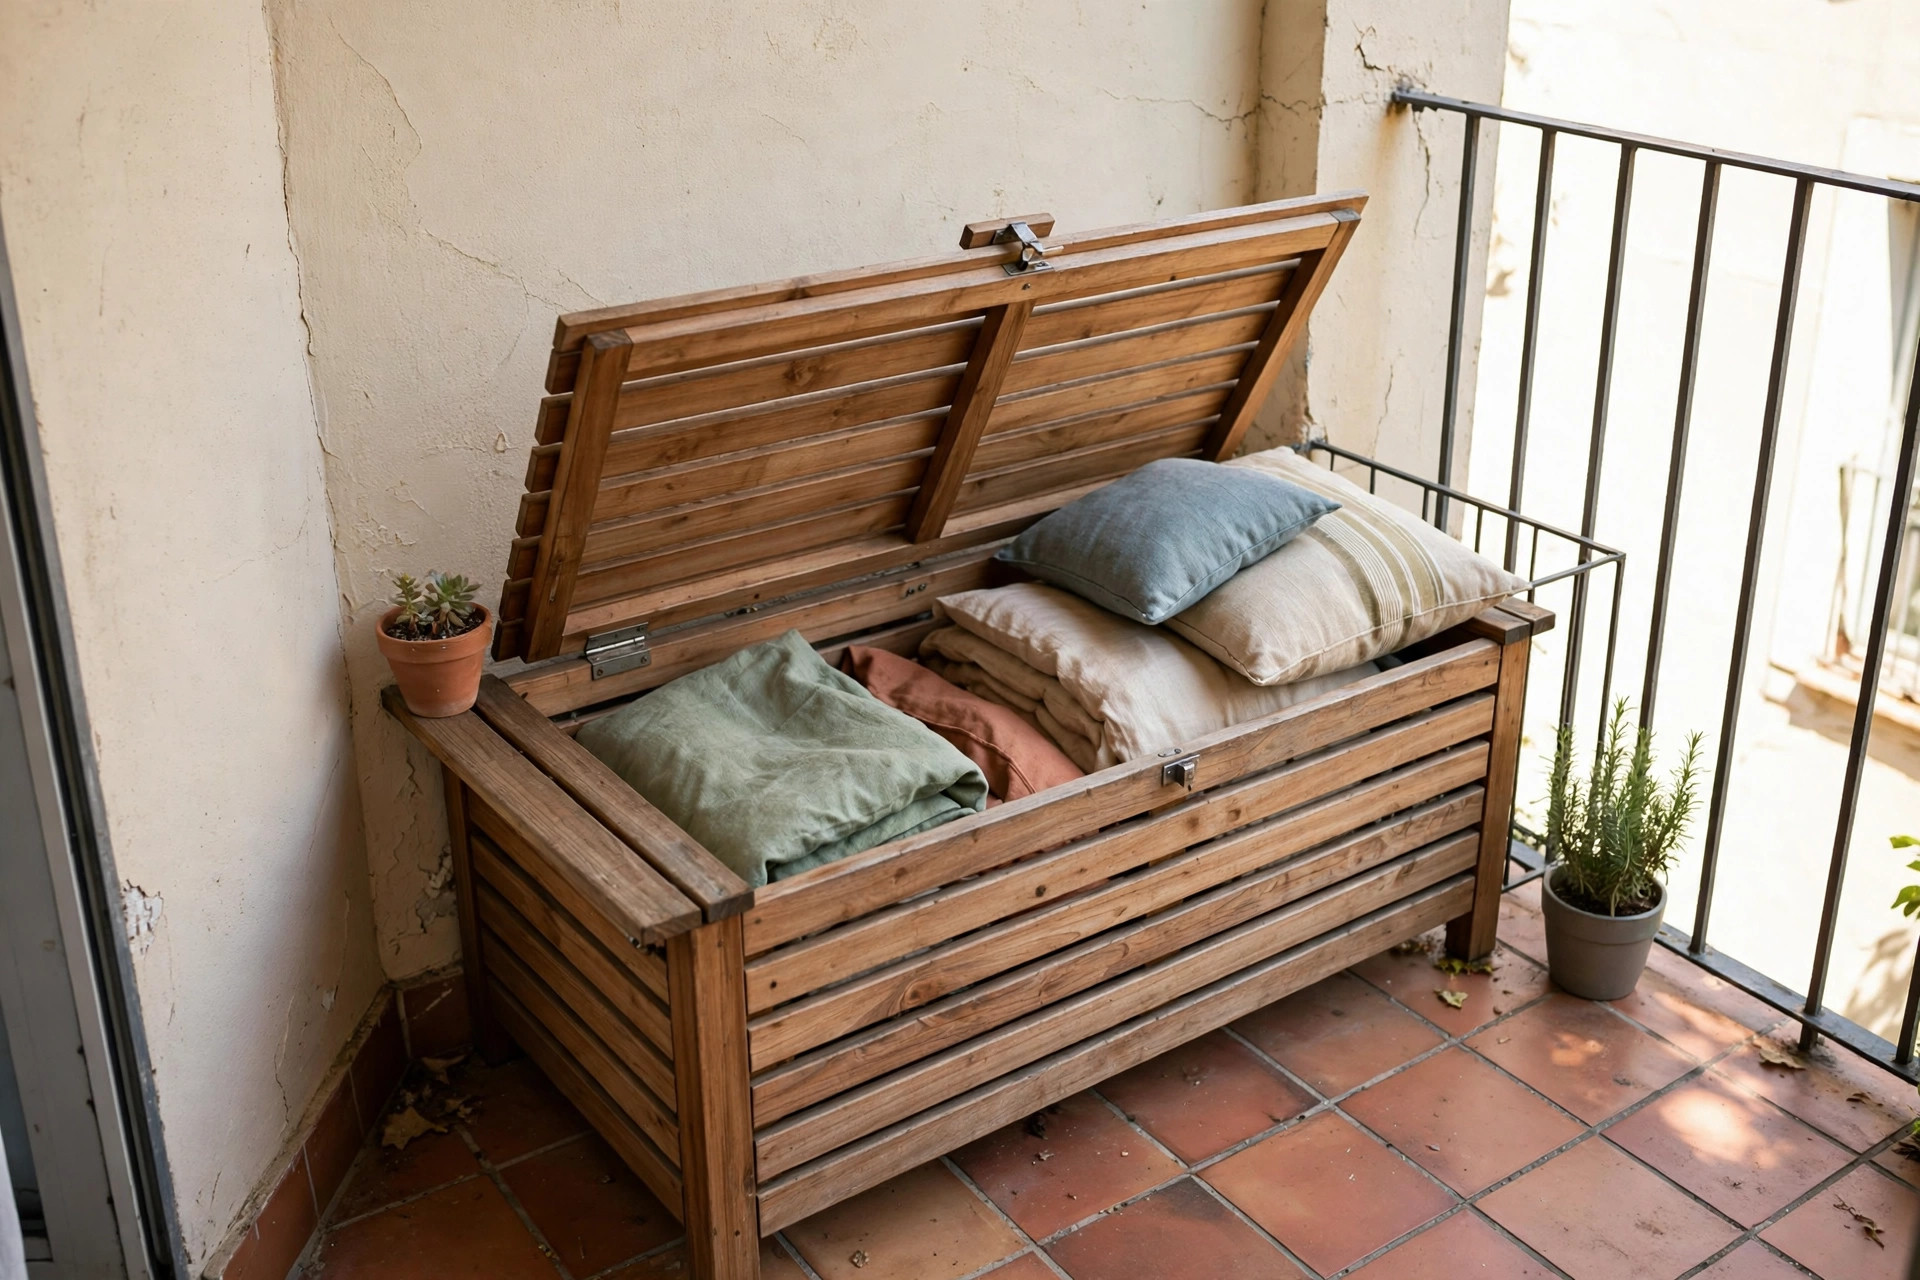
A storage bench is the deck box’s taller cousin: seating on top, hidden storage inside, and it lives against the building wall where it’s sheltered and out of the walkway. Mine holds the outdoor cushions I don’t want to haul inside every night, plus the picnic blanket and a spare throw. Guests get a seat; I get a closet.
Placement matters more than the bench itself. Against the building wall — never against the railing — it stays out of wind, out of the door swing, and out of sight from the street, which keeps picky HOAs happy. On narrow balconies, keep the depth at 45 cm (about 18 inches) or less so the walkway survives.
What to look for: a hinged lid that stays open on its own (you’ll be loading it with both hands full), drainage or ventilation so trapped moisture doesn’t mildew the contents, and a weight rating that handles actual sitting. If the bench doesn’t have interior compartments, add a fabric bin inside — otherwise it becomes one deep pit where the thing you want is always at the bottom.
Real prices: the IKEA ÄPPLARÖ small storage bench is $70 (31.5 × 16.9 × 17.75 inches), the large is $129, and the IKEA NÄMMARÖ storage box is $125 in acacia with a 243-pound seat rating. Acacia weathers well but will silver if you don’t oil it — I let mine go gray and honestly prefer it.
My tip: store the cushions inside the bench, not on it, overnight. The one week I got lazy and left them out, a surprise storm turned them into sponges. The bench is the cushion garage — use it as one.
3. The Clamp-On Fold-Down Rail Table
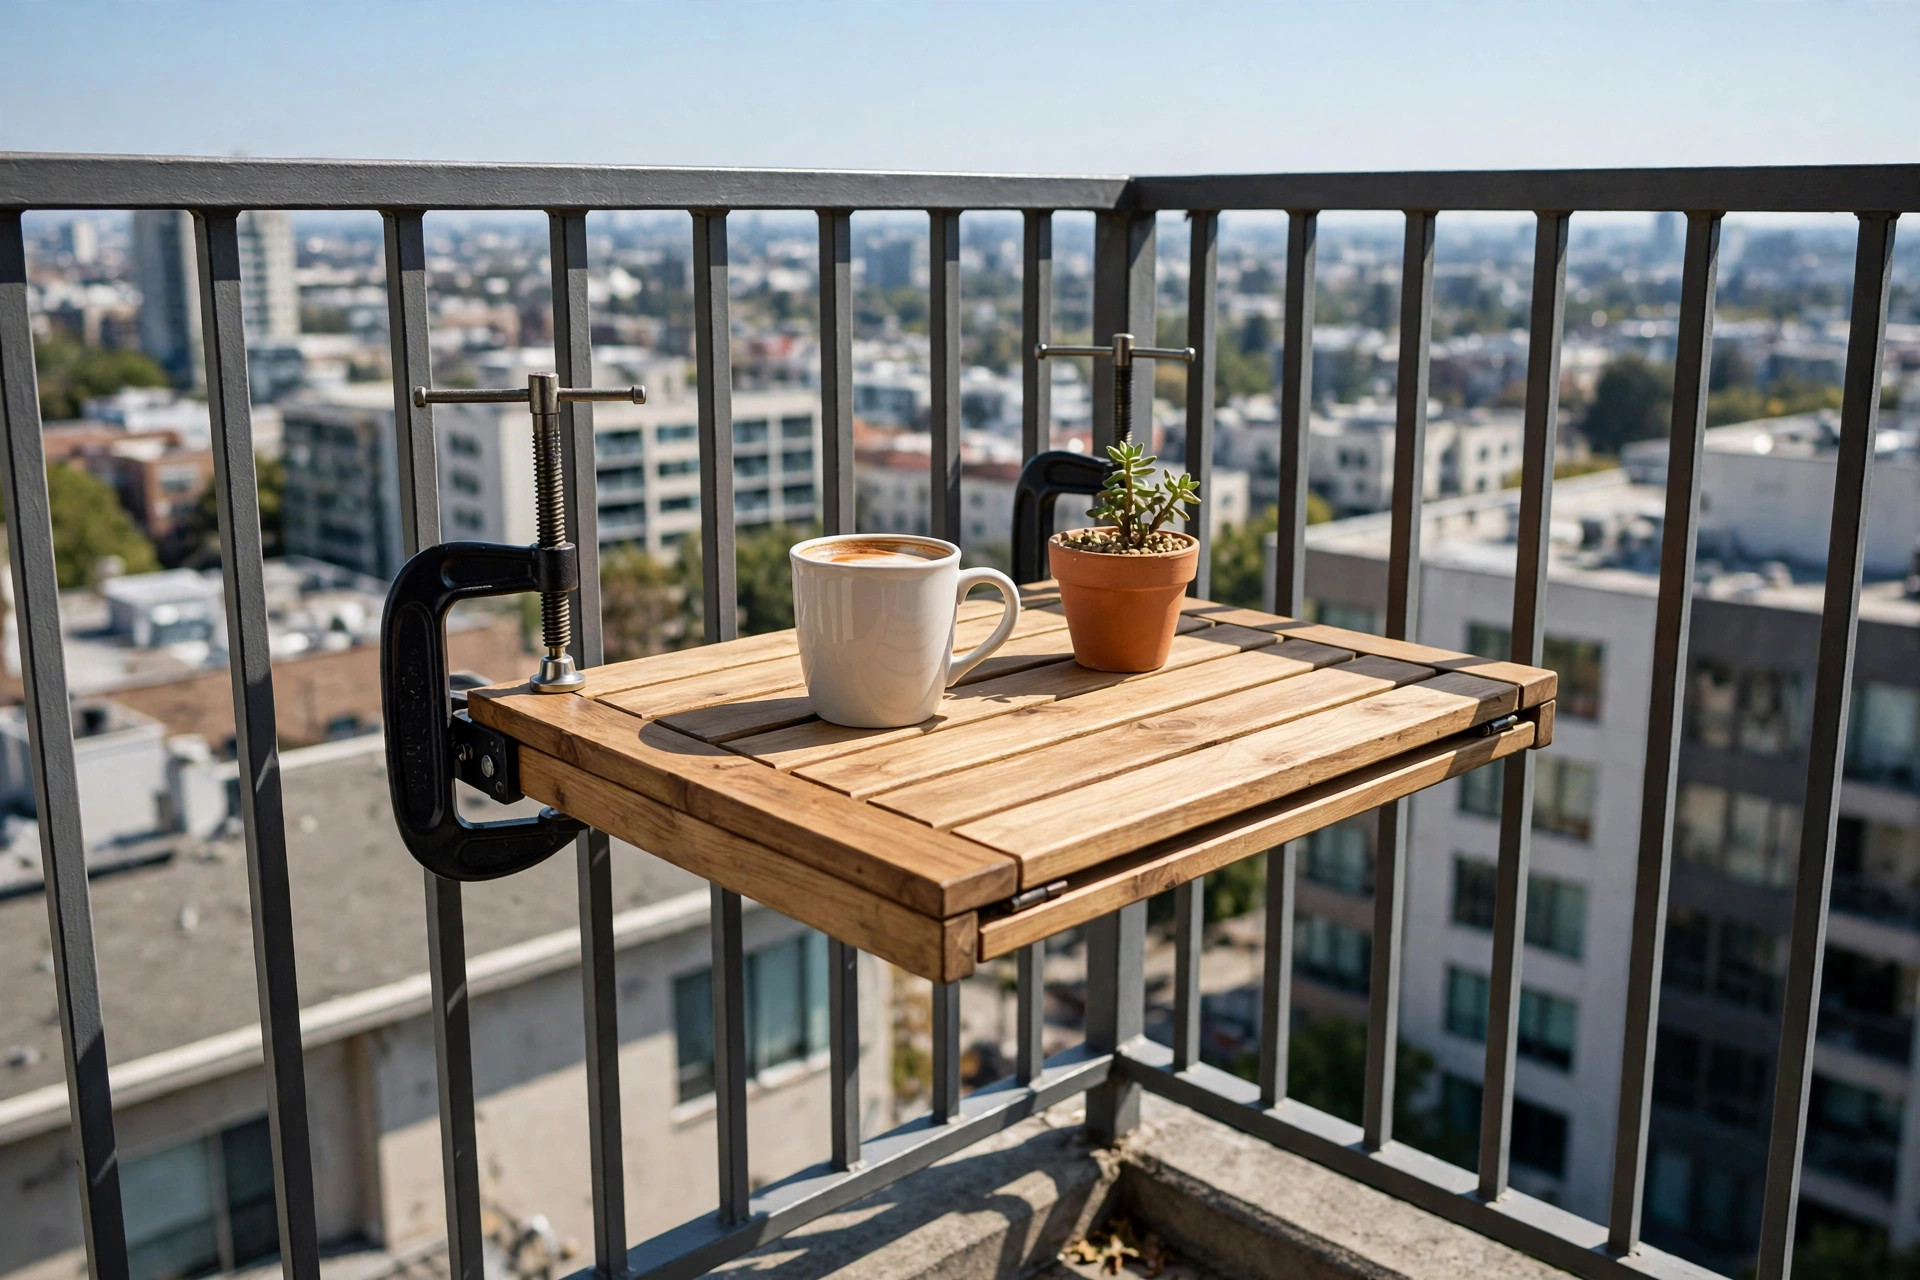
This is the one that breaks the internet every few months — the little wooden table that clamps to the balcony railing, unfolds for your laptop or lunch, and folds flat against the rail when you’re done. I finally get the hype: on a balcony too small for any real table, it’s the difference between eating inside and eating outside.
It works by clamping, not drilling — stainless steel brackets grip the railing and the tabletop hinges down from them. When folded, it takes up essentially zero floor space, which is the whole point on a tiny balcony. I’ve worked full afternoons on mine with a laptop, a coffee, and a notebook.
What to look for: brackets that match your railing profile (remember number 4 from the measuring section), stainless or powder-coated hardware that won’t rust, and a weight rating you actually respect — this is a laptop-and-lunch table, not a “stand on it to hang lights” table. Test the clamp tightness monthly; vibration and temperature swings loosen things over time.
The HOA catch: this is a railing-mounted item, which is exactly what some buildings restrict. Check your Step Zero email before buying. If your building says no, the deck-box-as-side-table (idea 1) is your fallback.
Real prices: generic fold-down rail tables run $60 to $200 depending on size, wood type, and bracket quality. The cheap end works fine — you’re paying for the bracket engineering, not the tabletop. Confirm your rail diameter before ordering; “universal” brackets are universal the way “one size fits all” hats are.
My tip: fold it down every night, even if you’ll use it tomorrow. A folded table survives windstorms; an unfolded one becomes a sail. This takes four seconds and it’s the cheapest insurance on the list.
4. Saddle Railing Planters (The No-Hardware Garden)

Saddle planters — the ones that straddle the railing like a saddlebag, one pocket inside and one outside — are the easiest garden a renter can have. No brackets, no screws, no hardware at all. Gravity and friction do the work. I grow herbs in mine: basil, mint, and chives on the inside pocket, trailing pothos on the outside where the neighbors get the nice view.
The make-or-break detail is fit. The planter’s channel must match your railing width snugly — too loose and a strong gust walks it right off the rail, too tight and you can’t get it on. This is why “measure the railing” was number 4 in the measuring section. For glass railings, get versions with rubber-coated clamps so the metal doesn’t scratch the glass or slip when wet.
What to look for: drainage holes with drip trays (your downstairs neighbor will thank you — more on this in the FAQ), UV-stable material that won’t go brittle in sun, and a snug fit you can test in the store by sliding it onto a display rail or a 2×4 of the same width.
Real prices: budget about $30 for three decent saddle planters — roughly ten dollars apiece. That’s the number from my starter-kit math below, and it’s held up across every store I’ve checked.
My mistake: my first set was a half-inch too wide for my rail. They looked fine for a month. Then a thunderstorm walked one of them six inches sideways and I found it hanging by hope. Replaced with a snug set and rubber grip pads, and they haven’t moved since. Fit is everything.
Renter rule: never drill into a railing to “secure” a planter. In most buildings, railing damage counts as property damage, not wear and tear, and it’s one of the few things that can actually cost you real deposit money.
5. A Tension Rod Between Railing Uprights for Hanging Baskets
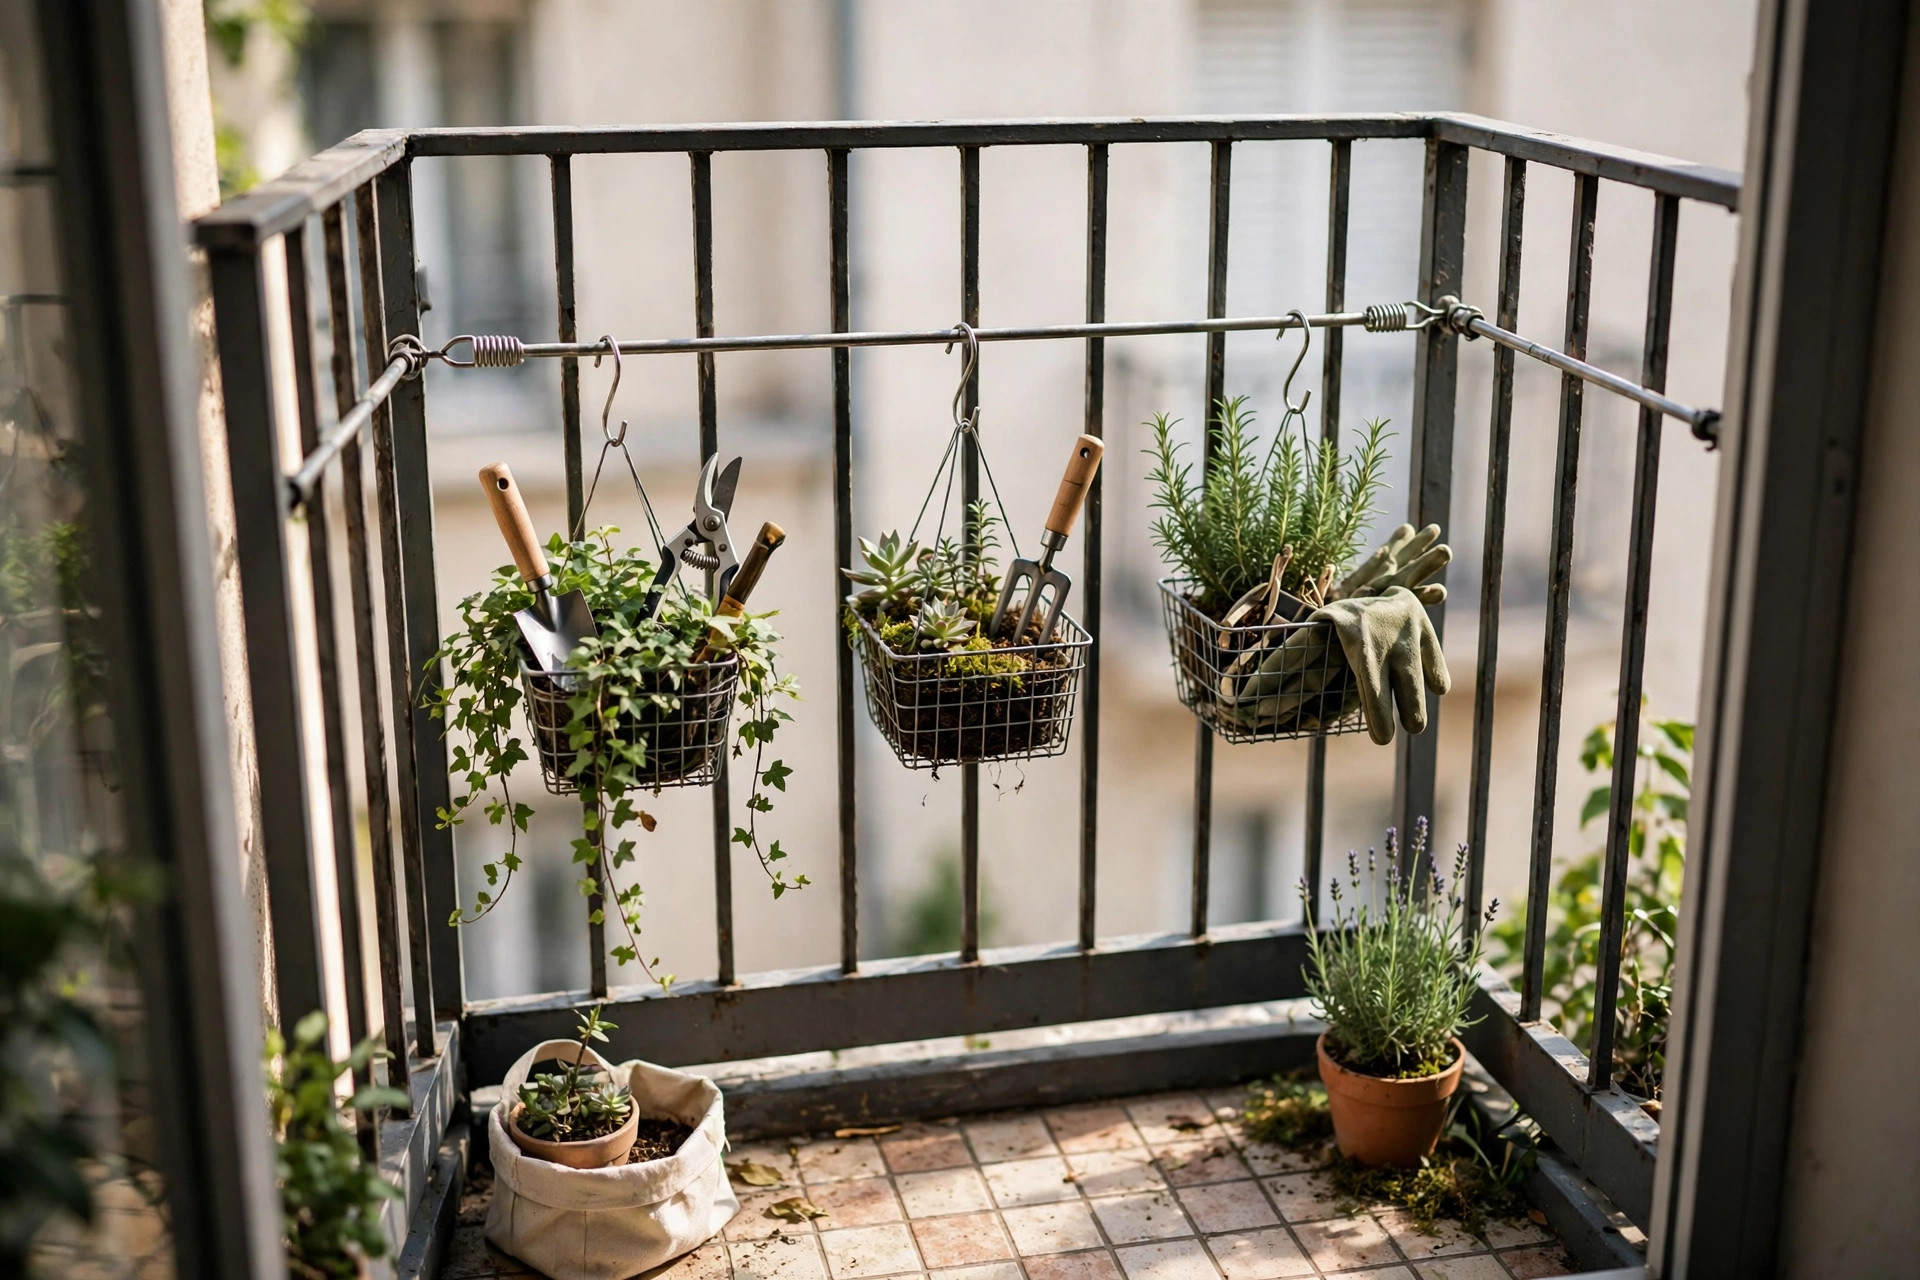
This one’s a little sneaky, and I love it. Most balcony railings have vertical uprights or balusters. A spring tension rod wedged horizontally between two uprights gives you a hanging bar for S-hooks and small baskets — no wall, no drilling, no damage to anything. I hang a small wire basket of cherry tomatoes, a pair of gardening gloves, and a solar lantern from mine.
It works best on railings with flat-sided uprights where the rod ends can grip. Keep the total load light — around 12 pounds max per rod, which is plenty for small baskets, gloves, and a lantern, and not enough for a hanging fern that weighs as much as a toddler when watered. Hang the rod low, near the middle of the railing height, where wind leverage is smallest.
What to look for: a rod rated for the span you’re covering (longer spans sag — keep it under 3 feet between uprights), rubber end caps for grip, and S-hooks in stainless or coated metal. Hang lighter items toward the middle and skip this idea entirely on glass-panel railings with no uprights.
My tip: this is also the best airflow option for hanging plants. Enclosed brackets trap humidity against the railing; an open rod with S-hooks lets air move through, which my herbs clearly prefer. The basil on the rod outgrows the basil in the saddle planter every single summer, and I’ve stopped questioning it.
6. The Leaning Ladder Shelf (Freestanding Vertical Storage)
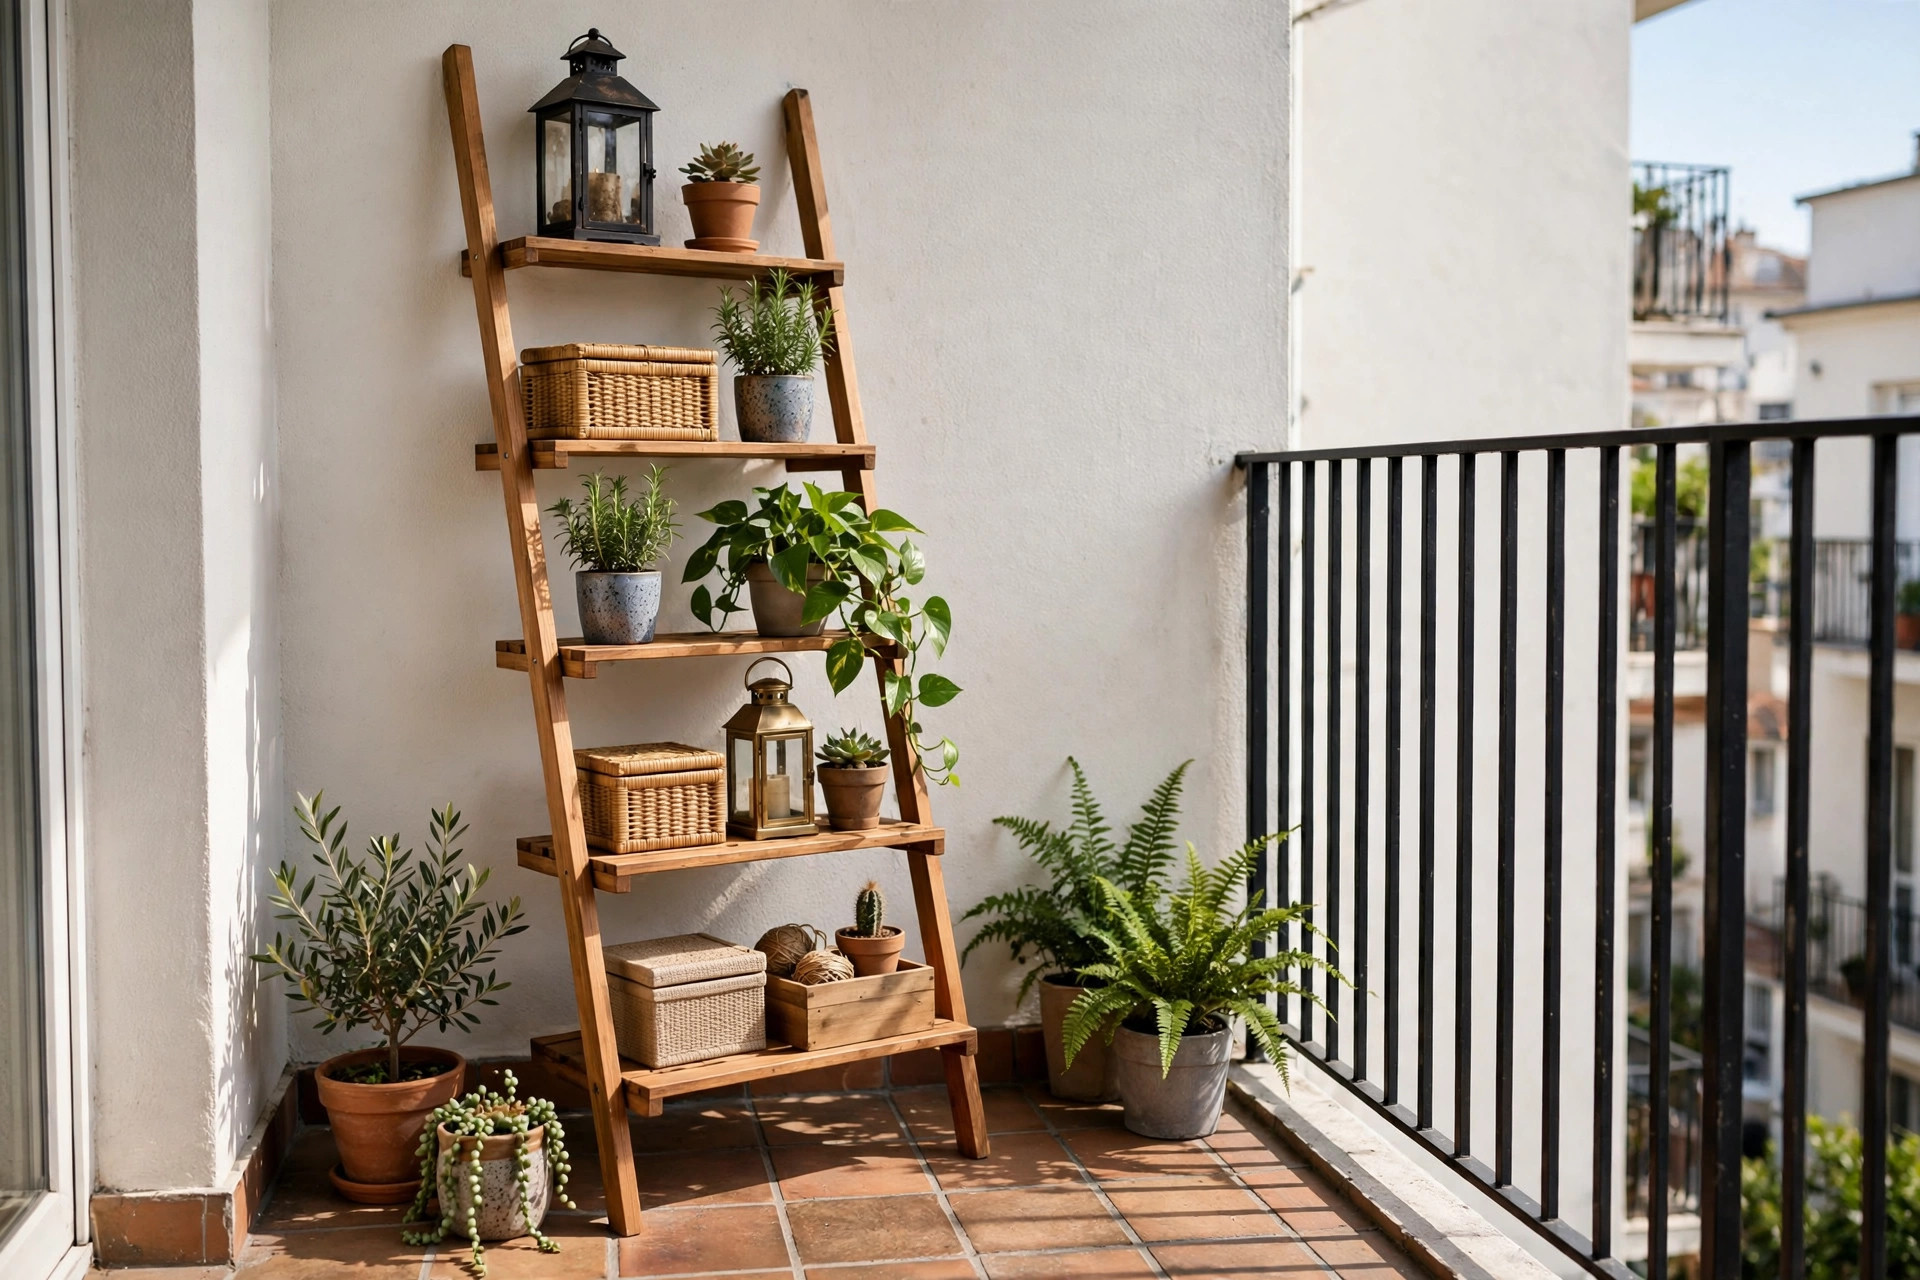
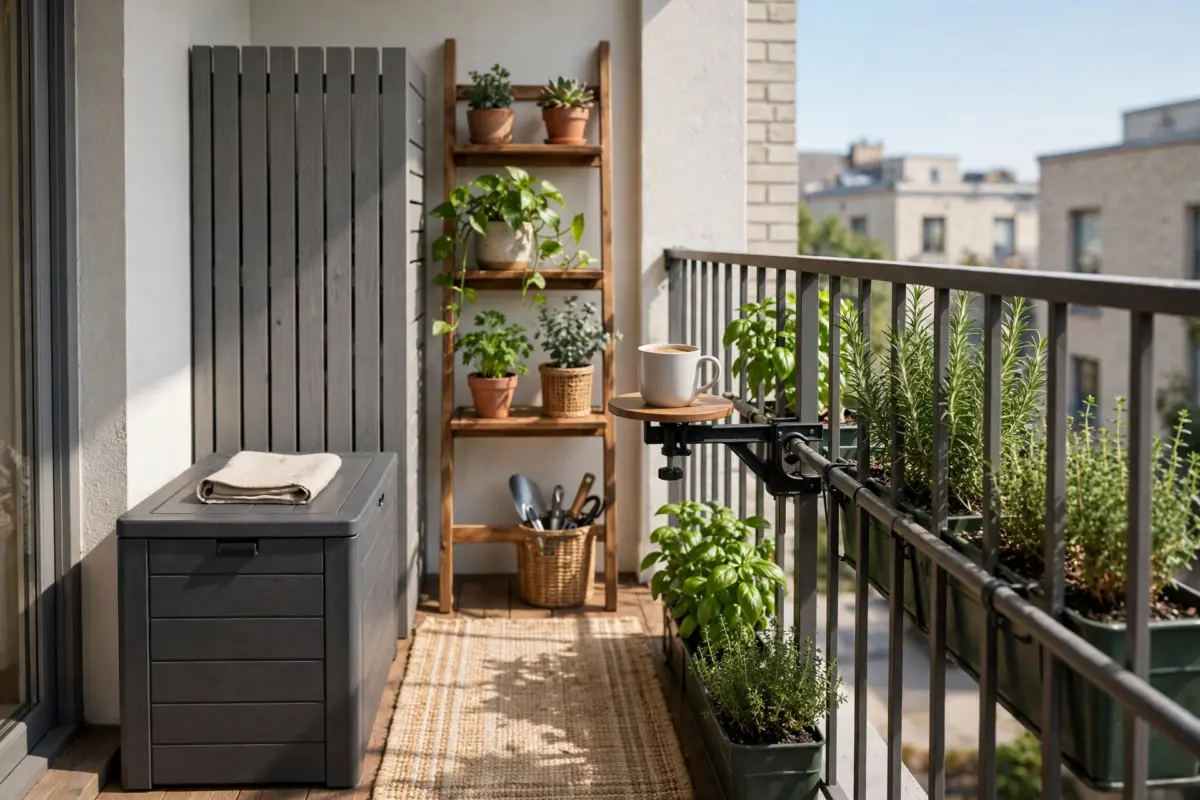
Wall-mounted shelves need drilling. A leaning ladder shelf needs gravity. It leans against the building wall on its own weight, takes up about 14 inches of depth, and gives you four or five tiers of vertical storage where your balcony previously had… wall. Mine holds potted herbs on the middle shelves, the watering can and spray bottle on the bottom, and a trailing plant on top that makes the whole thing look intentional.
This is the renter’s substitute for wall-mounted shelving, and it works because balconies are starved for vertical storage. Everything else in this list sits on the floor. The ladder shelf is the only thing that goes up.
What to look for: a freestanding design that leans rather than mounts (some “ladder shelves” are secretly wall-mount — read the assembly instructions before buying), shelves deep enough for actual pots (6 to 8 inches minimum), and weatherproof material — powder-coated metal or sealed wood, not raw pine. Put the heaviest pots on the bottom shelf for stability.
Wind note: a ladder shelf is tall and light, which is exactly the shape wind likes. On exposed high-rise balconies, keep it against the most sheltered wall, load the bottom shelf heavy, and in storm season, lay the top-heavy plants down inside the deck box. Mine has survived three summers on a fifth-floor balcony with this routine.
My tip: the bottom shelf is also the perfect home for the “balcony cleaning kit” — a spray bottle, a hand brush, and a dustpan live on mine full-time. Ten seconds to grab, which means the balcony actually gets swept.
7. A Tall Slim Weatherproof Cabinet
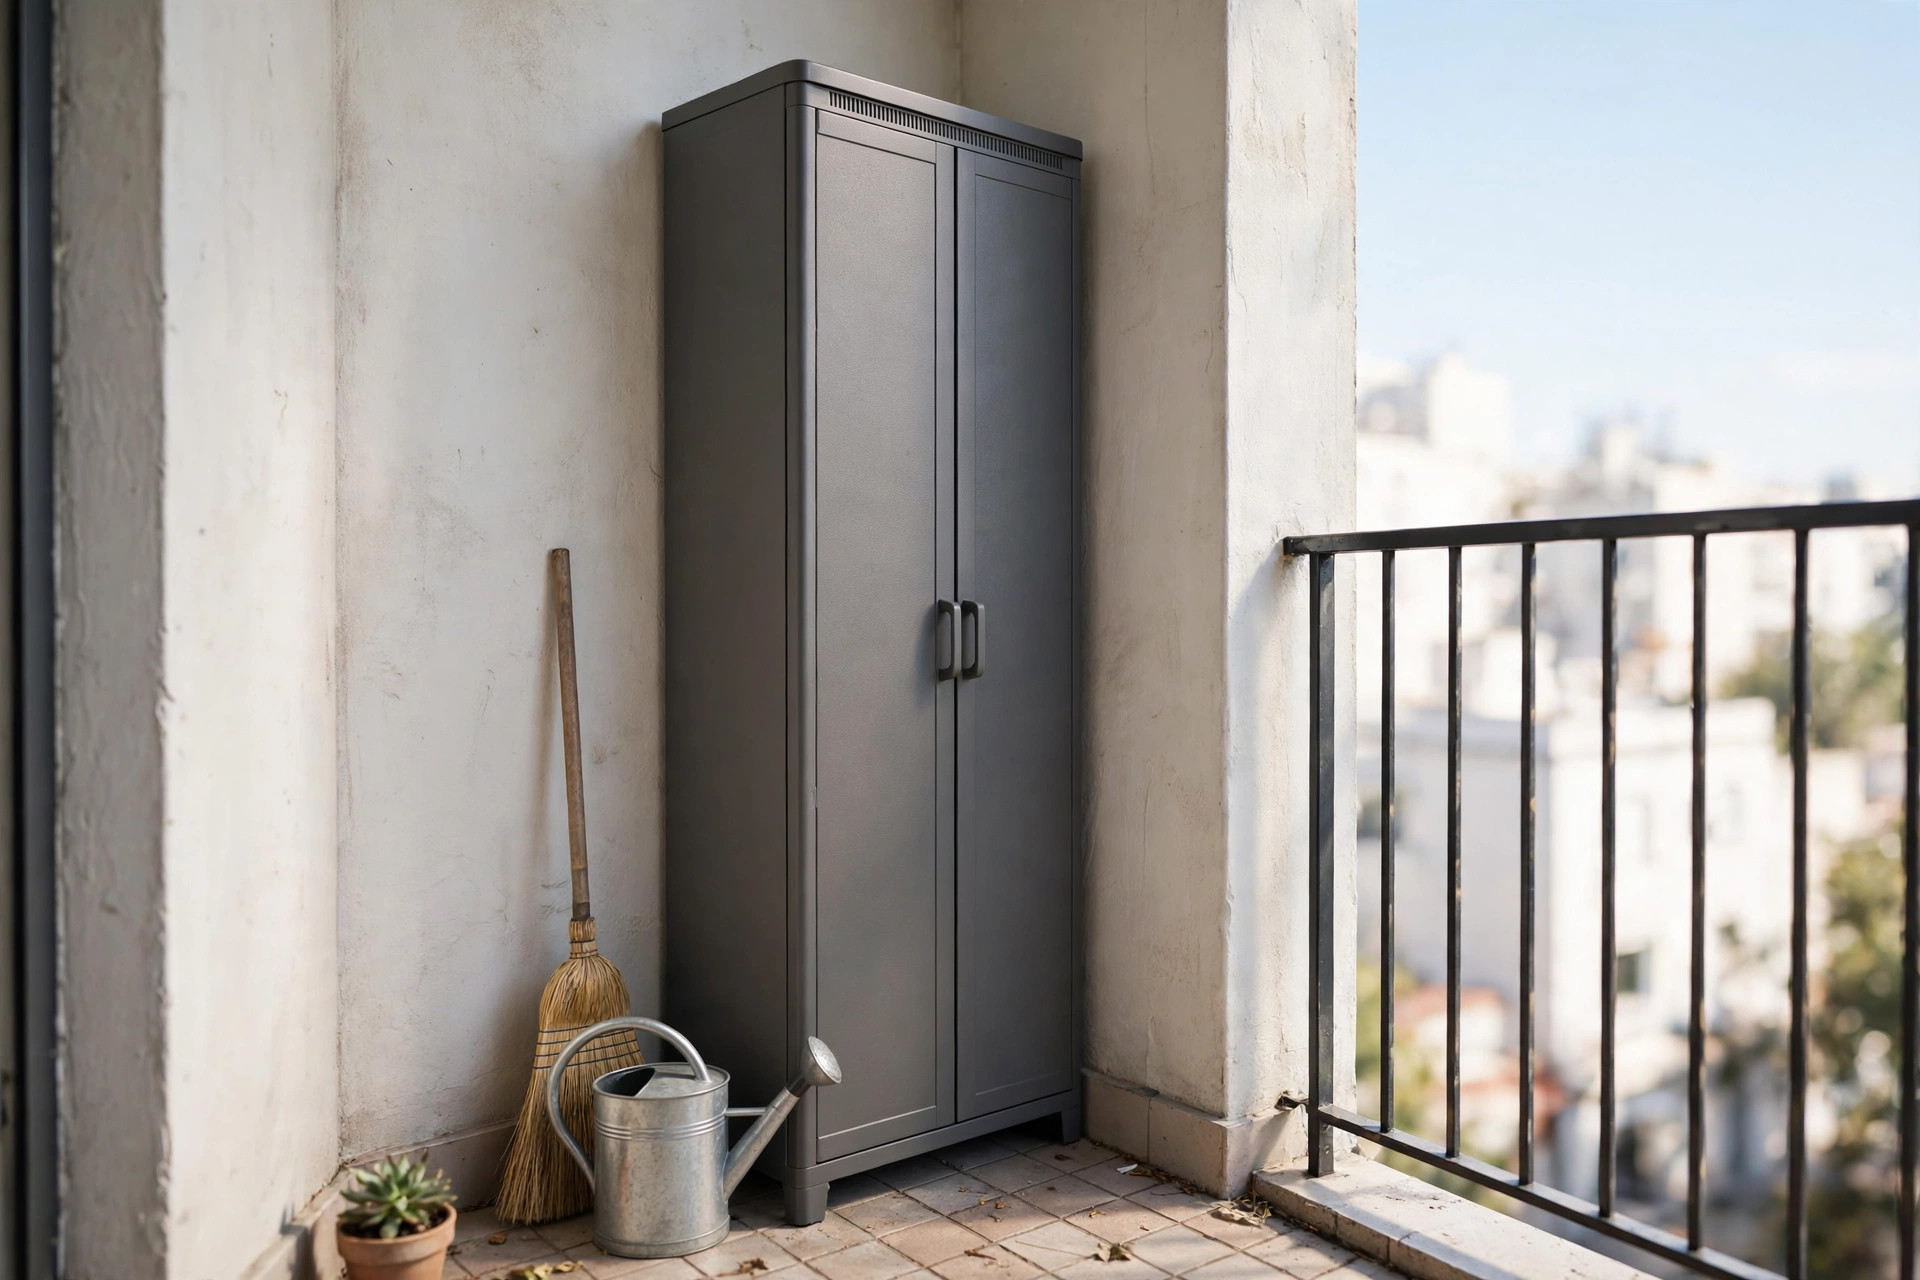
When the deck box and the bench aren’t enough — garden tools, spare cushions, the big bag of potting soil, the cleaning supplies — a tall slim resin or metal cabinet against the structural wall closes the deal. Doors instead of a lid means you can actually organize inside: shelves for the small stuff, tall space for the watering can and the folded camp chairs.
The placement rule is absolute: against the building’s structural wall, never against the railing. A tall cabinet is top-heavy and catches wind like a sail. Against the wall it’s sheltered and stable; against the rail it’s a liability and, in many buildings, a lease violation for blocking the railing.
What to look for: adjustable shelves (your storage needs will change by season), doors that latch shut in wind, ventilation so it doesn’t turn into a mildew box, and a footprint no deeper than 18 inches. Lockable doors are a bonus if your balcony is accessible from a shared courtyard.
What goes inside: I keep mine zoned like the inside of my apartment — top shelf for small stuff (gloves, seed packets, sunscreen), middle for medium (spray bottles, hand tools), bottom for heavy (potting soil, the watering can). It’s the same zone system I use under my kitchen sink — categories in fixed homes, just weatherproofed. The system transfers perfectly; only the materials change.
My tip: put a moisture absorber tub (the closet kind) on the bottom shelf if your climate is humid. It costs a few dollars, lasts months, and it’s the difference between tools that last years and tools that rust by fall.
8. The Rolling Cart That Flees Storms
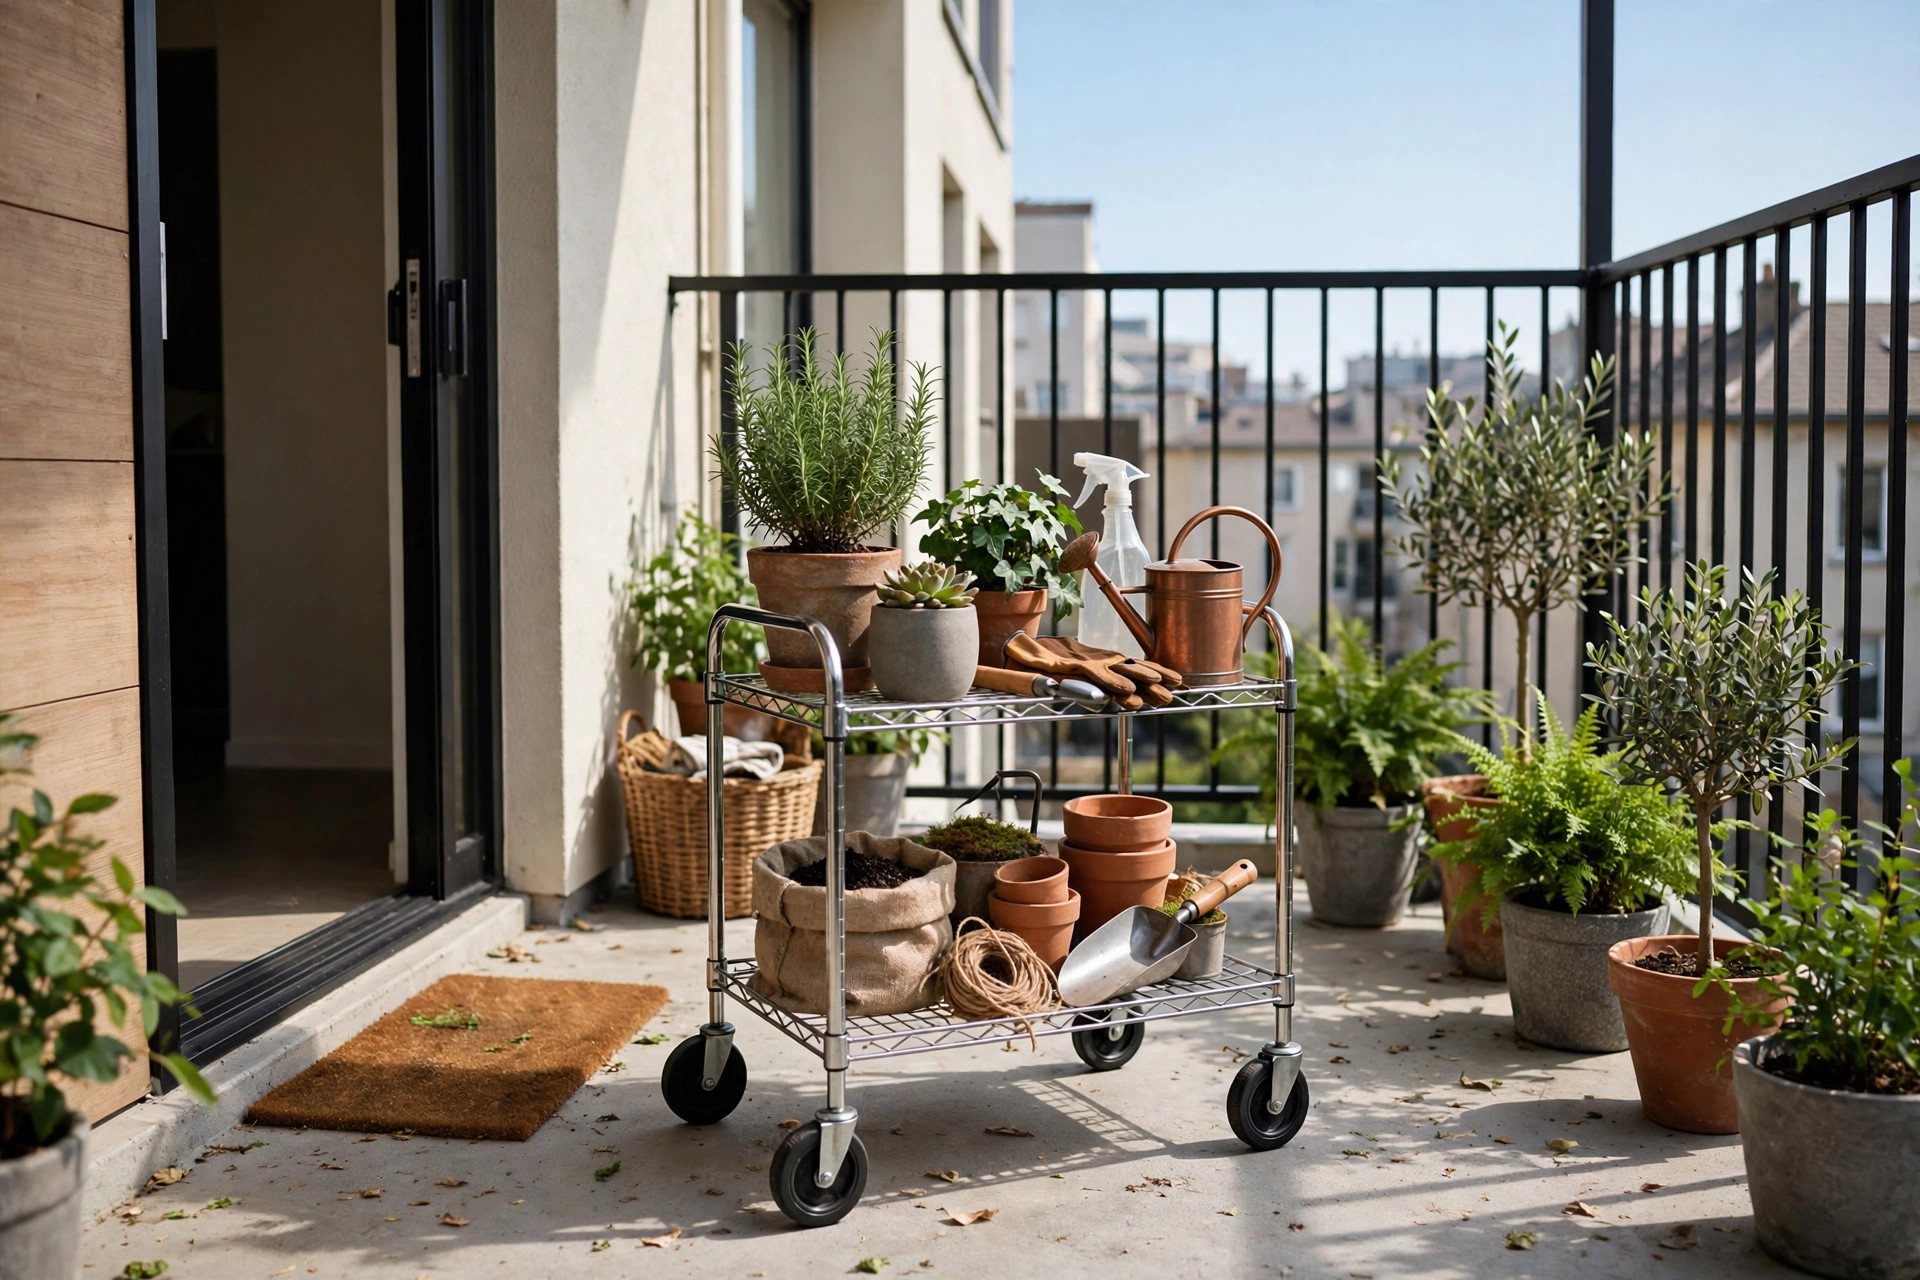
A three-tier metal rolling cart is my favorite balcony cheat. It holds the potting supplies, the watering can, the sunscreen, and the little hand tools — and when a storm rolls in, the whole thing wheels inside in ten seconds. No other storage on this list can evacuate. That’s its superpower.
Keep it small enough to fit through your sliding door easily — measure the door width, not just the balcony. The standard three-tier carts fit through most doors, but the wide “kitchen island” style ones don’t, and discovering that during a thunderstorm is a bad time.
What to look for: locking casters (an unlocked cart on a sloped balcony will migrate), rust-resistant coating, and a top tier with a lip or rail so things don’t slide off when you wheel it. In daily use, park it with the casters locked against the wall; unlock only for the storm dash.
My routine: the cart lives on the balcony from April to October and migrates to the laundry corner for winter. The seasonal move takes five minutes and doubles as my “inspect everything” moment — I wipe the tiers, toss the dead seed packets, and check the casters. It’s the only storage I own that forces a seasonal reset, and my balcony is better for it.
9. Lidded Bins in the Dead Zones
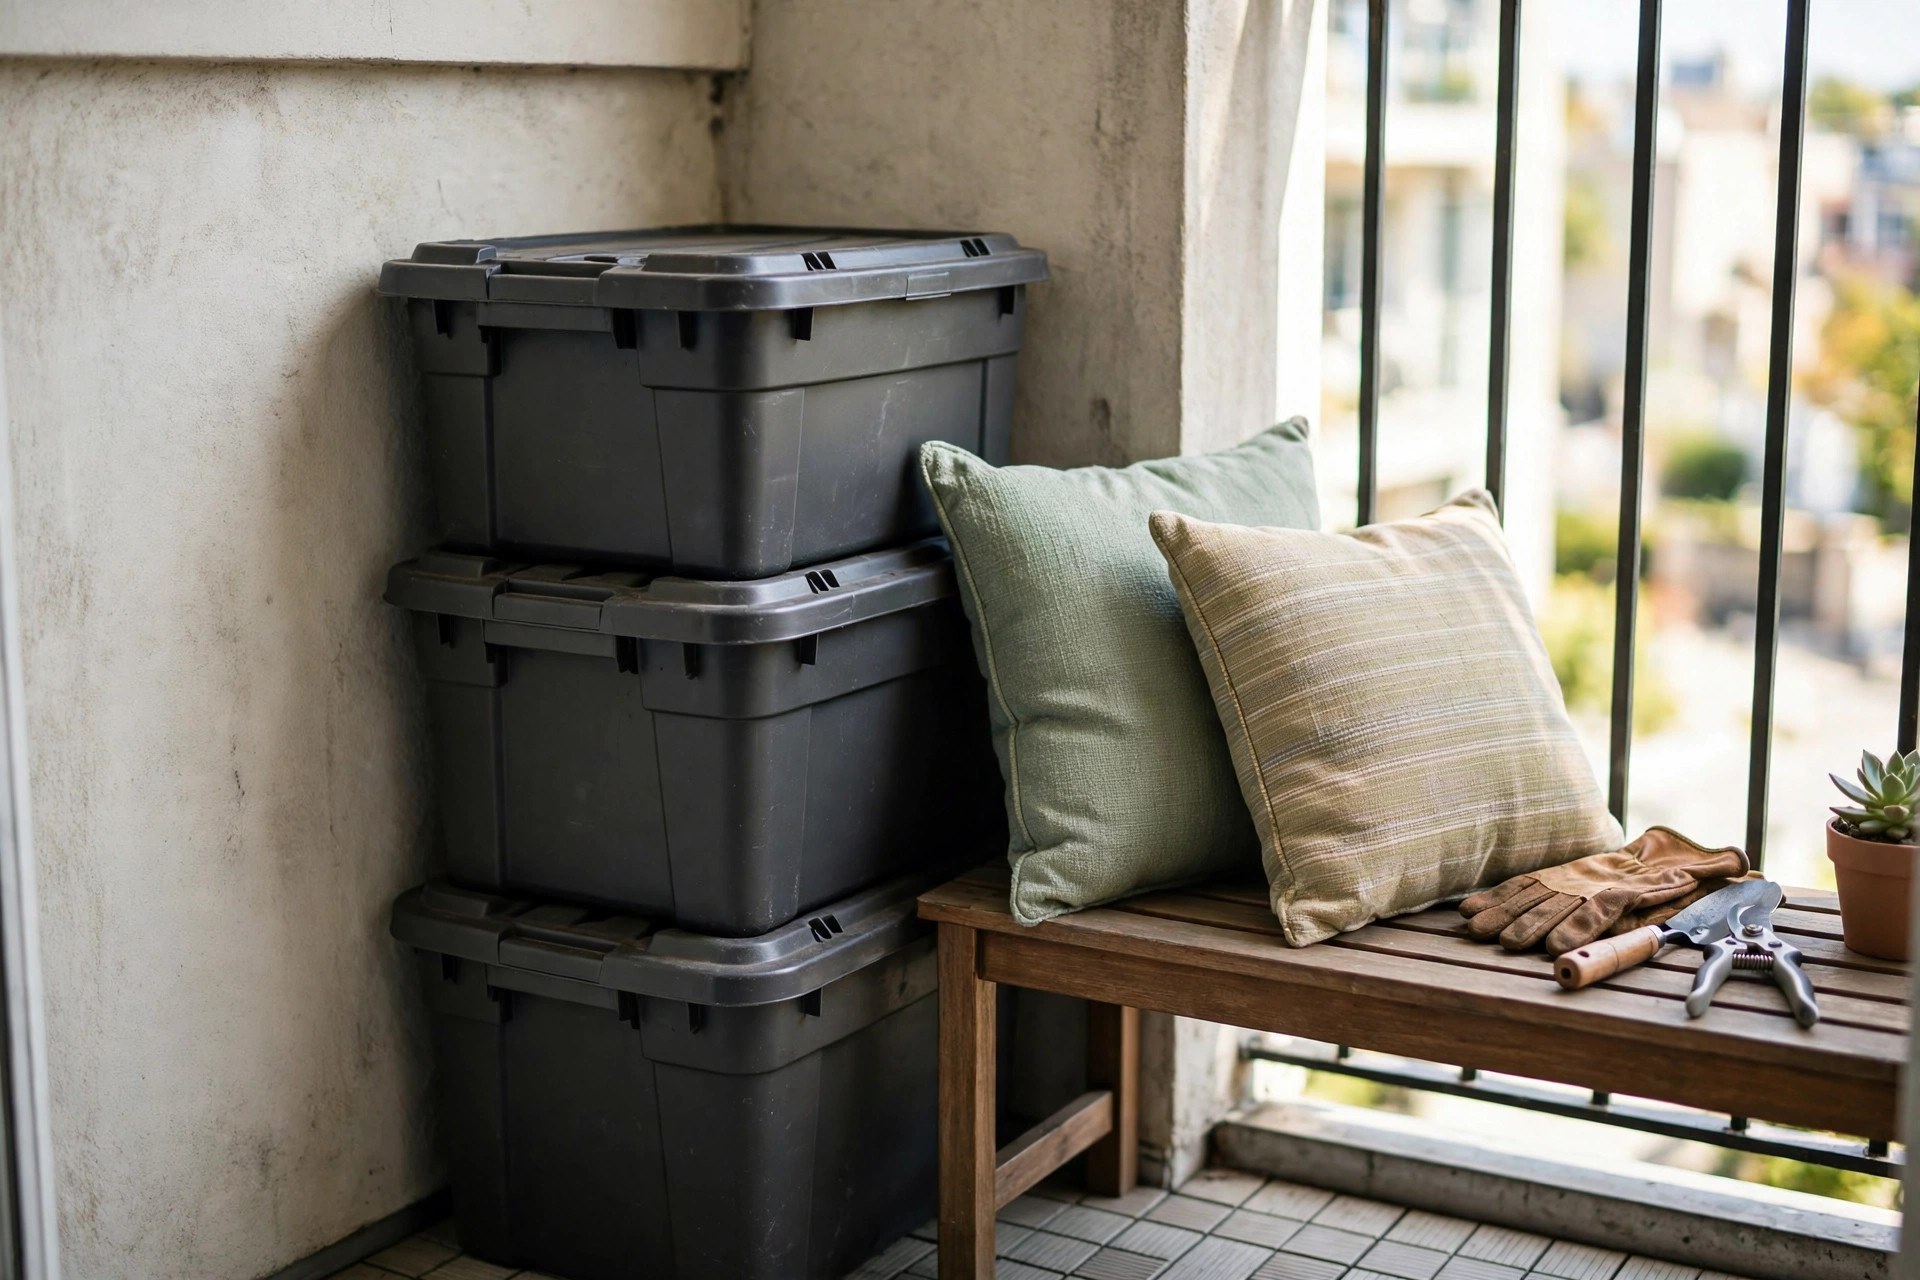
Every balcony has dead zones: under the bench, under the windowsill, the 8-inch gap between the deck box and the wall. Lidded weatherproof bins turn those gaps into storage. Mine hold the potting soil (in a sealed bucket — open soil bags and balconies are a spill waiting to happen), the spare plant saucers, and the bag of fertilizer.
The under-bench spot deserves special mention because it’s invisible storage — bins under the bench don’t count visually, so the balcony still looks uncluttered even when it’s fully loaded. Slide them in, slide them out. Nobody knows.
What goes where: heavy and ugly goes low and hidden (soil, fertilizer, spare pots), light and pretty goes visible (the stuff on the ladder shelf). This is the same “hide the ugly, show the pretty” rule from every room in the apartment — balconies just punish you faster for breaking it, because there’s nowhere else for the eye to go.
Shoes, honestly: a lot of renters stash the overflow shoes on the balcony in a lidded bin, and it works — until a rainy week, when you learn exactly how waterproof your “waterproof” bin is. If the balcony shoe experiment fails you, here’s the indoor version that actually solved it for me — the slim shoe cabinet from my entryway post. Balcony bins are the overflow valve, not the system.
Real prices: budget about $25 for a set of decent lidded weatherproof bins. Uniform bins in one color look dramatically tidier than a rainbow of whatever was on sale — this is the cheapest visual upgrade on the list.
10. An Over-the-Rail Pocket Organizer
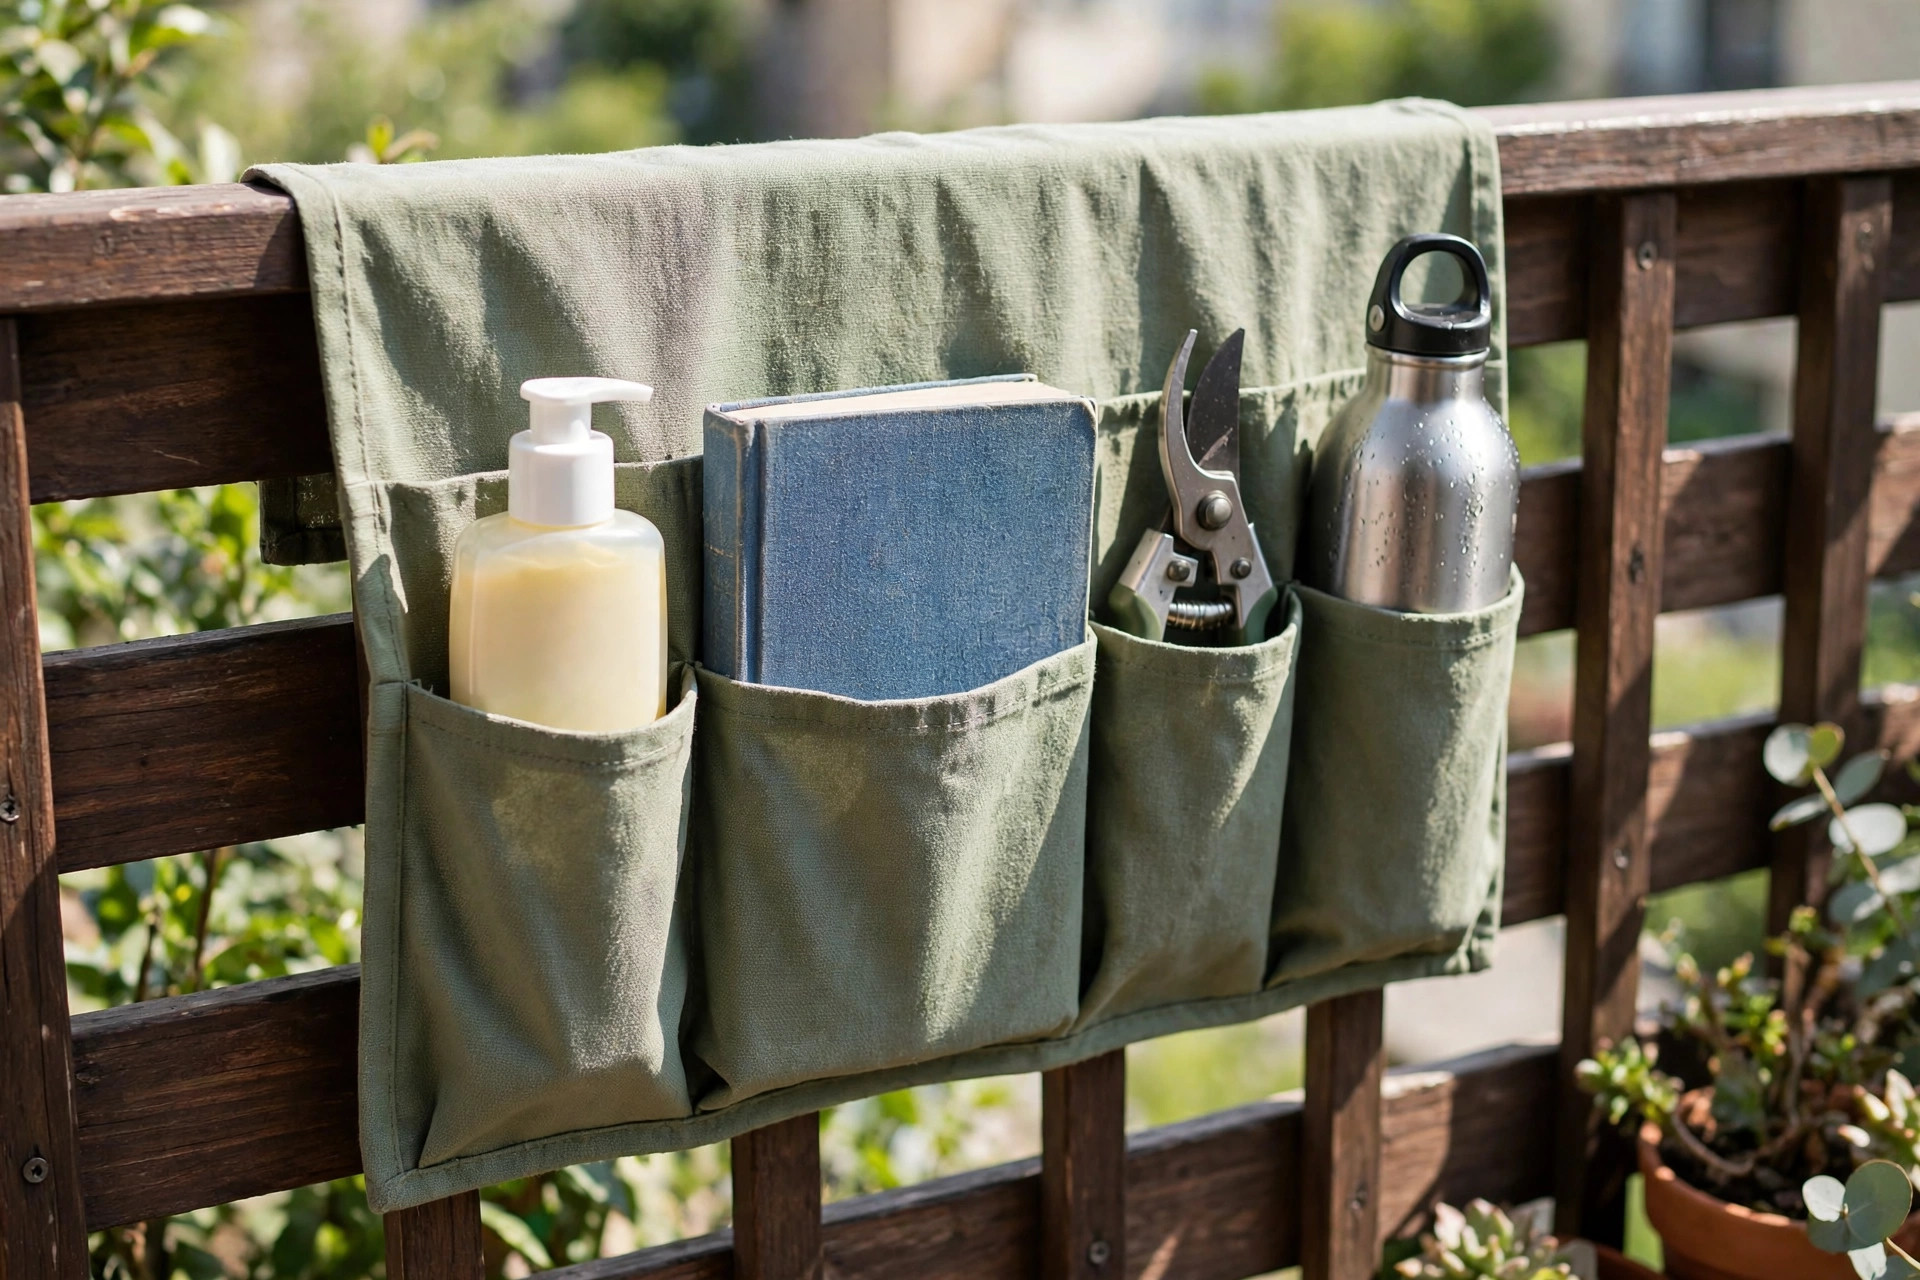
The last idea is the smallest and, per square inch, the most useful: a fabric pocket organizer draped over the railing, shoe-pocket style. Mine holds the hand trowel, pruning shears, plant ties, seed packets, gloves, and the little notebook where I pretend I’ll track what I planted. Everything small and losable, in one place, at arm’s reach.
Get the outdoor-rated kind — solution-dyed acrylic or heavy-duty polyester with UV treatment — not a dollar-store fabric one meant for a closet door. The indoor kind fades and rots in a single summer. Hang it on the inside face of the railing so it’s sheltered from direct rain, and keep it below the railing top so it’s not visible from the street (remember the Step Zero visibility rule).
What to look for: deep pockets (shallow ones eject their contents in wind), reinforced grommets or a sturdy drape-over flap, and a width that fits your railing section without bunching. Clear or labeled pockets beat mystery pockets — if you can’t see the seed packets, you’ll buy basil seeds three years in a row. Ask me how I know.
My tip: this is also where the “balcony first-aid kit” lives — sunscreen, bug spray, and a spare phone charger in a zip bag. The things you always forget to bring outside, now permanently outside.
The $160 Starter Kit: What I’d Buy First
If your balcony currently holds a dead plant and regret, here’s the buy order that gives you a functional setup for about $160:
- 30-gallon deck box (~$45) — the foundation. Cushions, soil, candles, and a side table in one.
- Clamp-on rail shelf (~$60) — your outdoor table and extra surface, folding flat when done.
- 3 saddle planters (~$30) — the garden. Herbs you actually cook with.
- Set of lidded bins (~$25) — the dead zones, organized.
That’s weatherproof storage, a table, a garden, and hidden bins for less than a single “real” piece of patio furniture. Add the bench ($70) next payday and you’re at a genuinely complete setup for $230.
4 Balcony Mistakes I Made (So You Don’t Have To)
Buying the box before measuring. Covered above, still stings. Measure the depth minus the 36-inch walkway before you buy anything with a footprint.
Storing the wrong things outside. My first summer, I kept a fabric storage ottoman on the balcony. By August it was faded, musty, and structurally suspicious. If it doesn’t have a UV rating, it lives inside. The weatherproofing section exists because I needed it.
Overloading the railing. My ambitious phase involved four hanging planters on S-hooks along the rail. They held — but every windy night I lay awake doing structural math. Now it’s two saddle planters, properly fitted, and I sleep fine. The railing is for light, well-fitted items, not your entire garden center haul.
Forgetting that wind is a roommate. Anything under 5 pounds needs a lidded home or it will eventually visit the parking lot. The pocket organizer, the lantern on the tension rod, the empty nursery pots — all secured or stored. Wind doesn’t negotiate.
Winterizing: The 30-Minute Shutdown
If you get real winter, your balcony needs a shutdown routine. Mine takes thirty minutes, once, in late fall:
- Bring in: the rolling cart (it lives inside for winter), fabric items without UV rating, the pocket organizer, anything ceramic that can crack in a freeze, and the tension-rod baskets.
- Stays out: the deck box (latched, with a cover if you have one), the bench (cushions inside it), the cabinet (doors latched), saddle planters emptied of annuals.
- Do: sweep everything, check the drain is clear, wipe down the rail table brackets and fold it flat, bring the soil bags inside or seal them in the bins.
- Check: one last look at what’s visible above the railing line — winter wind is stronger, and anything marginal should come in.
Come spring, reverse it. The whole system is designed to be packed and unpacked, which is the point — renter storage should move with you, season to season and apartment to apartment.
FAQ
What are the best weatherproof materials for balcony storage? Heavy-duty UV-stable resin, powder-coated aluminum or steel, teak or acacia wood, and solution-dyed acrylic fabrics. These four survive rain, sun, and temperature swings for years. Avoid unsealed wood, unrated fabrics, and anything paper or cardboard — one season will destroy them.
How do I keep water from dripping onto the neighbors below? Use planters with drip trays or self-watering inserts with built-in reservoirs, and add a catchment saucer under every pot. Water in the morning so excess evaporates during the day, and never let a hanging basket drip freely over the rail — it’s the fastest way to get a complaint and, in some buildings, a lease violation.
Are storage pieces safe on older balconies? What about weight limits? Residential balconies are generally designed for around 60 pounds per square foot of live load, but that’s a design number, not a promise about your specific 1970s building. Everything in this post is lightweight — resin boxes, a bench, planters — which keeps you far under any realistic limit. If you’re planning anything genuinely heavy (a water-filled planter, a stone bench), check with your building first. When in doubt, lighter and fewer pieces beats heavier and more.
How do I keep railing planters from falling? Fit is everything: the planter channel must match your railing width snugly, with no wobble. For glass rails, use rubber-coated clamps. Keep planters on the inside face where possible, don’t overload them (wet soil is shockingly heavy), and check the fit monthly — heat and vibration loosen things over time. Never drill into the railing to secure a planter; that’s property damage.
Can I fit storage on a tiny balcony without it looking cluttered? Yes, with three rules: keep the 36-inch walkway clear, hide the ugly stuff (lidded bins in dead zones, soil in sealed buckets), and keep everything visible in one material family. A resin deck box, matching bins, and one bench read as “designed.” A rainbow of sale bins reads as “storage unit.” Uniformity is free visual calm.
That ironing-board balcony of mine ended up being my favorite room in the apartment. Morning coffee on the rail table, herbs within arm’s reach while cooking, and everything I needed in lidded, latched, weatherproof homes. No holes drilled, full deposit returned, and the whole system moved to the next apartment in under an hour. Your balcony is square footage you’re already paying for — might as well use it.
Loved this? Pin it so you can find it later.
Pin this post
Zoya Siddiqui
Hi, I'm Zoya Siddiqui, the founder of Shutki. I live in small rental spaces and share practical, renter-friendly storage ideas for tiny kitchens, bedrooms, closets, and bathrooms — no drilling, no renovations, no lost security deposit.
All postsKeep reading