15 Small Kitchen Organization Ideas for Renters (Zero Drilling)
 Save
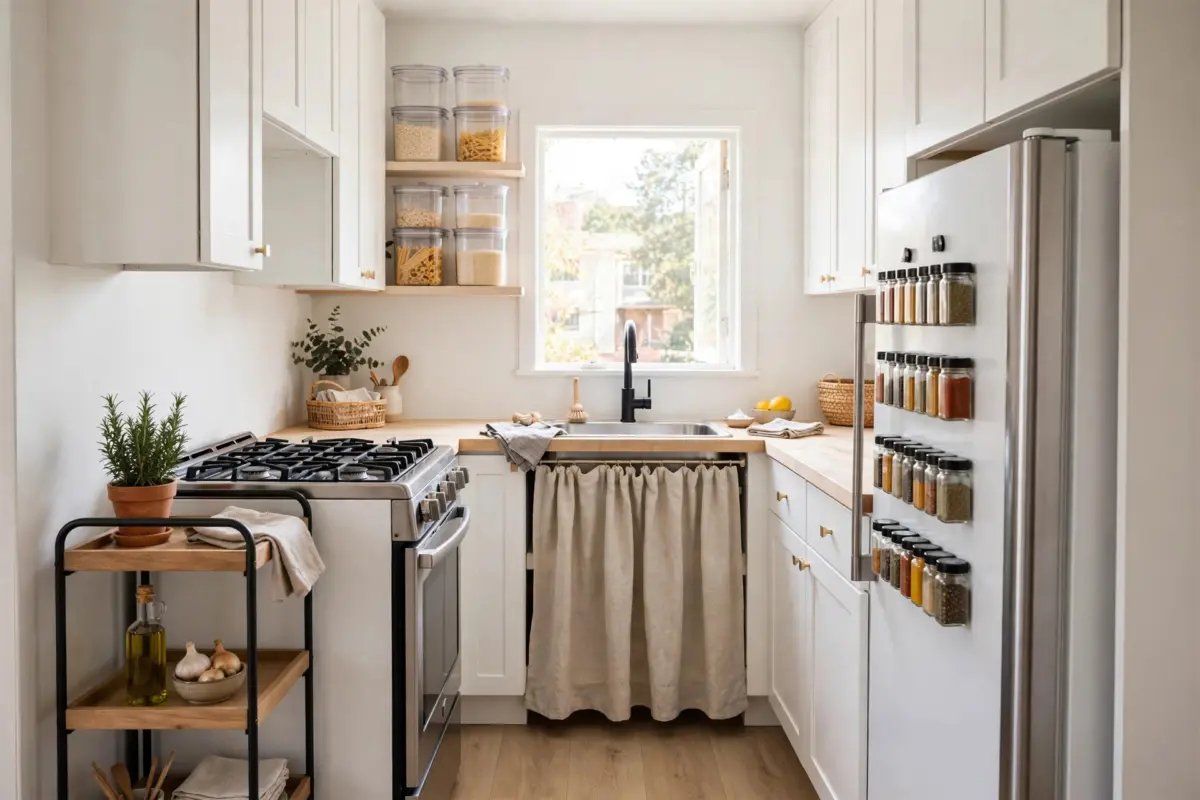
My first apartment kitchen was a galley so narrow I could touch both counters at once if I stretched. It had four cabinets, one drawer that stuck every single time, and a landlord who said “no drilling” with the tone of a man who had seen things. Things involving toggle bolts, probably.
For the first month, my pots lived on the stove burners. My spices lived in a grocery bag on top of the fridge. Cooking dinner felt like an archaeological dig — every meal required moving three things to reach the one thing I actually needed.
Here’s what I learned over two rentals and a lot of trial and error: small rental kitchens aren’t short on space. They’re short on systems. The square footage is there — it’s just hiding inside cabinet doors, under the sink, on the sides of the fridge, and in the six inches of air above everything you own. Everything below is no-drill, no-damage, and deposit-safe. Real costs, real measurements, and the mistakes I made so you don’t have to.
Step Zero: Clear the Counters First
Before you buy a single organizer, do the free thing: take stuff off the counters. Every idea on this list works twice as well when it’s not competing with clutter, and half of a “small kitchen” problem is really a “too much stuff on the counter” problem. Clearing my counters gave me back more usable space than any single product I bought.
Do it in this order:
- Small appliances you use fewer than twice a week → into a cabinet or onto the rolling cart’s bottom tier (idea #3). The bread maker from 2021 does not need counter residency.
- Spice jars → magnetic tins on the fridge side (idea #11). A spice rack eats a full square foot of counter; the fridge side eats zero.
- The fruit bowl → a hanging basket from an adhesive hook or over a cabinet edge. Fruit doesn’t need a bowl; it needs air.
- Mail, keys, and paper clutter → out of the kitchen entirely. The kitchen counter is not a landing strip. Give paper a home by the front door and watch the kitchen exhale.
- Cutting boards → hung on hooks, not stacked in a leaning pile. A board on a hook takes zero counter space and dries faster.
Honest math: doing just the first two — appliances and spices — typically wins back close to half your counter space. The rest is bonus. Do this before you spend a dollar, because organizers bought for a cluttered counter end up organizing the clutter instead of the kitchen.
Set Up Zones, Even in 40 Square Feet
Here’s the mindset shift that changed my kitchen more than any product: stop grouping by type and start grouping by task. Mugs with mugs and plates with plates looks tidy, but you don’t cook by type — you cook by task. Morning coffee is a task. Baking is a task. Tuesday-night stir-fry is a task.
Set up three zones, even in a 40-square-foot kitchen:
- Coffee station: mugs, coffee, filters, and the kettle all together — in one cabinet section or on one shelf of the cart. Mornings become a two-minute operation instead of a four-cabinet scavenger hunt.
- Baking zone: measuring cups, flour, sugar, and baking powder in one cabinet area. If you bake twice a year, this zone can be a single high shelf; if you bake weekly, give it prime real estate.
- Cooking zone: oils, spices, and utensils near the stove. This is the one zone that earns the closest-to-the-action spot, because you reach for it mid-recipe with a hot pan in play.
Grouping by task beats grouping by type because it matches how you actually move. You’ll make fewer trips across the kitchen, and — the real win — anyone else in your home can find things without asking you where the cumin lives.
1. A Tension Rod + Curtain Under the Sink
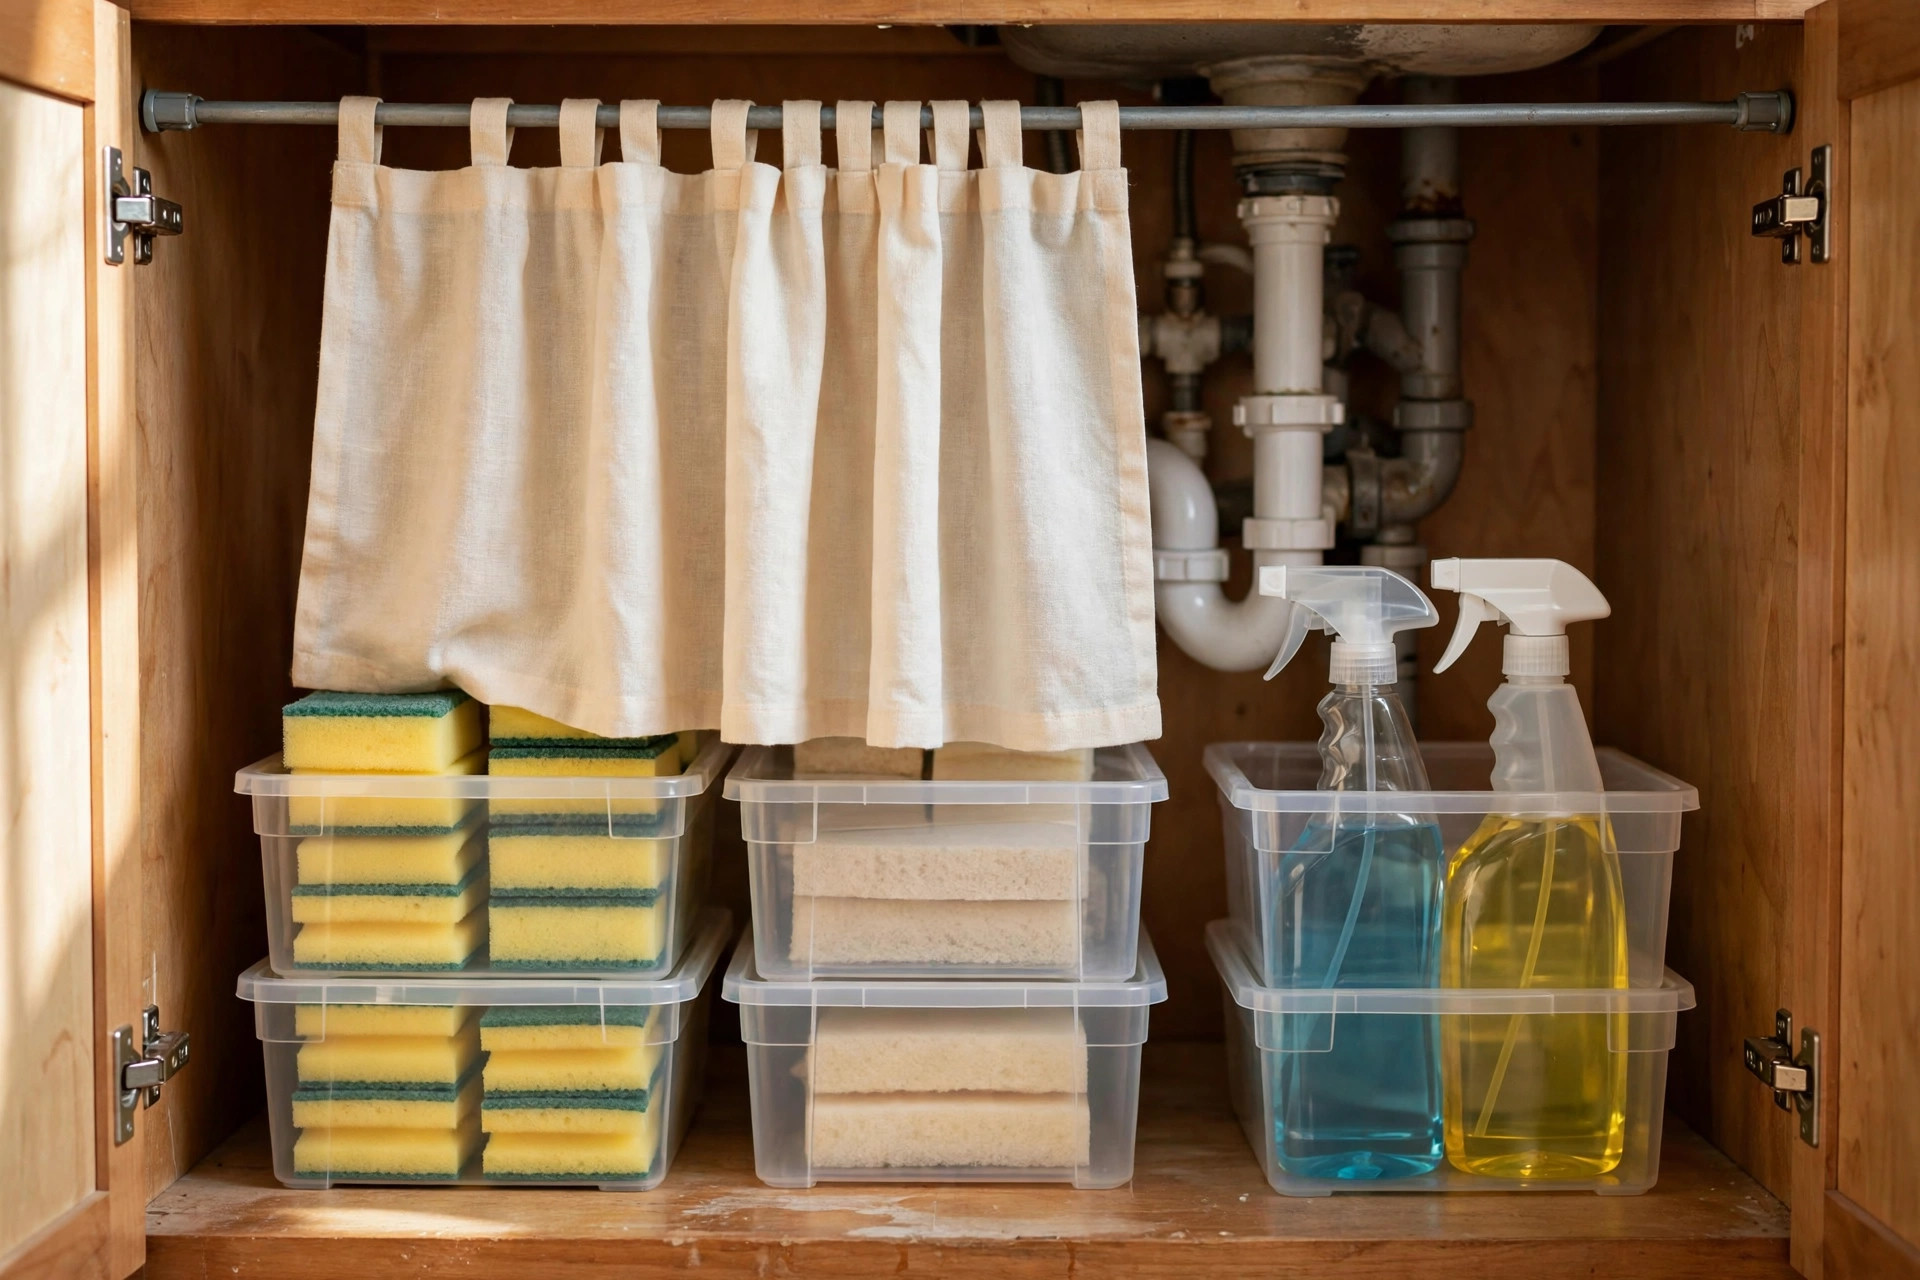
The cabinet under the sink is the Bermuda Triangle of rental kitchens. Pipes eat half the space, everything tips over, and you end up storing the trash bags on top of the dish soap on top of a sponge that has seen better decades.
A $6 tension rod changed mine completely. I mounted it across the front of the under-sink cabinet, about 4 inches below the top, and hung a cheap curtain panel from it. Behind the curtain: a small stackable bin for sponges and brushes, the dish soap, and a bag holder. In front: nothing, because the curtain hides the chaos and my kitchen suddenly looks like I have my life together.
Measure first: open the cabinet and measure the inside width at the height you want the rod — under-sink cabinets are often narrower than they look because of the plumbing. Most are 24 to 30 inches wide inside. Buy a rod that covers that range with room to spare; tension rods hold best when they’re not fully extended to their max.
My mistake: I hung the curtain too low the first time and it dragged on the cleaning bottles every time I reached in. Mount the rod high — just under the cabinet top — so the curtain hangs behind your supplies, not over them.
2. An Over-the-Door Rack on the Pantry (or Any) Door
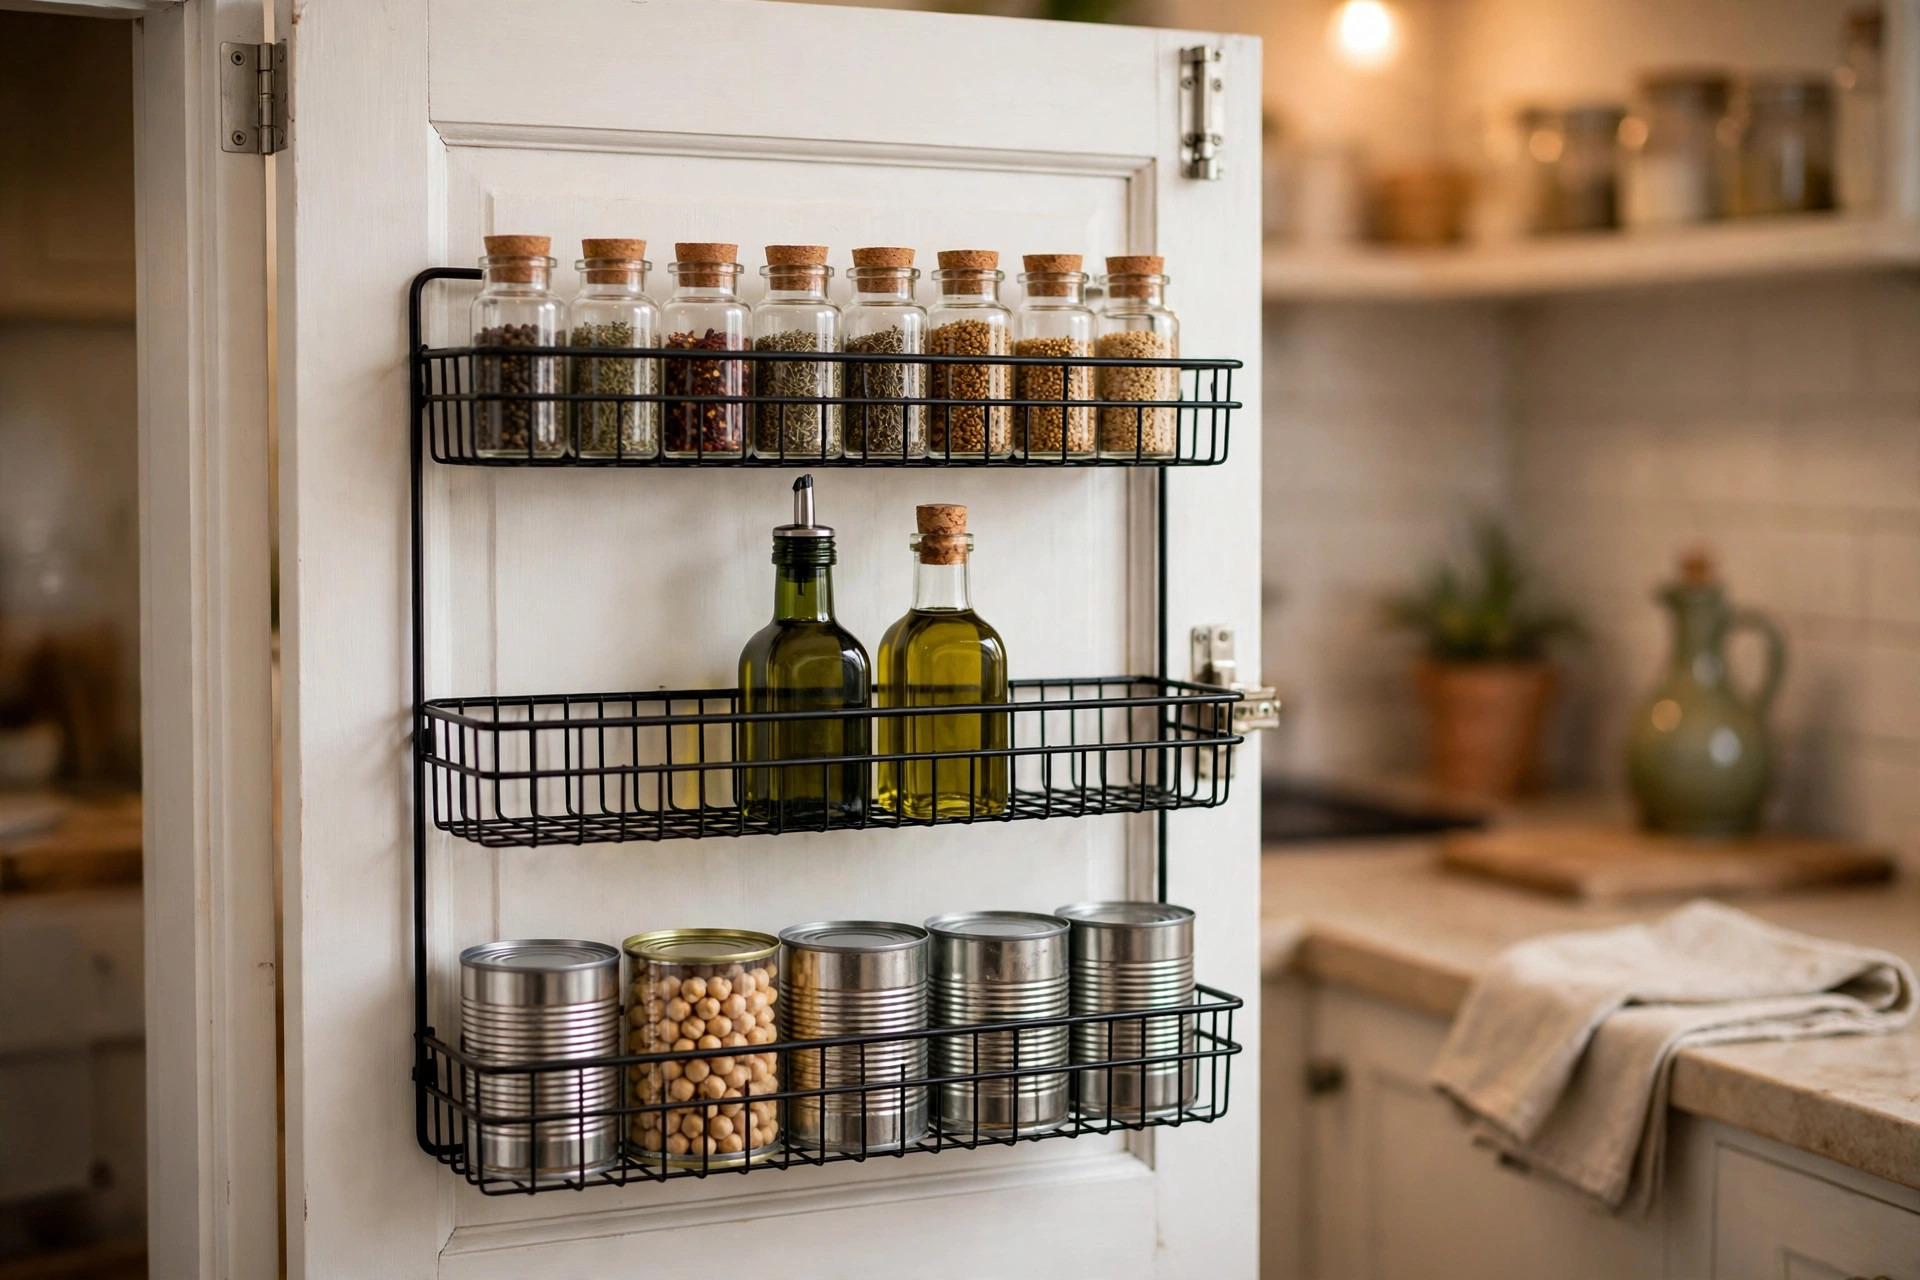
If you have a pantry closet — or honestly any door in or near the kitchen — the back of it is a full extra shelf you’re not using. I hung a wire over-the-door rack on my pantry door and it now holds all my spices, three kinds of oil, and the vinegar collection I pretend is intentional.
The wire kind (usually $15 to $25) beats the fabric kind here because cans and bottles are heavy and you want to see everything. Look for one with baskets deep enough to hold a standard spice jar lying down — about 3 inches deep per tier. Most doors need about a quarter inch of clearance above the door for the hooks, so check yours before you buy; thick fire doors in some buildings won’t take them.
Weight warning: this is the one idea on the list where overloading is a real risk. A rack full of glass jars gets heavy fast. Keep it to spices, oils, and small cans — move the 5-pound bag of flour to a cabinet. If the rack starts pulling the door out of alignment, you’ve gone too far.
3. A Slim Rolling Cart as Your Island
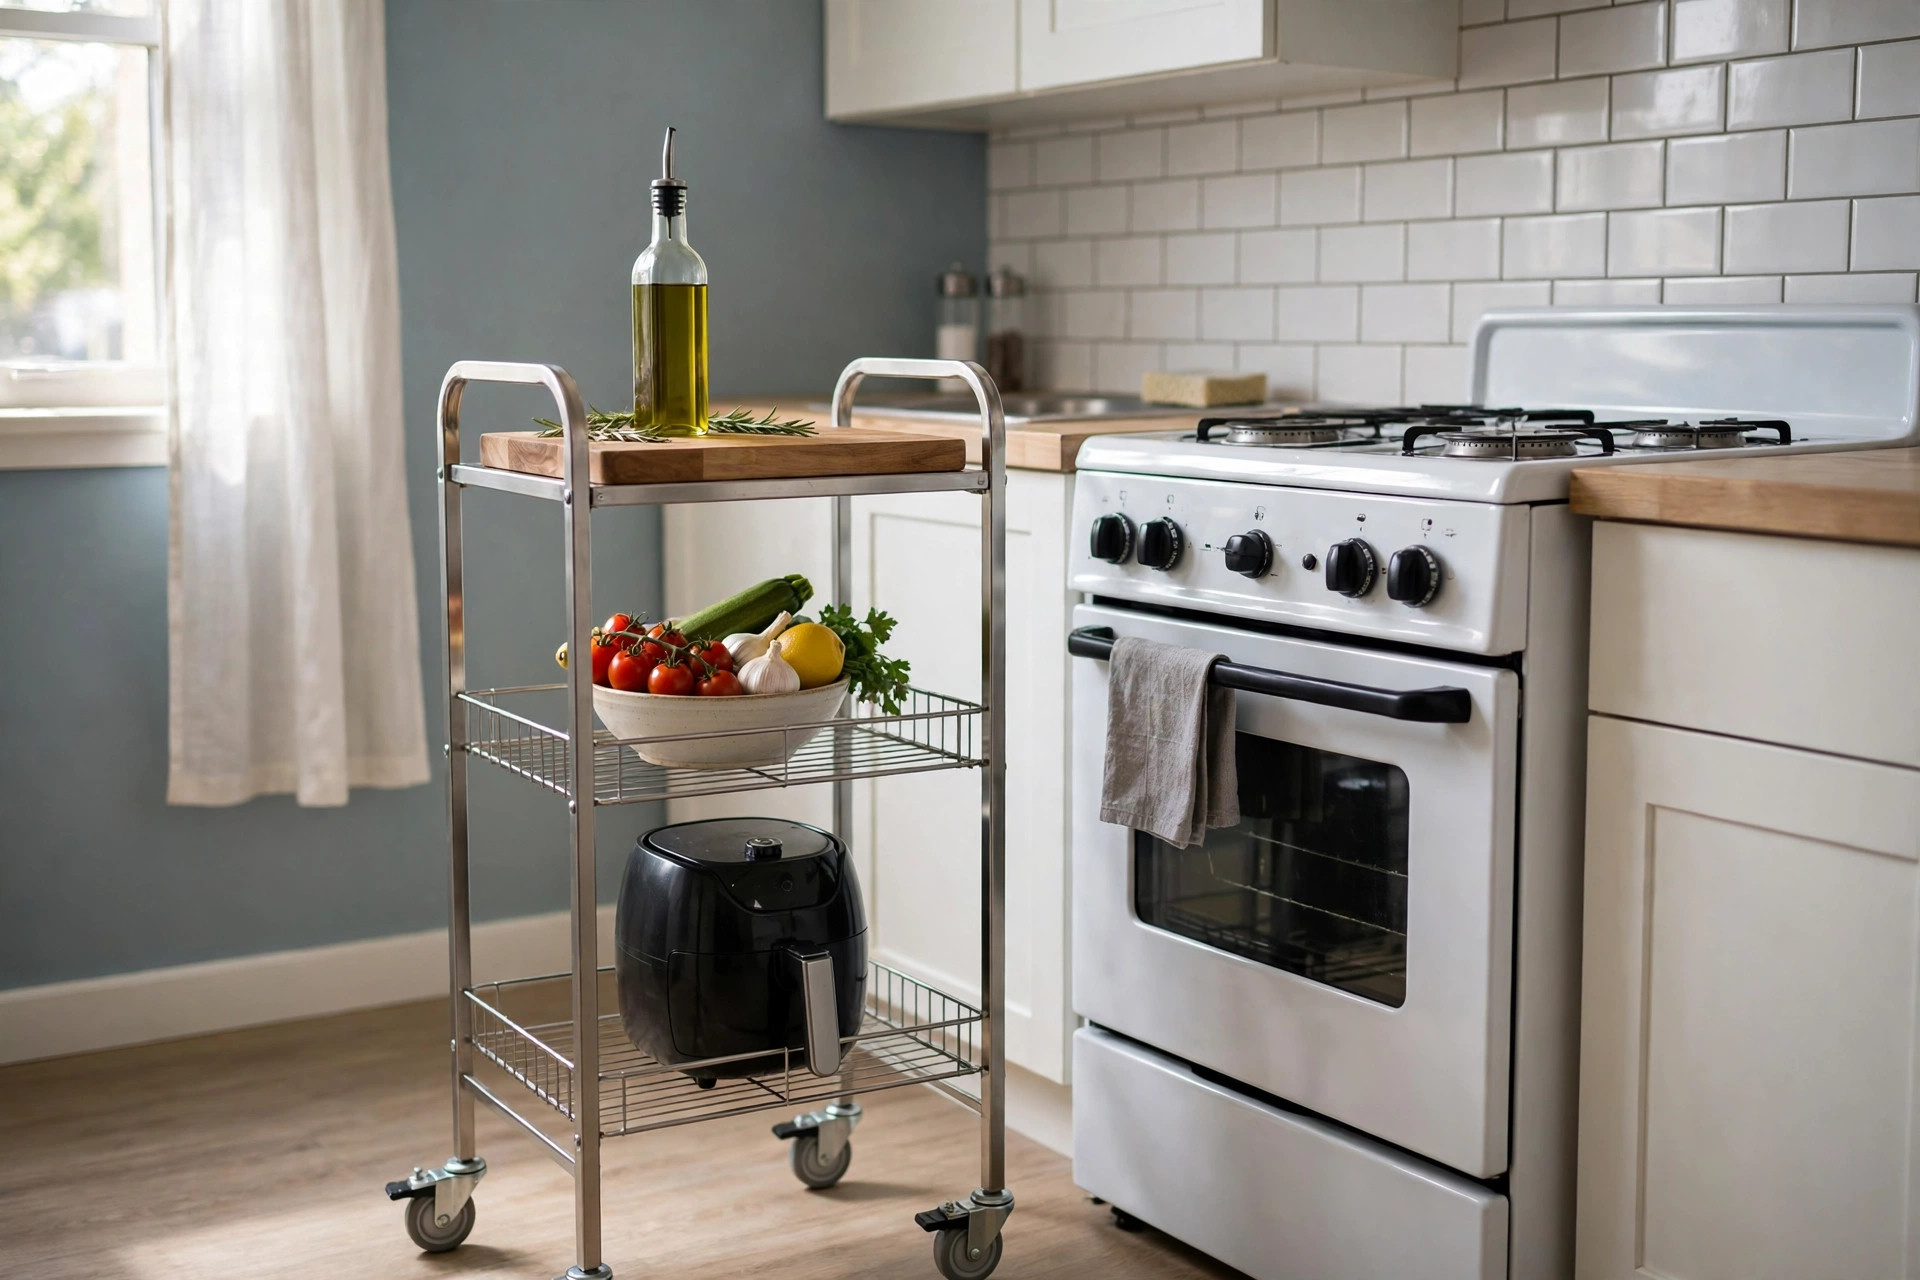
No counter space? A slim rolling cart becomes your island, your prep station, and your pantry overflow. Mine is 12 inches wide — it slides into the gap between my fridge and the wall when I’m not cooking, and rolls out next to the stove when I am.
Top tier: the cutting board lives here permanently, plus the olive oil and salt I reach for every meal. Middle tier: the vegetables I’m actually going to cook this week (visibility = they get eaten). Bottom tier: the air fryer, which used to eat half my counter.
What to look for: locking wheels (non-negotiable — a cart that drifts while you’re chopping is a hazard), a top that can handle a cutting board, and a width under 14 inches if you’re sliding it into a fridge gap. Measure the gap first. The standard 3-tier carts run $25 to $40, and the slim ones cost about the same as the wide ones, so don’t pay extra for “slim” branding.
Renter bonus: when you move, it becomes a bathroom cart, a craft cart, or a bar cart. I have personally used one cart for all three across two apartments.
4. A Countertop Knife Dock (Skip the Wall-Mounted Strip)
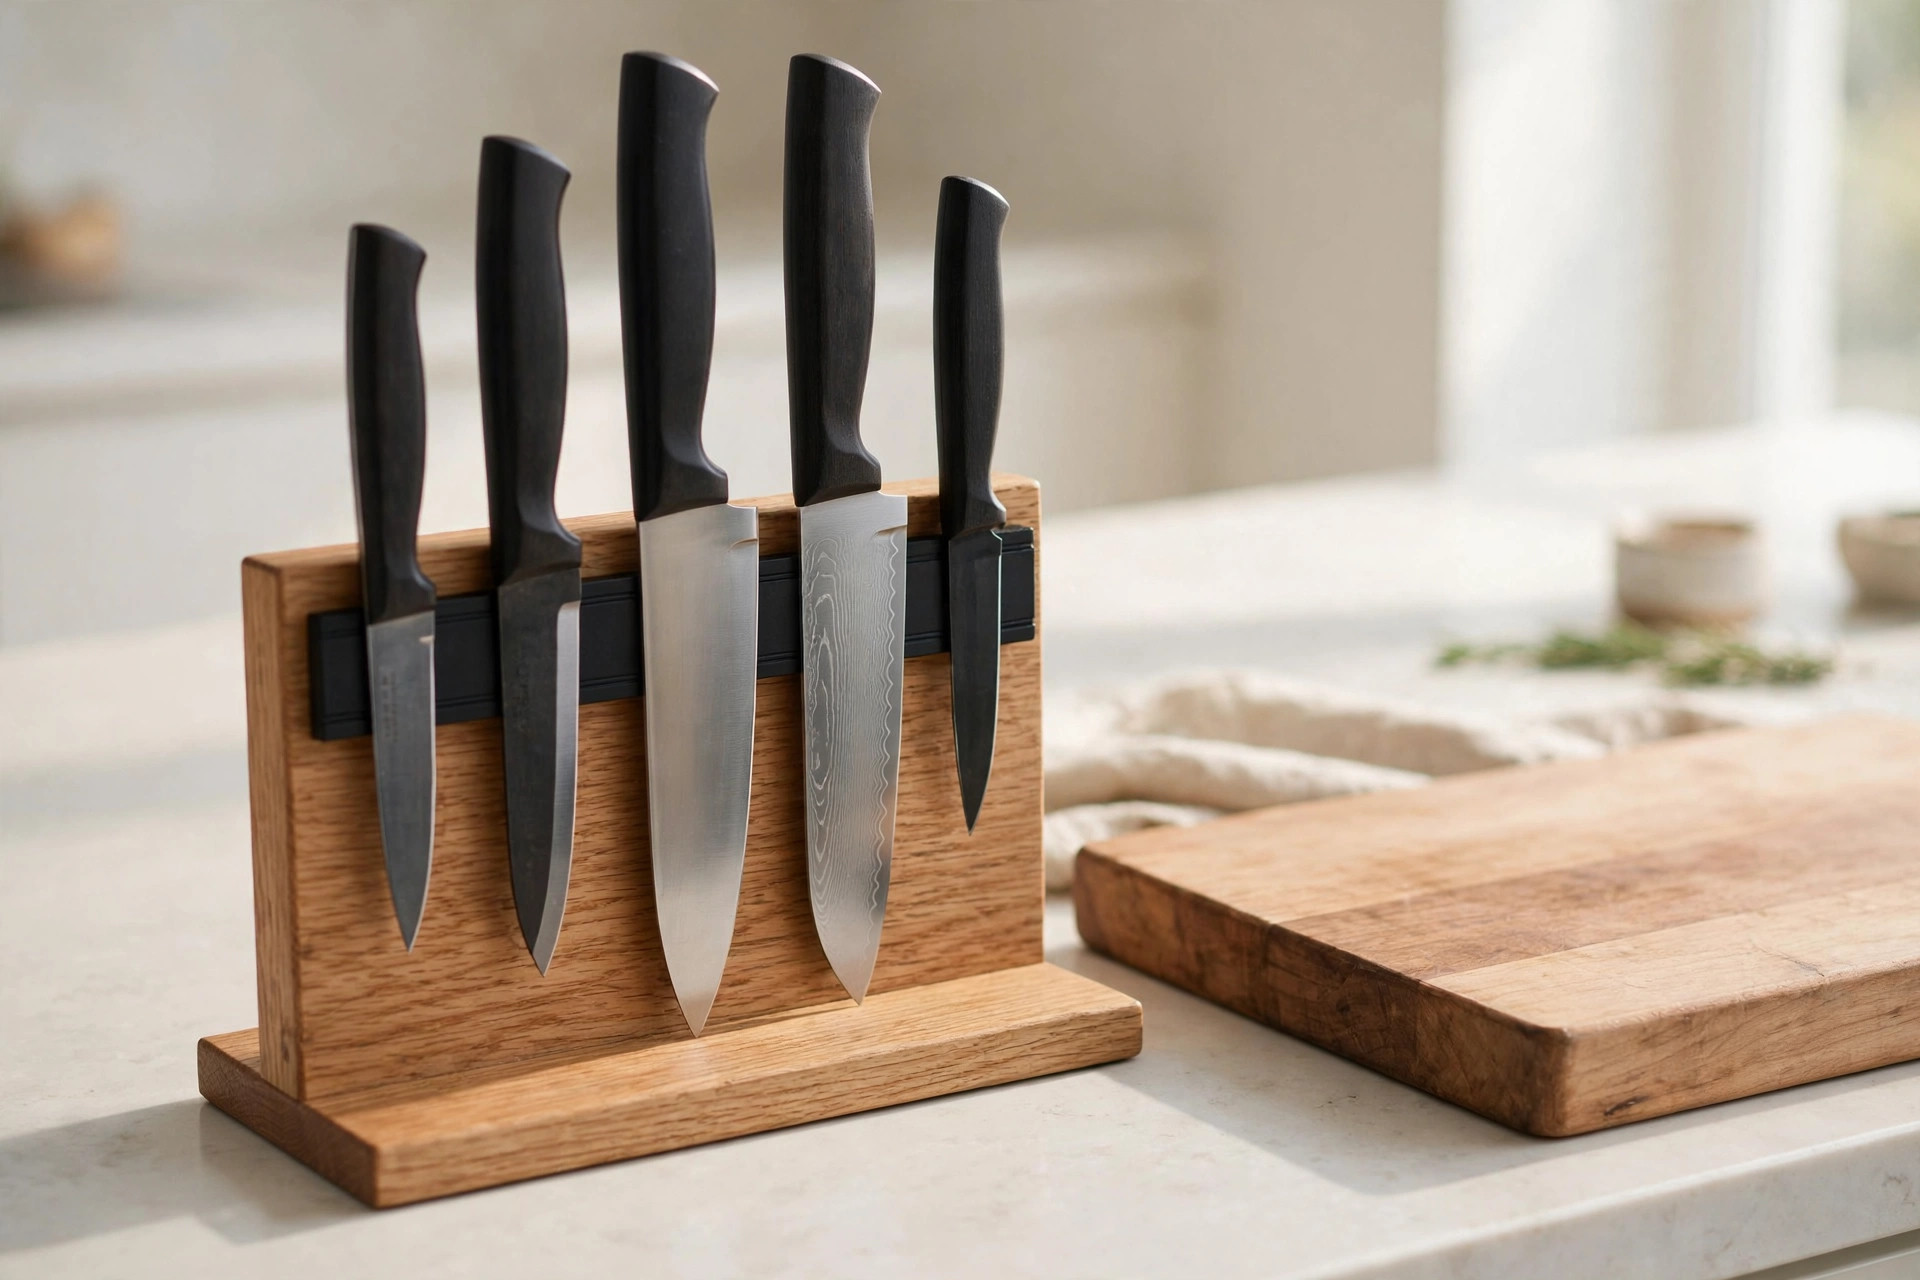
Everyone tells renters to mount a magnetic knife strip on the wall. Everyone forgets that requires drilling into tile or a backsplash your landlord loves more than you. A countertop knife dock gives you the same one-handed grab without touching the wall.
Mine is a wooden block with a magnetic face that sits on the counter — the knives stick to the side, handles up, and I can see every blade at a glance. It takes up about 4 by 10 inches of counter, which sounds like a lot until you realize the old knife block it replaced was twice as bulky and hid the knives inside slots I never cleaned.
The safety math: a knife dock or in-drawer organizer is genuinely safer than a loose knife in a drawer. Loose blades in drawers cause the “reach in blindly” cut that every home cook knows. If counter space is truly zero, an in-drawer knife dock ($15 to $20) is the backup plan — it fits in a standard drawer and keeps blades separated.
What not to do: don’t stick knives to the side of the fridge with a magnetic strip and call it done. Fridge sides work for spice jars (idea #11), but knives at hip height next to a walkway are an accident waiting for a houseguest.
5. Under-Shelf Baskets Inside the Cabinets
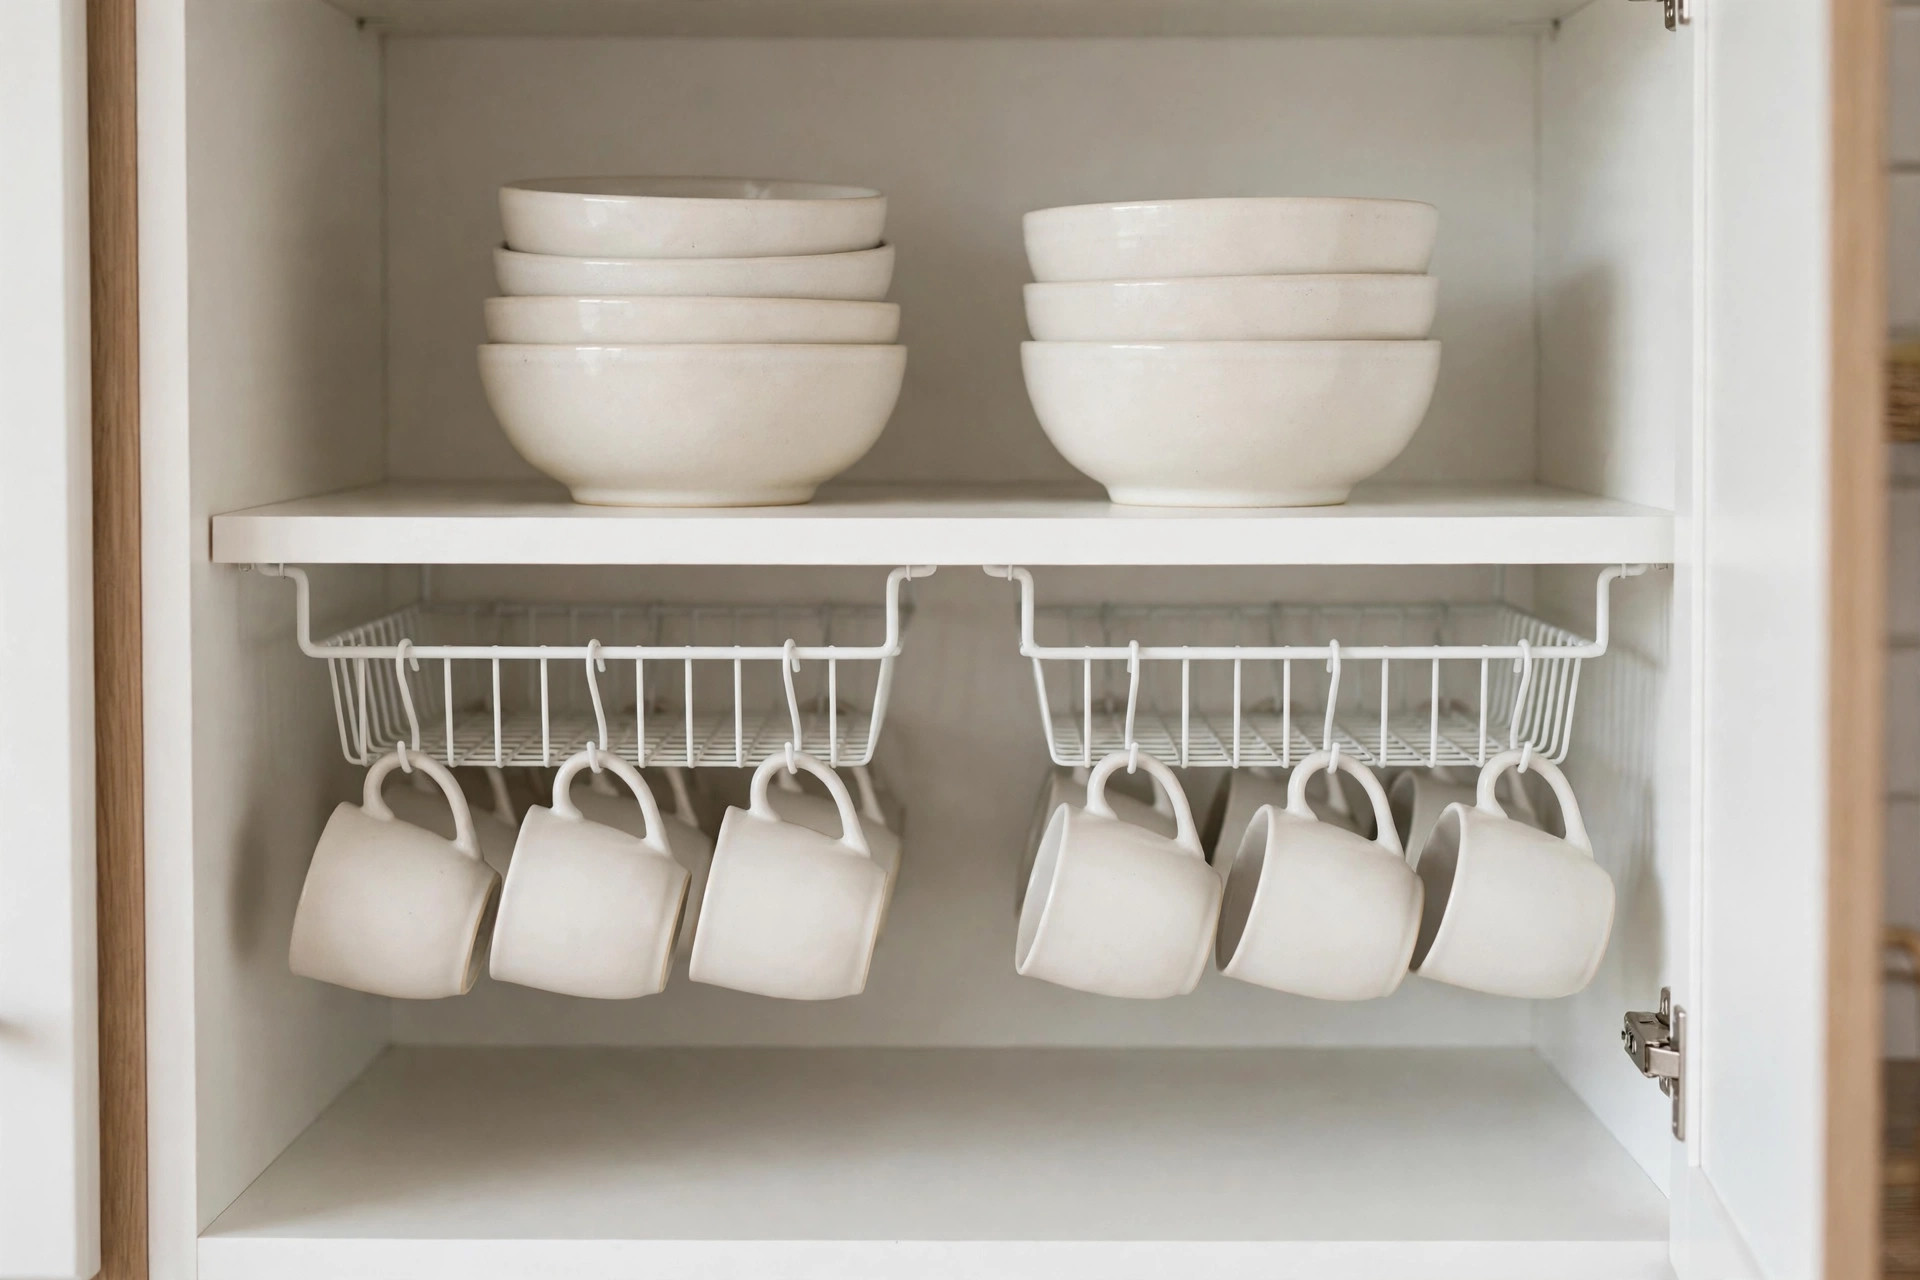
Rental cabinets are always too tall for what you’re storing. You put mugs on the shelf, and above them sits six inches of nothing. Under-shelf baskets hook onto the existing shelf and instantly give you a second layer.
I have two in my main cabinet: one holds mugs (they hang by their handles, which feels clever every single time), the other holds the small bowls and ramekins. It roughly doubled that cabinet’s usable space for about $10 per basket.
Fit check: measure your shelf thickness and the clearance below it before buying. The baskets need about 4 to 5 inches of clear space under the shelf to be useful, and the arms need to grip a shelf that’s usually 5/8 to 3/4 inch thick. If your shelves are adjustable, you may need to move one up a notch to make room — that’s allowed, just remember the original positions for move-out.
My mistake: I bought the kind with arms that were too short for my shelf depth and they slid forward every time I grabbed a mug. Measure the shelf depth too, not just the thickness — the arms should reach at least two-thirds of the way back.
Level two: pull-out sliding organizers. If under-shelf baskets are the beginner move, this is the upgrade all over renter-kitchen videos right now: a multi-tier metal rack with sliding mesh baskets that sits inside your existing cabinet — no screws, no mounting, just set it in place. The baskets glide out toward you like drawers, so the pots at the back stop being theoretical. One two-tier unit roughly doubles the usable space of a base cabinet, and it’s where my pots, pans, and the leaning tower of foil boxes finally stopped avalanching. Measure your cabinet’s interior width and depth before you buy — the unit has to clear the door frame when the baskets slide out.
6. Shelf Risers: Double Every Cabinet Shelf
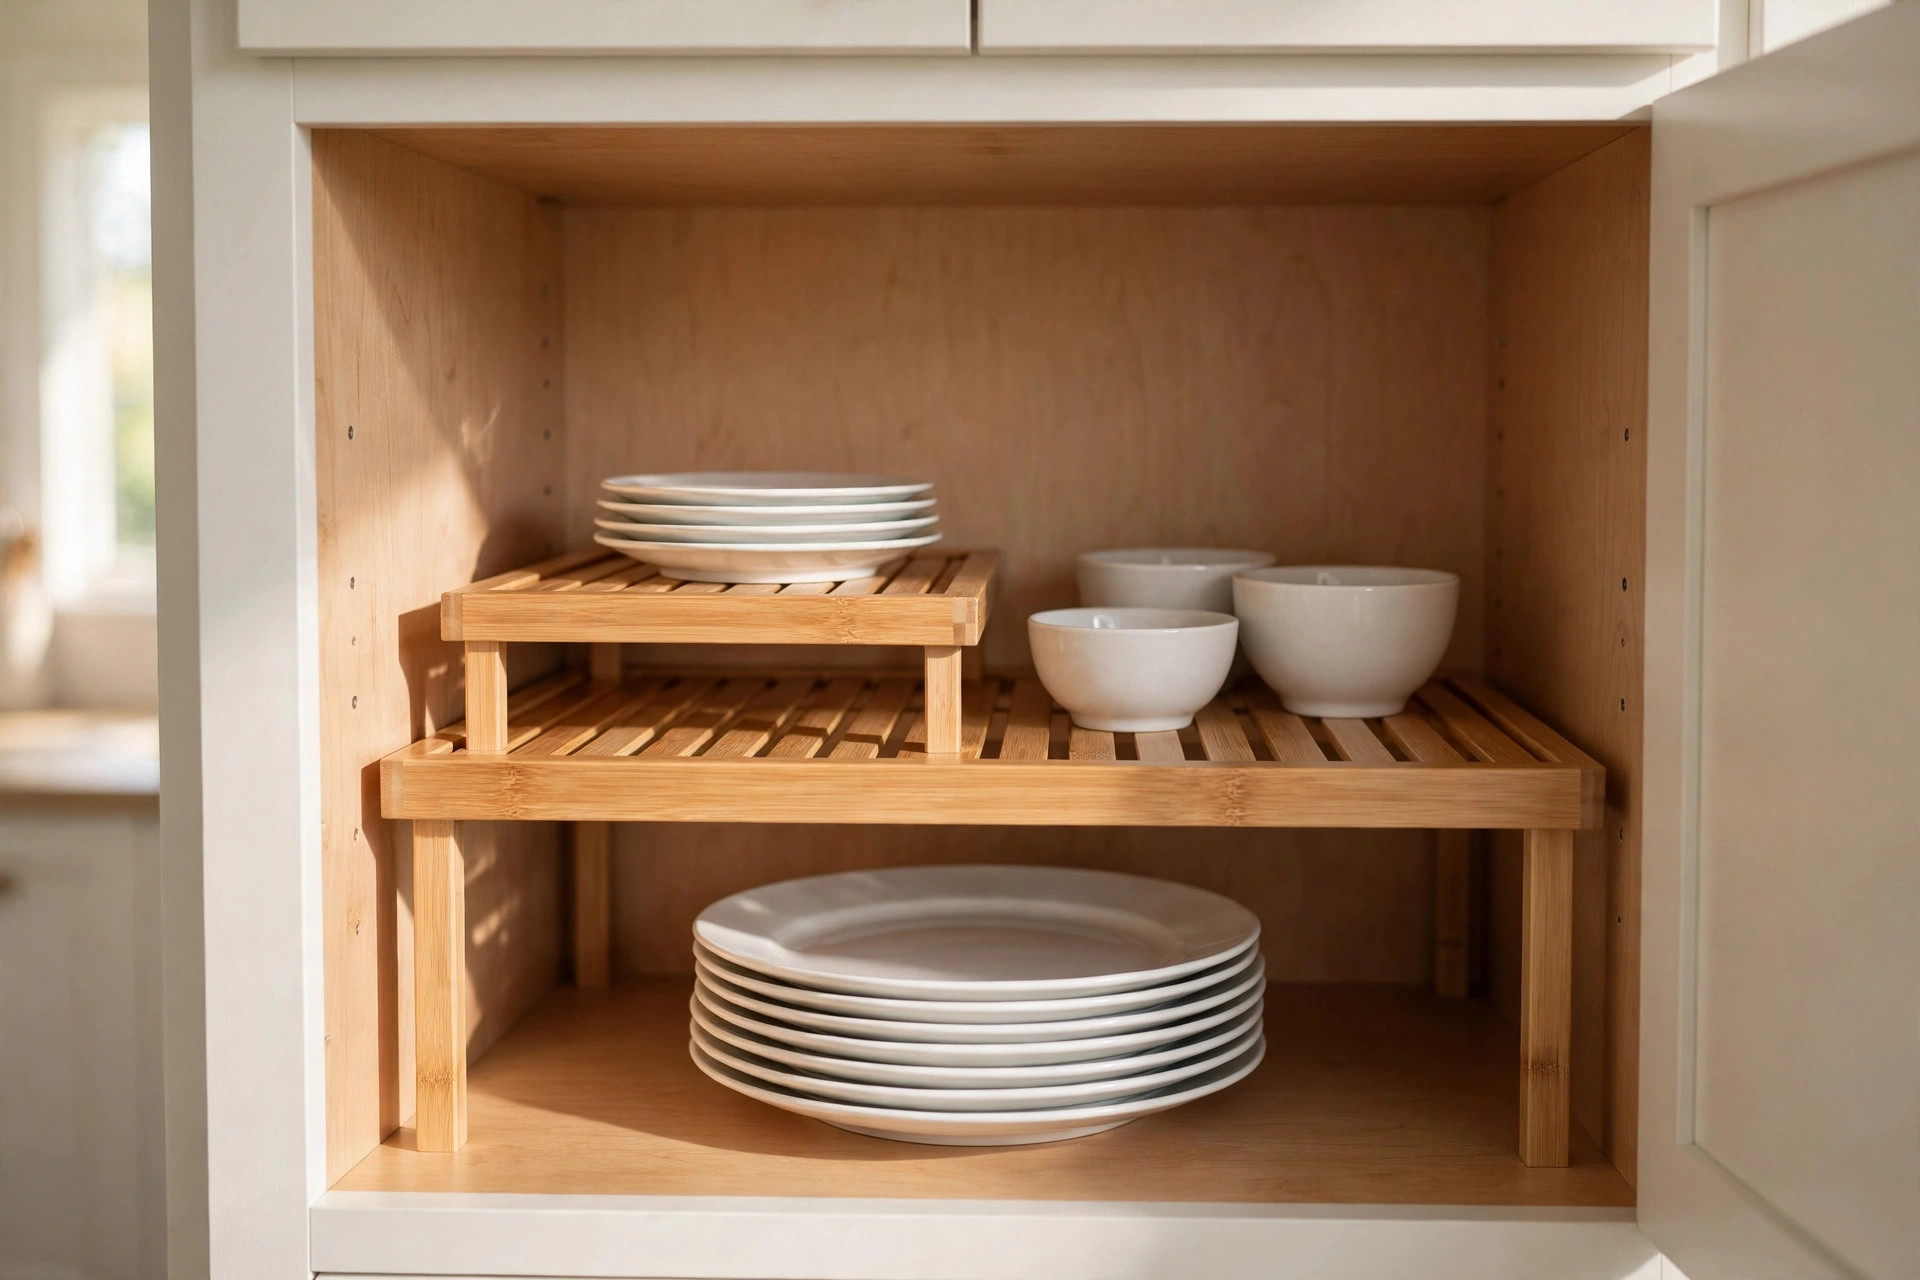
This is the cheapest square footage you’ll ever buy. A shelf riser is a small wire or bamboo platform that sits on your existing shelf and creates a second level — plates below, bowls above, or canned goods in two tidy rows instead of one chaotic pile.
My upper cabinets went from “stack of bowls I have to unstack every morning” to “grab the bowl, done” with three $8 risers. The trick is using them for the same category in two layers: dinner plates below and salad plates above, not plates below and random mugs above. Categories stay findable.
Sizing: the standard riser is about 10 inches wide and fits a 12-inch-deep cabinet. Measure your cabinet interior height first — you need the shelf spacing to be at least 10 inches for a riser to fit with plates underneath. If your shelves are adjustable (most rental cabinets are), move them to create one tall section for the risers and keep the rest standard.
What to look for: bamboo or coated wire, both fine. Avoid the flimsy plastic ones — they bow under a stack of ceramic plates within a month. And get the kind with a small lip or rail at the back so things don’t slide off when you close the cabinet door with enthusiasm.
7. Adhesive Hooks Inside Cabinet Doors
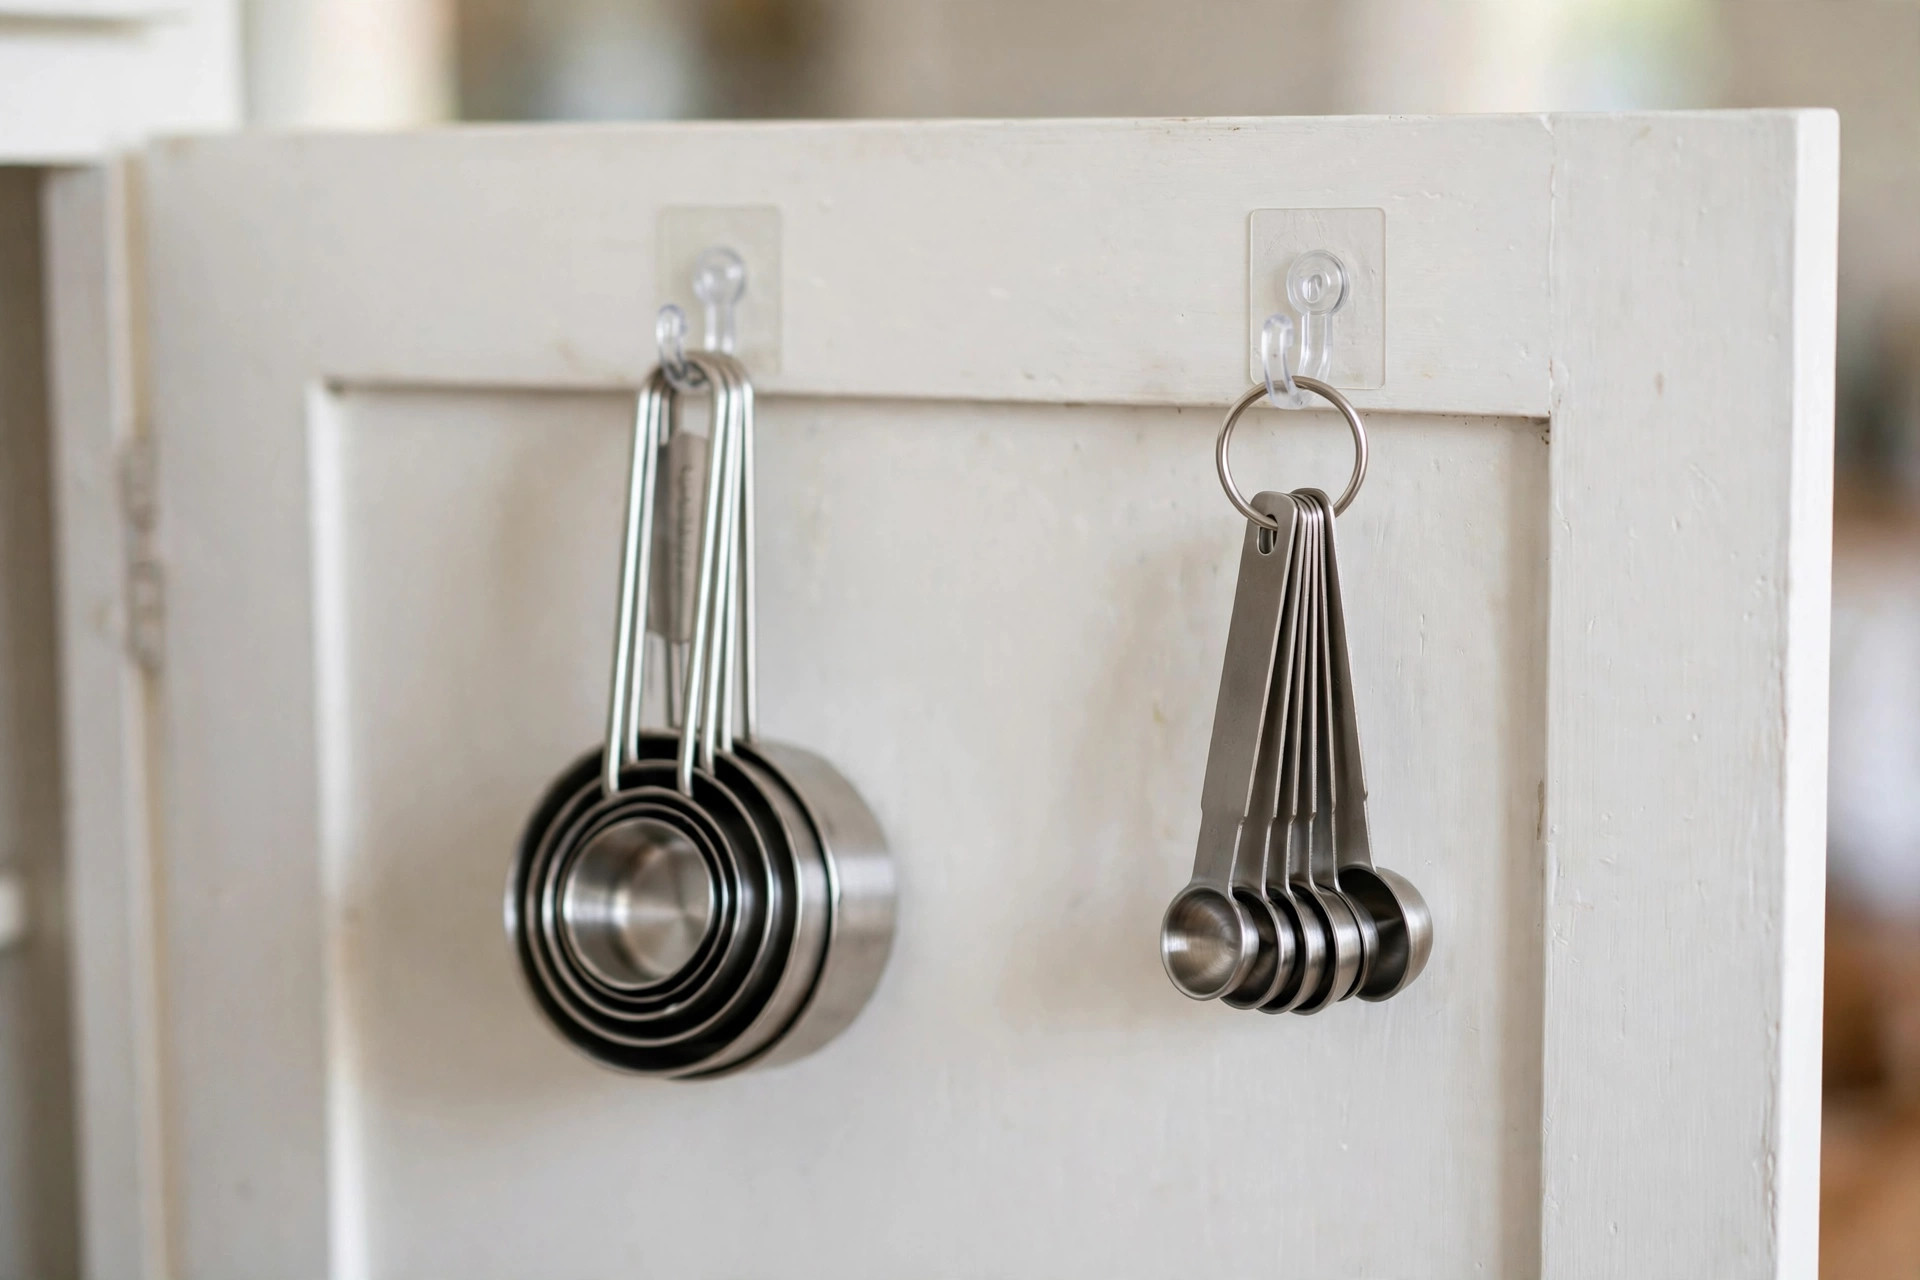
The inside of every cabinet door is a wall you’re allowed to use — it just needs hooks that don’t drill. Heavy-duty adhesive hooks on the inside of the cabinet door under my sink hold my measuring cups (nested, on one hook) and the measuring spoons (on another). The cabinet door next to the stove holds two potholders.
This works because the weight is tiny and the surface is smooth. A set of measuring cups weighs almost nothing; the hooks are rated for pounds. Put the hooks where the door’s own weight won’t fight them — the upper half of the door, not down by the hinge where things swing.
Surface rules: adhesive hooks need 24 hours to cure before you hang anything — I know, waiting is the worst part, but a hook loaded after 2 hours will fall at 3 a.m. and scare the dog. They stick best to smooth laminate and painted wood; they struggle on raw unfinished wood and textured melamine. Test one hook with a light load first.
Move-out note: when you leave, pull the tab slowly straight down along the wall — never yank outward. A slow pull leaves the paint intact; a fast yank takes a chip with it and that’s a deposit deduction for a $2 hook.
The backsplash bonus: locking suction-cup shelves. Adhesive hooks own the cabinet doors, but the tile backsplash is a whole second wall going unused. Locking suction-cup racks — the kind with a twist-lock that actually holds — stick to smooth tile or glass and give you a removable shelf for cooking utensils, dish soap, or a few spice jars right where you cook. They’re fully removable (twist, release, gone), which makes them one of the strongest no-drill options renters have, and they’re all over renter-kitchen videos for a reason. One rule: suction only works on smooth, non-porous surfaces. Textured tile or grout lines will defeat it — test one shelf with a light load for a day before you trust it with the good olive oil.
8. An Over-the-Sink Roll-Up Dish Rack
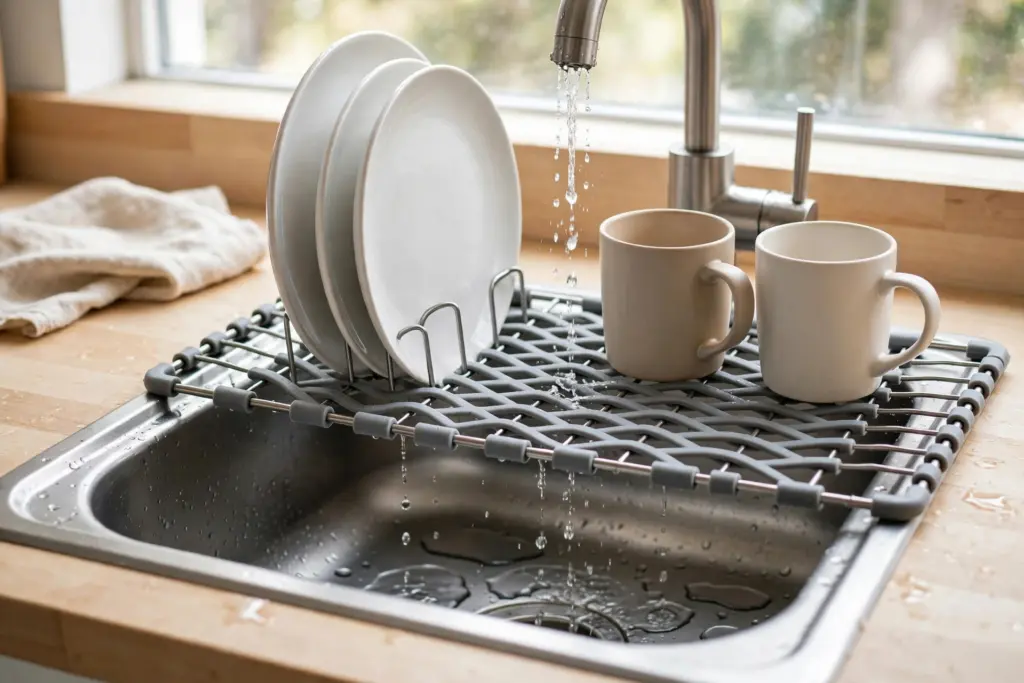
If your rental didn’t come with a dishwasher (mine didn’t, twice), the dish rack eats a full two square feet of your only counter. A roll-up rack that sits over the sink gives you that counter back.
It’s a row of steel rods wrapped in silicone that unrolls across the sink basin. Wash, set the dishes on the rods, water drips into the sink, roll it up and stash it when you’re done. Mine lives rolled up behind the faucet when it’s not in use — it takes up about as much space as a rolled magazine.
Measure the sink: these come in standard widths — measure your sink basin left to right and buy one that sits on the rim with at least an inch of overlap on each side. Too short and it slides into the sink; too long and it won’t sit flat. Most kitchen sinks are 22 to 25 inches wide inside the rim.
What it’s not: it’s not a replacement for drying everything. Heavy pots still go on a towel. But for the daily plates-glasses-mugs cycle, it keeps the counter clear, which in a small kitchen is worth more than any gadget.
9. Tension Rods as Pan and Baking-Sheet Dividers
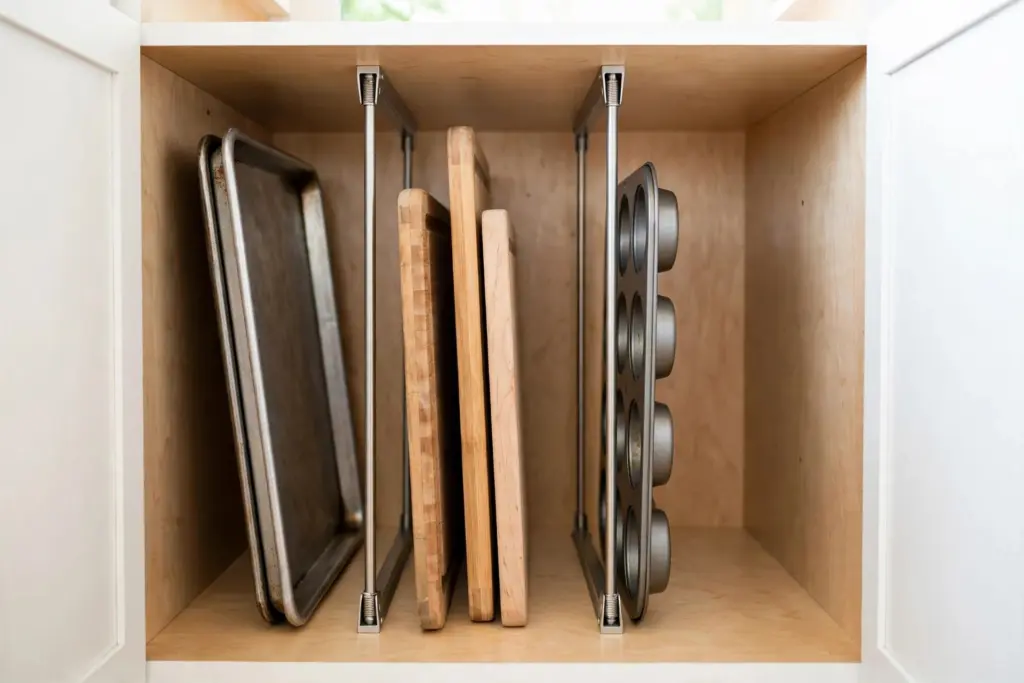
The cabinet where the baking sheets live is always a leaning tower of metal that crashes down when you pull the wrong one. Two short tension rods, mounted vertically inside the cabinet, turn it into filing slots.
I put two rods upright in my narrow cabinet — one near the front, one near the back — and now the sheet pans, cutting boards, and muffin tins stand upright in slots like files. Pull one out, the rest stay put. No more avalanche.
How to size it: measure the cabinet’s interior height and buy rods that span it with the rod not fully extended (tension rods grip best in the middle of their range). For a standard 24-inch-tall cabinet opening, two 18-to-28-inch rods work. Wedge a small piece of shelf liner under each end if your cabinet walls are slick — it stops the slow slide.
My mistake: I tried this with one rod first. One rod is a suggestion; two rods are a system. The pans just leaned around the single rod like it wasn’t there. Two rods, front and back, or don’t bother.
10. Decant Into Stackables (But Only 5 Things)
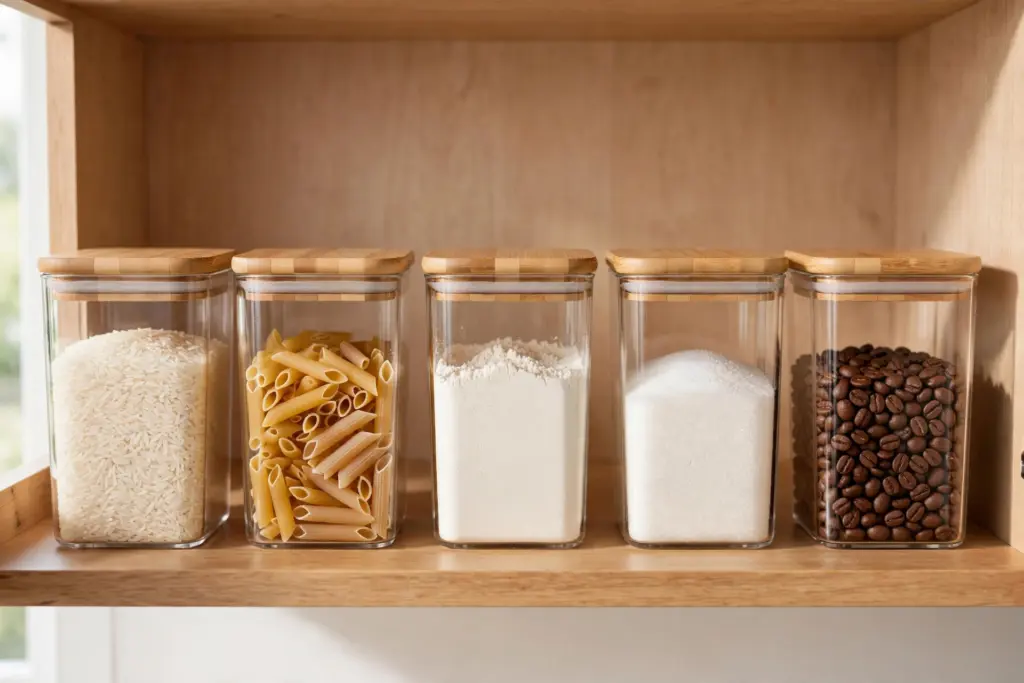
Decanting everything into matching jars looks great on the internet and wastes an entire Sunday in real life. Decant five things — the five dry goods you reach for most — and you get 90% of the benefit for 10% of the effort.
Mine are: rice, pasta, flour, sugar, and coffee. They live in square stackable canisters (square wastes less space than round — a round jar in a square cabinet leaves dead corners) on one shelf, labeled with a $5 label maker. Everything else stays in its original bag, because the original bag has the cooking instructions on it and I’m not rewriting those.
The real benefit isn’t looks — it’s inventory. When you can see the rice is low, you buy rice. When it’s hiding in a crumpled bag behind the oatmeal, you buy a second bag and discover the first one six months later. Clear canisters for the staples genuinely cut my duplicate buying.
What not to decant: anything you use less than monthly (it goes stale faster out of the bag), anything with instructions you actually read, and spices — keep spices in their original jars, just corral them on a tiered riser or the magnetic fridge setup in idea #11.
11. Magnetic Spice Jars on the Side of the Fridge
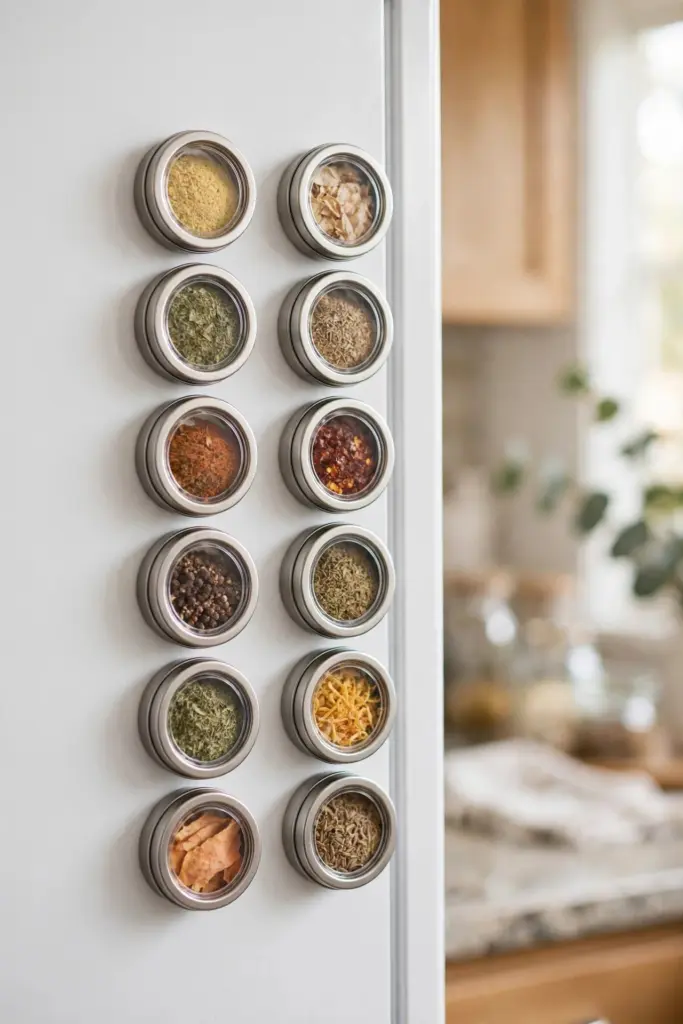
The side of your fridge is a magnetic wall you’re not using. Small magnetic spice jars stick right to it — my entire spice collection lives on the fridge side panel in two neat columns, off the counter and off the cabinet shelves.
This only works with the small jars (the standard 3-ounce magnetic tins), and only if your fridge side is actually magnetic — most are, but some stainless-steel-look fridges have a non-magnetic coating. Test with a fridge magnet before you buy 20 tins. Ask me how I know. (I bought 20 tins.)
The system: alphabetical, always. It sounds fussy until you’re mid-recipe with garlic burning and you need the smoked paprika now. Two columns, A to Z, and you’ll never dig again. Refill from bulk bags — the tins are small, so buy the big cheap refill bags and keep those in a cabinet.
Renter reality check: if the fridge belongs to the landlord, check that the tins don’t scratch the finish when you slide them. Put a tiny felt dot on the back of each tin if you’re worried. Mine have lived on two different landlord fridges with zero marks — but the felt dots cost $3 and buy peace of mind.
Don’t forget the top. While you’re at the fridge — the top of it is wasted space most renters ignore. It’s the perfect home for the stuff you use a few times a year: the waffle iron, the big serving platters, the punch bowl from the wedding registry. Corral it all on a cheap tray or low-sided bin so it reads as one intentional unit instead of appliance Jenga, and keep a step stool nearby. Out of sight, out of the way, but not out of your life.
12. Over-Cabinet-Door Towel Bar and Lid Holder
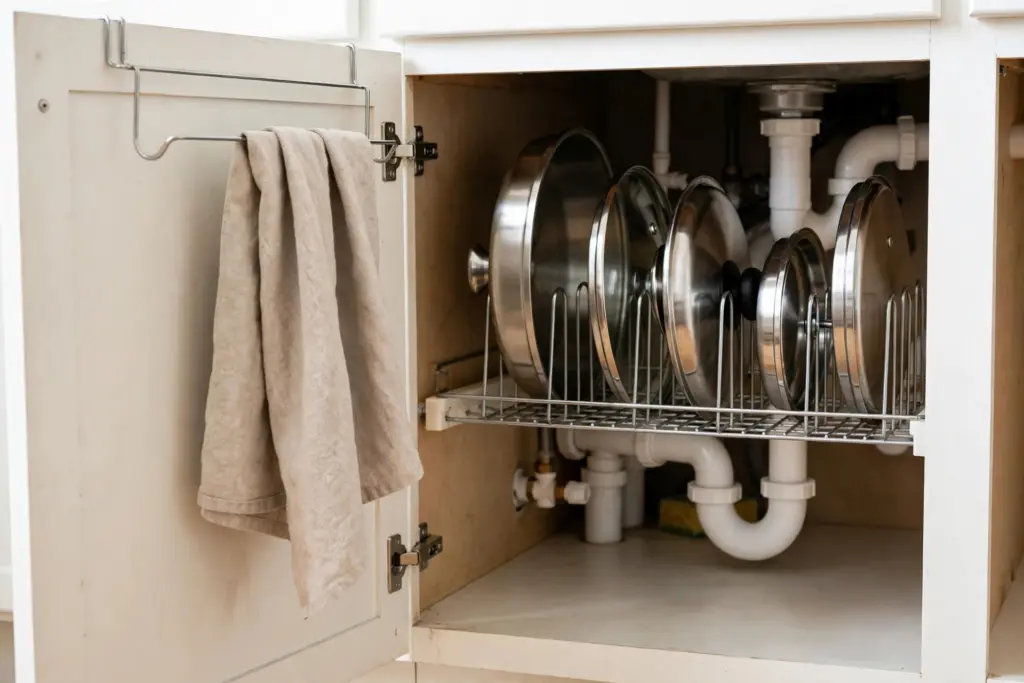
The cabinet door under the sink pulls double duty in my kitchen: inside it has the adhesive hooks from idea #7, and over the top hangs a wire towel bar. Dish towel on the bar, always within reach of the sink, never draped over the oven handle where it picks up grease.
The over-door kind hooks over the top edge of the cabinet door — no screws, no adhesive, just gravity and a snug fit. The same trick works for pot lids: an over-door wire lid holder on the inside of the big pot cabinet keeps lids upright and stops the “lid avalanche” when you reach for the Dutch oven.
Clearance check: open and close the door slowly after hanging anything over it. The hooks add about half an inch of thickness at the top — if your cabinet doors sit tight against the frame, they’ll bind. Most standard cabinets have enough play, but the test takes ten seconds and saves a scratched frame.
What goes where: towel bar on the sink cabinet (wet hands, short trip), lid holder on the pot cabinet (lids live with their pots). Don’t put the towel bar on a cabinet far from the sink — you’ll never walk over there with wet hands, and the towel will migrate back to the oven handle within a week.
13. Lazy Susans in the Corner Cabinets (and the Fridge)
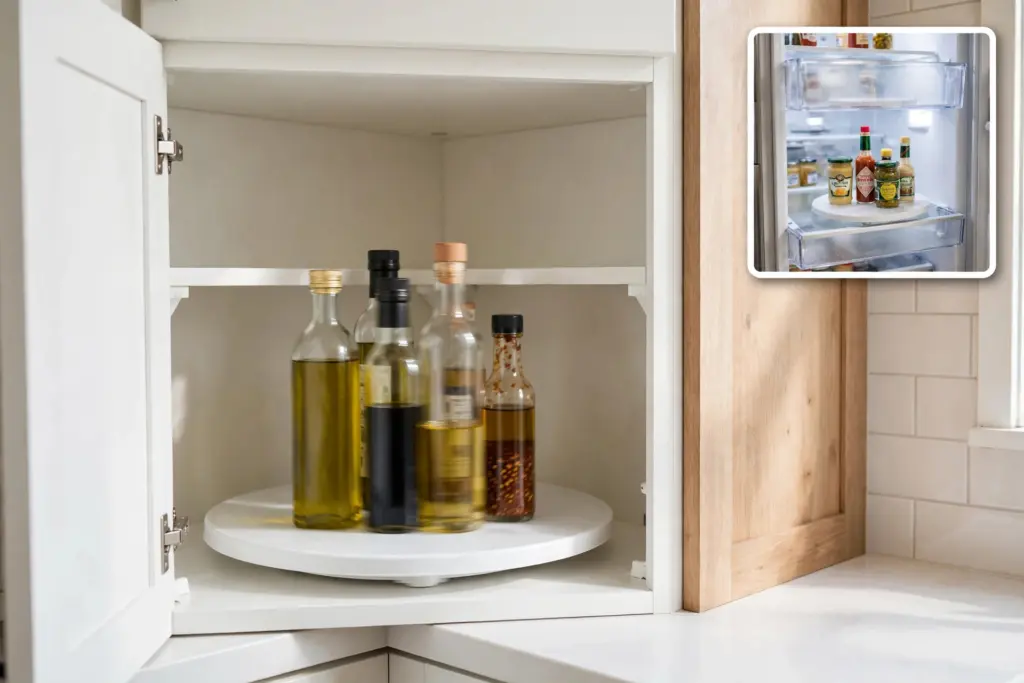
Corner cabinets are where condiments go to die. You push the soy sauce to the back, buy another one because you can’t see it, and eighteen months later you own four. A 10-inch turntable fixes it: spin, grab, done.
I have one in the corner cabinet for oils and vinegars, and a smaller one in the fridge for the condiment herd — mustard, hot sauce, the three mustards I apparently needed. The fridge one is the real hero: no more pulling every jar out to reach the one in back.
Size it right: measure the cabinet opening, not the interior. A 12-inch turntable doesn’t fit through a 10-inch door opening, and I have the return label to prove it. For most rental cabinets, a 10-inch turntable is the sweet spot. In the fridge, go smaller — 9 inches — so it doesn’t eat the whole shelf.
The two-inch rule: put a 2-inch rim or lip on it (most have one). Without a lip, bottles slide off when you spin with enthusiasm. With a lip, everything stays put and you can spin like you’re on a game show.
14. A Freestanding Baker’s Rack as Your Pantry
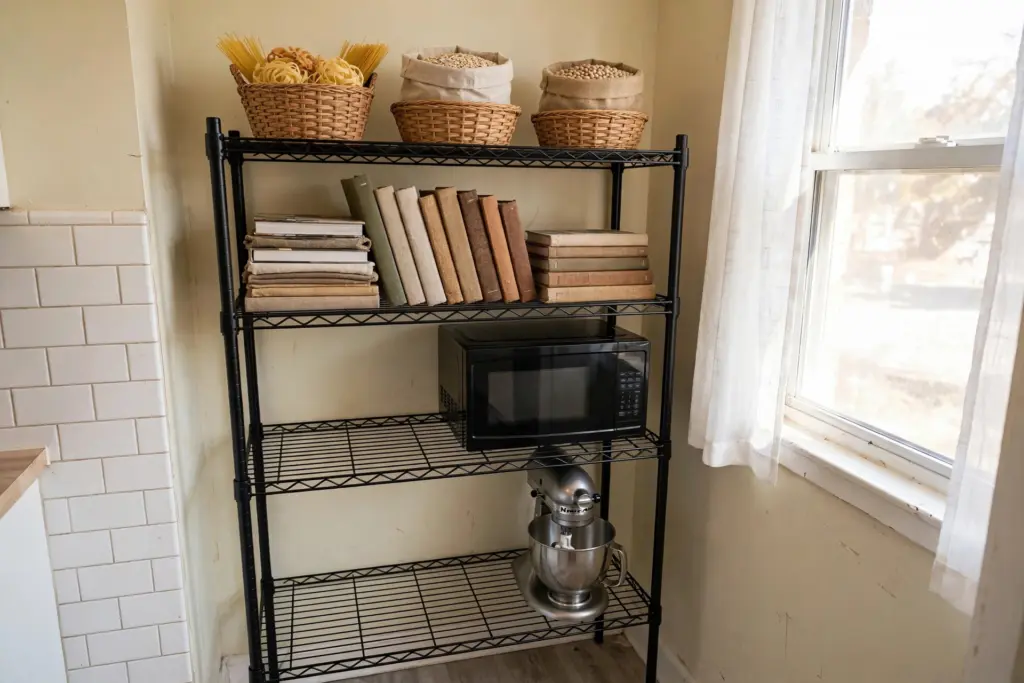
When the cabinets are full and the counters are full, the answer is more furniture — the freestanding kind. A baker’s rack (open metal shelving, usually 3 to 4 tiers) against one kitchen wall becomes your pantry, your appliance garage, and your cookbook shelf.
Mine holds the microwave on the middle shelf (the one rated for the weight — check this, microwaves are 25 to 35 pounds), dry goods in baskets on the top, and the stand mixer on the bottom where I don’t have to lift it. The open sides mean I can see everything, which means I actually use everything.
Measure the wall first: standard baker’s racks are 30 to 36 inches wide and 14 to 16 inches deep. Make sure it doesn’t block a walkway — you need at least 30 inches of clear path in a kitchen, 36 if two people cook together. And check the weight rating per shelf before you put the microwave on it; the cheap ones sag.
Renter bonus: it’s the single piece that makes a kitchen-less studio livable. No pantry? The rack is the pantry. When you move, it disassembles flat in twenty minutes and becomes a garage shelf, a plant stand, or a bathroom tower.
15. An Under-Cabinet Paper Towel Holder on Adhesive
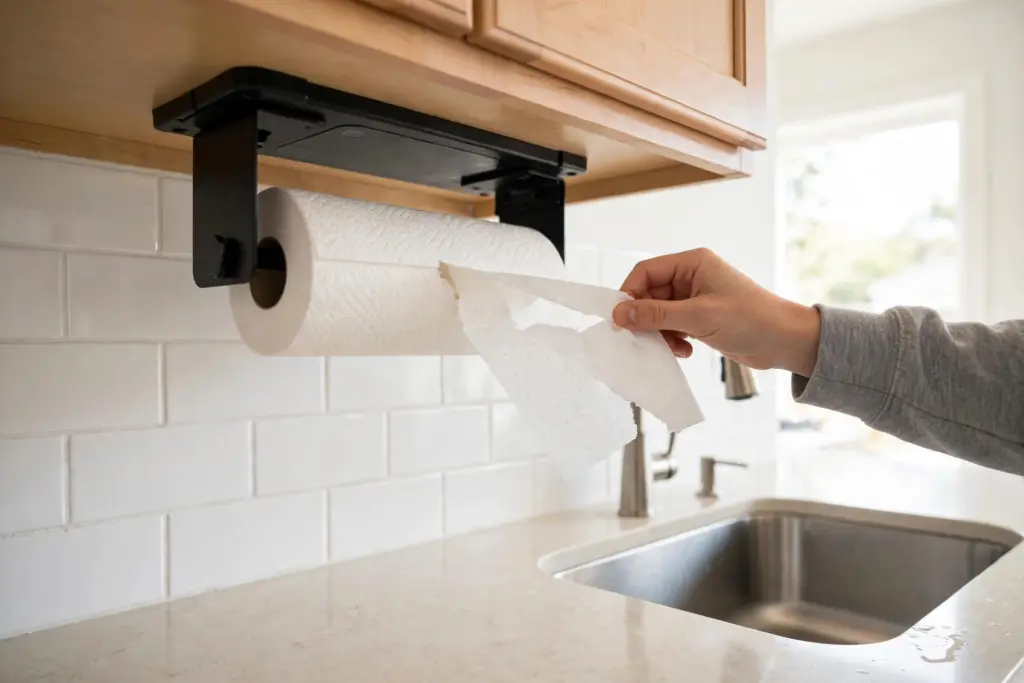
The paper towel roll lives in the worst spot in every rental kitchen: on the counter, taking up prime real estate, or under the sink where it’s damp by Tuesday. Mount it under the upper cabinet with a heavy-duty adhesive mount and it disappears into dead space.
Mine is stuck to the underside of the cabinet right next to the sink — tear off a towel with one wet hand, zero counter used. The adhesive mounts rated for 5+ pounds hold a full jumbo roll without complaint, as long as you let the adhesive cure the full 24 hours first. (There’s a theme on this list. The theme is: wait the 24 hours.)
Placement matters more than the product: it needs to be within arm’s reach of the sink and the stove, because those are the two places your hands are wet or greasy. Under the cabinet between them is the sweet spot. Don’t mount it above the stove itself — heat and steam will kill the adhesive in months.
Move-out: same drill as the hooks — slow straight-down pull on the tab. I’ve removed three of these across two apartments with zero paint damage. Keep the little mounting plate; the replacement adhesive strips cost $4 and the holder itself moves with you.
Measure Before You Buy (10 Minutes, Saves $100)
Almost everything on this list fails for exactly one reason: wrong size. Ten minutes with a tape measure before you order anything:
- Cabinet interiors: width, depth, and shelf spacing. Write all three down — shelf spacing decides whether risers and under-shelf baskets fit.
- Under the sink: width at the height you’ll mount the rod, and note where the pipes actually are. Pipes steal 4 to 6 inches you thought you had.
- Door clearance: the gap above any door you want to hang something over — you need about a quarter inch. Open and close it after hanging; binding scratches frames.
- Fridge gaps: width of the slot beside the fridge if a rolling cart is going there. Carts come in 12, 14, and 18-inch widths; the gap decides, not your preference.
- Sink basin: inside width for the roll-up rack. Too short slides in, too long won’t sit flat.
- Walkways: keep 30 inches clear wherever you add a baker’s rack or cart. A kitchen you can’t move in is a kitchen you won’t cook in.
Take a photo of the measurements on your phone. You’ll reference it in the store aisle, guaranteed.
The $110–$150 Starter Kit: What to Buy First
If your kitchen currently has nothing and you want the biggest change for the least money, buy in this order:
The dollar-store tier (about $25): if even the kit below feels like a lot right now, start here — a $3 tension rod, an $8 under-shelf basket, and $12 of labels genuinely transform a kitchen. Do Step Zero first (free), add these three, and you’ve solved the worst of it. The full entry range for a complete setup runs about $100 to $300 depending on your kitchen; the kit below is the mid tier — the sweet spot of price and durability.
- 3-pack of tension rods ($15–$20) — under-sink curtain, pan dividers, and one spare. The highest versatility per dollar on this list.
- Shelf risers, 3-pack ($20–$25) — doubles your cabinet shelves overnight.
- Under-shelf baskets, 2-pack ($18–$22) — the dead air under every shelf becomes storage.
- Over-the-door wire rack ($15–$25) — a whole extra pantry shelf on a door.
- Lazy Susan turntable ($12–$15) — ends the condiment graveyard.
- Adhesive hooks, 12-pack ($10–$12) — inside cabinet doors, landing zone, everywhere.
- Roll-up over-sink dish rack ($20–$30) — gives you back two square feet of counter.
Total: roughly $110 to $150. Add the rolling cart ($25–$40) if you have zero counter space and you’re still under $200 for a complete kitchen system.
5 Mistakes Renters Make (I Made 4 of Them)
Buying organizers before decluttering. I bought $60 of baskets, then donated a third of my kitchen gadgets. The garlic press I used twice in three years didn’t need a storage solution — it needed a donation bag. Declutter first; it’s free.
Storing daily stuff out of reach. The olive oil you use every night belongs between knee and shoulder height, next to the stove. I kept mine in the top cabinet for a year and developed a whole step-stool ritual. Prime real estate is for prime-frequency items — everything else goes high or low.
One giant organizer instead of zones. A single huge bin under the sink becomes a junk drawer with plumbing. Small, categorized containers — sponges here, bags there — beat one big catch-all every time.
Ignoring the insides of doors. I organized every shelf for a year while the cabinet doors stood empty. The inside of a door is free square footage: hooks, towel bars, lid holders. Look at the doors.
Forgetting the move-out. If it can’t come with you, think twice. Everything on this list moves — that’s the point. The one built-in-looking thing I ever bought for a rental (a “permanent” spice rack I screwed into a cabinet) cost me $40 in patching and a very awkward conversation. Never again.
The Move-Out Reset: 30 Minutes
Because everything here is no-drill, move-out is a half-hour job, not a weekend:
- Pull every adhesive tab slowly, straight down — hooks, towel holder, knife dock mounts. Slow = clean. Budget 10 minutes for all of them.
- Wipe the ghost rectangles — adhesive sometimes leaves a faint dust outline. A damp cloth handles it.
- Put adjustable shelves back to their original positions (you photographed them on move-in day, right?).
- Roll up the curtain, collapse the rods — tension rods collapse to nothing and the curtain folds into a drawer.
- Walk the kitchen with your phone flashlight — side-lighting shows every mark. Touch up nothing; just confirm there’s nothing to touch up.
I’ve done this reset twice. Total deposit deductions for kitchen “damage” across both apartments: zero.
FAQ
How can I organize a small rental kitchen without drilling? Lean on tension, gravity, and adhesive: tension rods, over-the-door racks, rolling carts, freestanding shelves, magnetic jars, and heavy-duty adhesive hooks. Everything on this list removes cleanly.
What’s the first thing I should buy for a kitchen with no storage? Tension rods and shelf risers. The rods unlock under-sink and pan storage for under $20, and risers double every cabinet shelf. Those two purchases fix the most common rental-kitchen pain points.
Will adhesive hooks really hold in a kitchen? For light loads on smooth surfaces — yes, if you let them cure 24 hours and respect the weight rating. Measuring cups, towels, and potholders are perfect. Keep them away from stove heat and don’t hang cast iron from them.
What should I not store on the counter? Anything you don’t touch daily. The air fryer you use twice a month belongs on the rolling cart’s bottom tier or the baker’s rack — not on the two square feet where you chop vegetables. Counter space is prep space; defend it.
How do I keep open storage from looking messy? Limit yourself to one or two container colors, label everything, and group by use — not by type. A baker’s rack or open shelf looks chaotic when every container is a different shape and color; it looks intentional when the bins match and each shelf is a zone. Labels are the cheat code: they make mismatched stuff read as a system.
Small rental kitchens aren’t a space problem — they’re a systems problem. Pick the three ideas that match your actual daily friction — the under-sink chaos, the spice avalanche, the missing counter — and start there. Your deposit stays safe, your walls stay hole-free, and dinner stops feeling like an archaeological dig.
Loved this? Pin it so you can find it later.
Pin this post
Zoya Siddiqui
Hi, I'm Zoya Siddiqui, the founder of Shutki. I live in small rental spaces and share practical, renter-friendly storage ideas for tiny kitchens, bedrooms, closets, and bathrooms — no drilling, no renovations, no lost security deposit.
All posts