10 Under-Sink Organization Ideas for Renters (No Drilling, No Damage)
 Save
Open the cabinet under your kitchen sink right now. Go ahead, I’ll wait.
Was it a Tetris game of cleaning bottles, a graveyard of plastic bags, and at least one sponge of mysterious origin? Mine was. For two years I just shoved things in and slammed the door before anything fell out.
The under-sink cabinet is the most wasted space in a rental kitchen — a big box with a pipe running through the middle of it that makes normal organizers useless. But with the right approach, it becomes genuinely useful storage. Everything here is renter-safe: no drilling, no permanent changes, and it all comes out on move-out day. Real costs and measurements included, because I’ve bought the wrong size organizer twice and I’d like to save you the return trips.
1. Start by Emptying Everything (Yes, Everything)
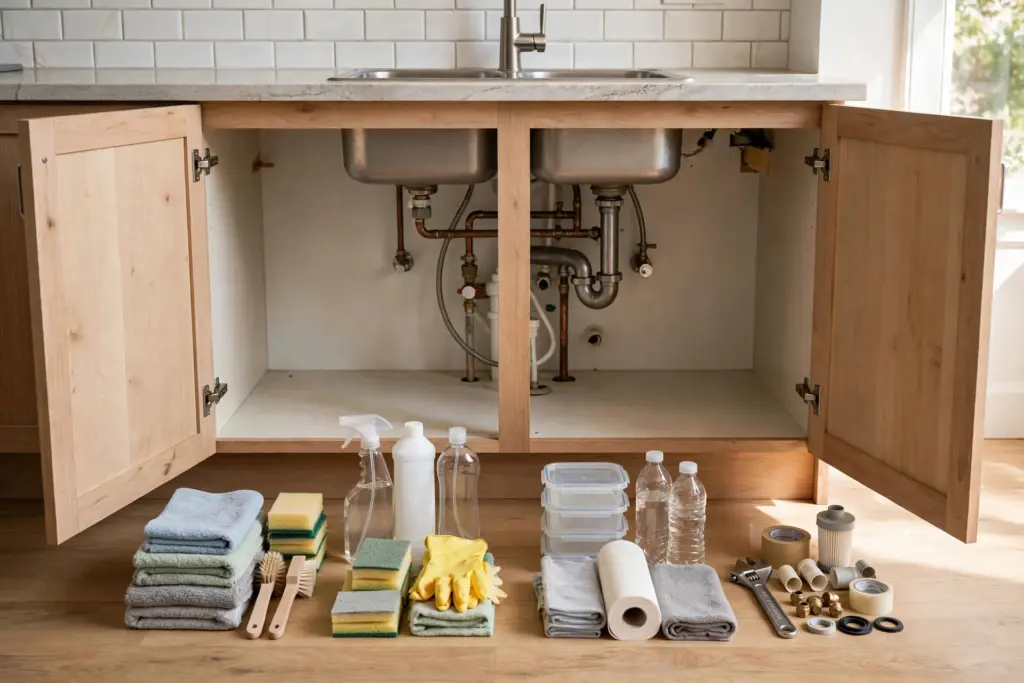
I know, I know. But you can’t organize what you can’t see. Pull it all out, wipe the cabinet floor, and check for leaks or moisture damage while you’re in there — landlords love tenants who catch leaks early, and you’ll want to know before you invest in organizers.
Throw away: expired cleaners (yes, they expire — check dates), the third half-used bottle of the same spray, and anything leaking. My rule: if I can’t name what it’s for, it’s gone. I threw away a bottle I’d been moving between apartments for four years without ever opening. Felt amazing.
While it’s empty, do this 2-minute inspection: run your hand along the pipe connections feeling for moisture, look for water stains or warping on the cabinet floor, and sniff for mustiness. Finding a slow leak now saves you from a mold problem later — and documenting it with a photo protects your deposit if the damage predates you.
2. A Tension Rod for Spray Bottles
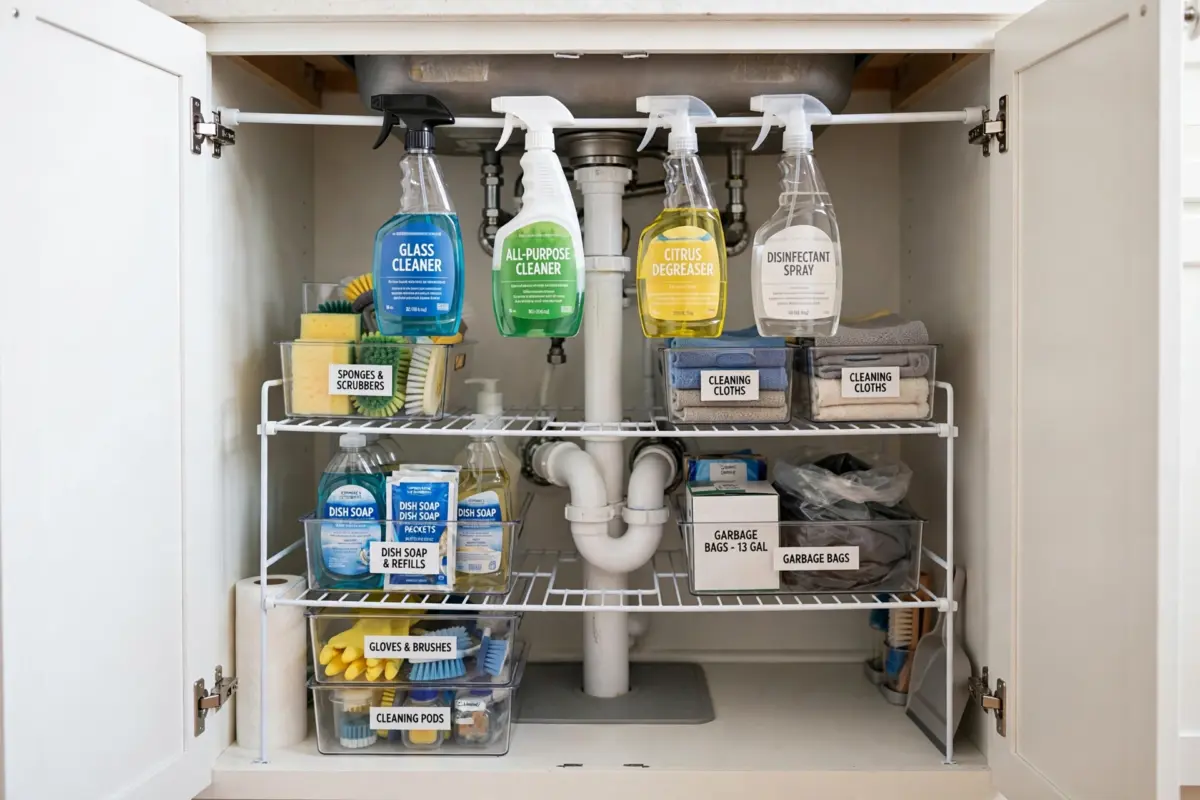
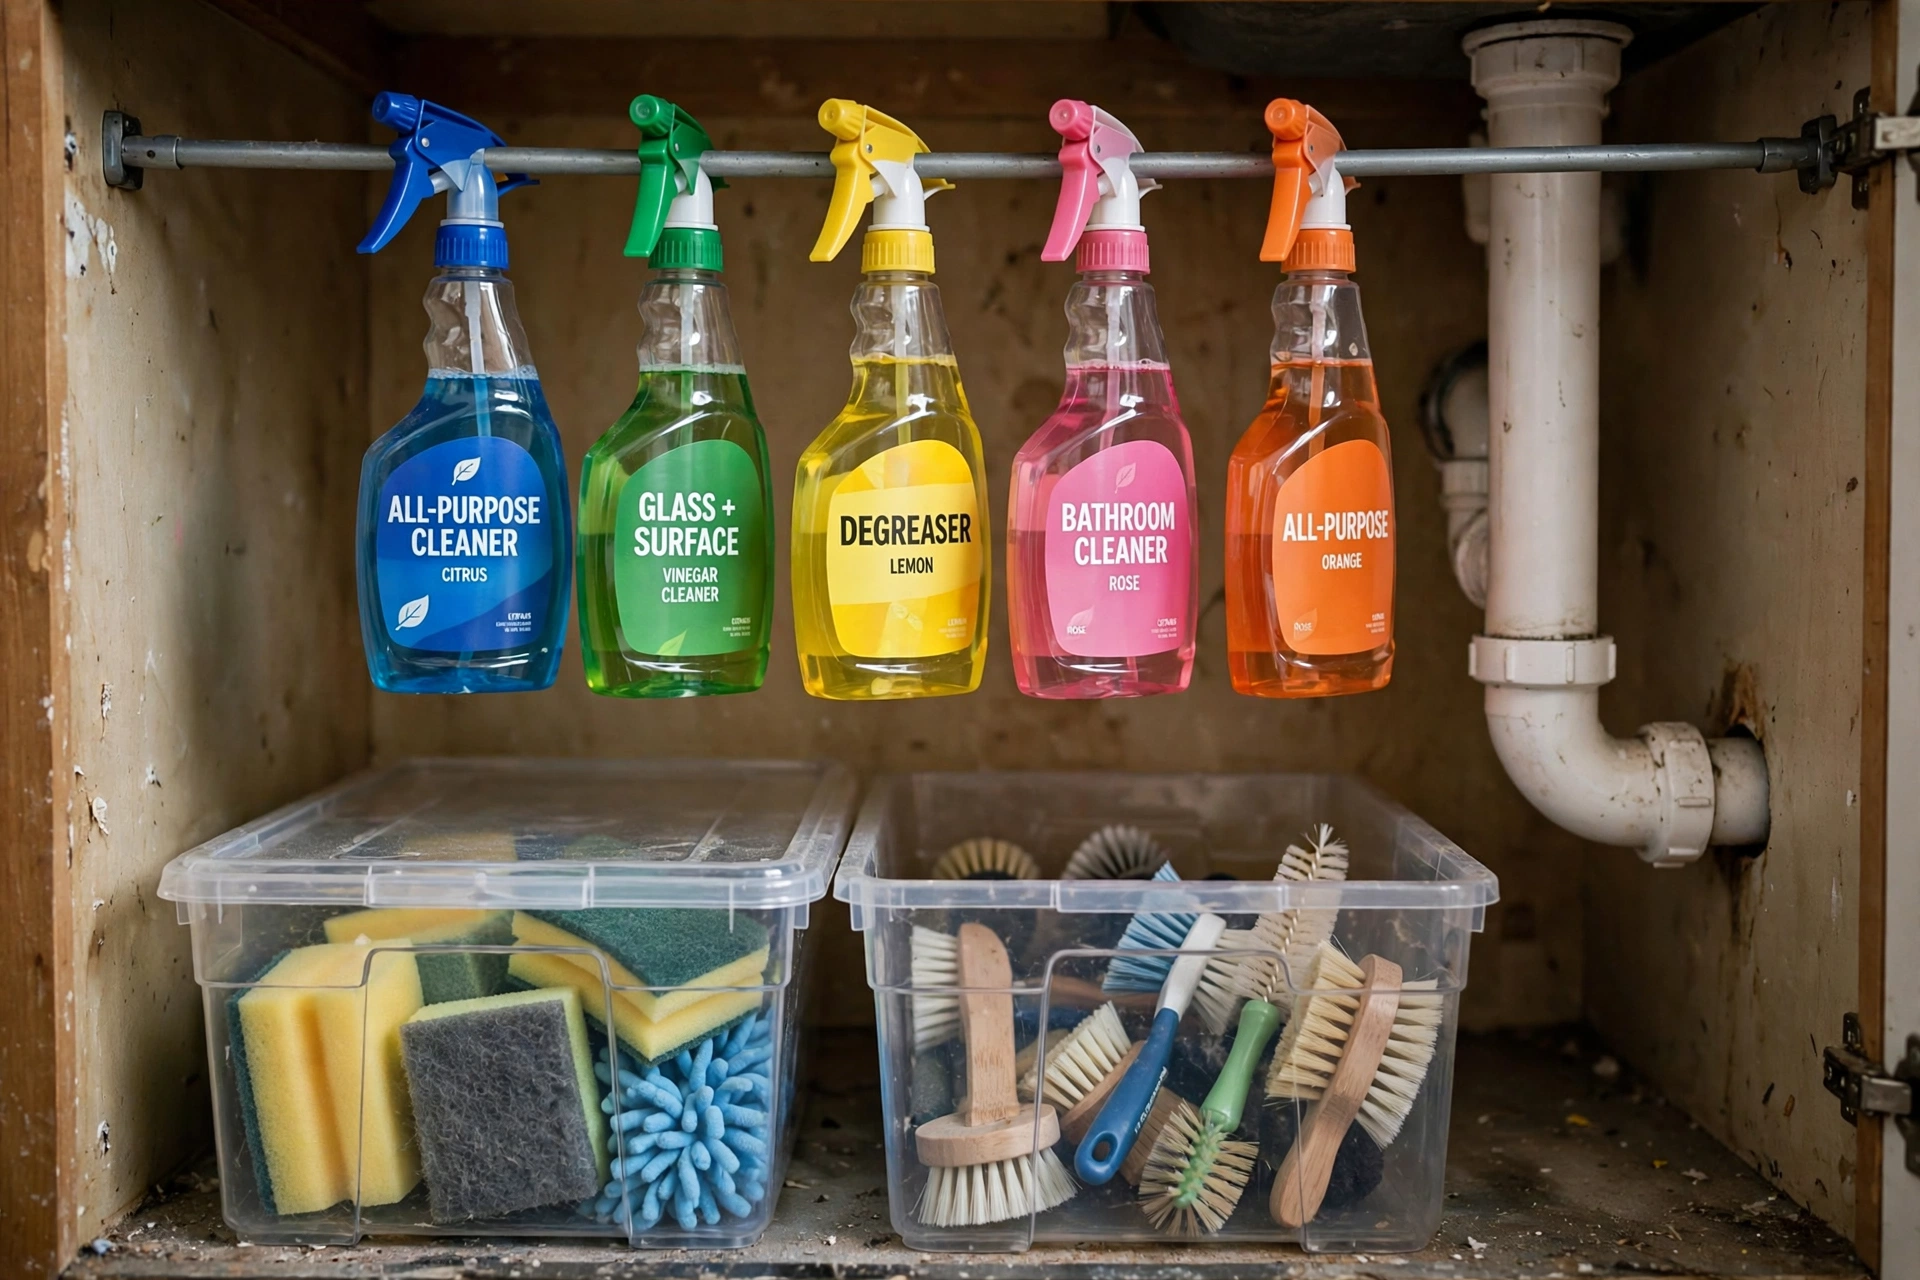
This is the classic for a reason. A spring tension rod across the cabinet, hung just under the top, lets you hang spray bottles by their trigger handles. They dangle neatly instead of hogging floor space.
Measure your cabinet width first — most need a 16 to 24-inch rod, about $8 to $12. Check the weight rating; heavy full-size bottles can slide a cheap rod. Hang it 2 to 3 inches below the cabinet top so the bottles clear the shelf or items below. This one trick freed up half my cabinet floor.
Pro tip: hang only the bottles you use weekly. The full-size backup bottles are heavy and make the rod sag over time — store backups elsewhere and keep a small working spray bottle on the rod. Lighter load, longer rod life.
3. Stackable Clear Bins for Small Stuff
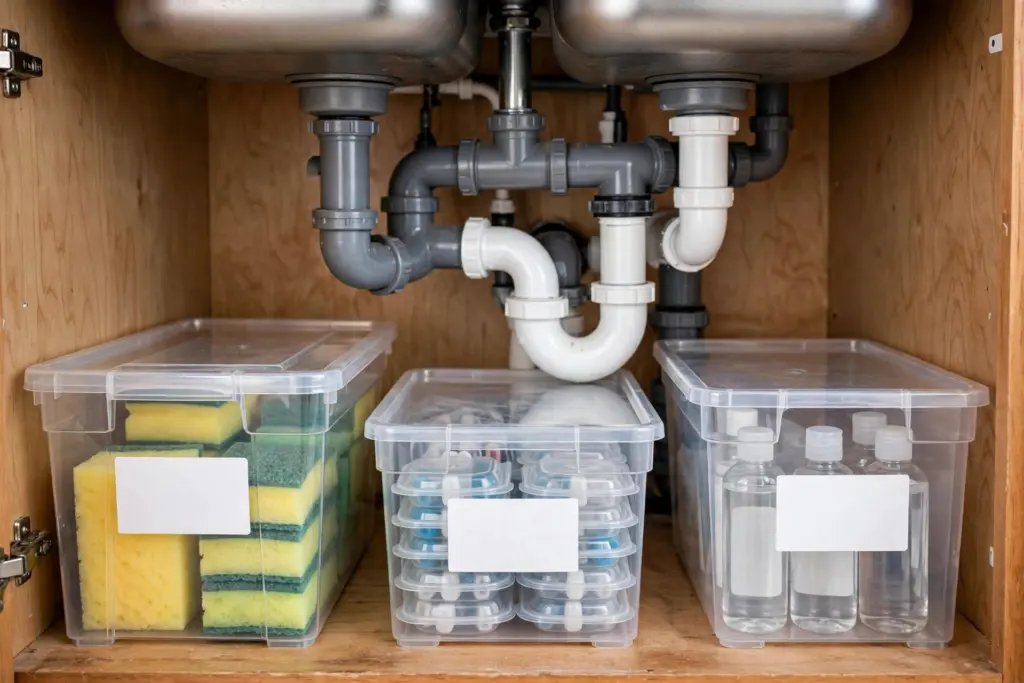
Sponges, dishwasher pods, scrub brushes, rubber gloves — the small stuff that vanishes into the void. Stackable clear bins corral them into visible zones. Clear matters: if you can see the dishwasher pods, you won’t buy a fourth bag.
Go for bins with lids if your cabinet has any moisture issues. Damp sponges in open bins get funky fast — and “funky” under a sink means mildew, which means smell, which means a problem. A set of 4 stackable bins runs about $15 to $20.
Sizing: measure your cabinet’s interior height before buying. Standard under-sink cabinets give you 20 to 28 inches of vertical space, but the pipe eats the middle. Two stackable bins (each 6 to 8 inches tall) usually fit; three is optimistic unless your cabinet is unusually tall.
4. A Two-Tier Shelf Around the Pipes
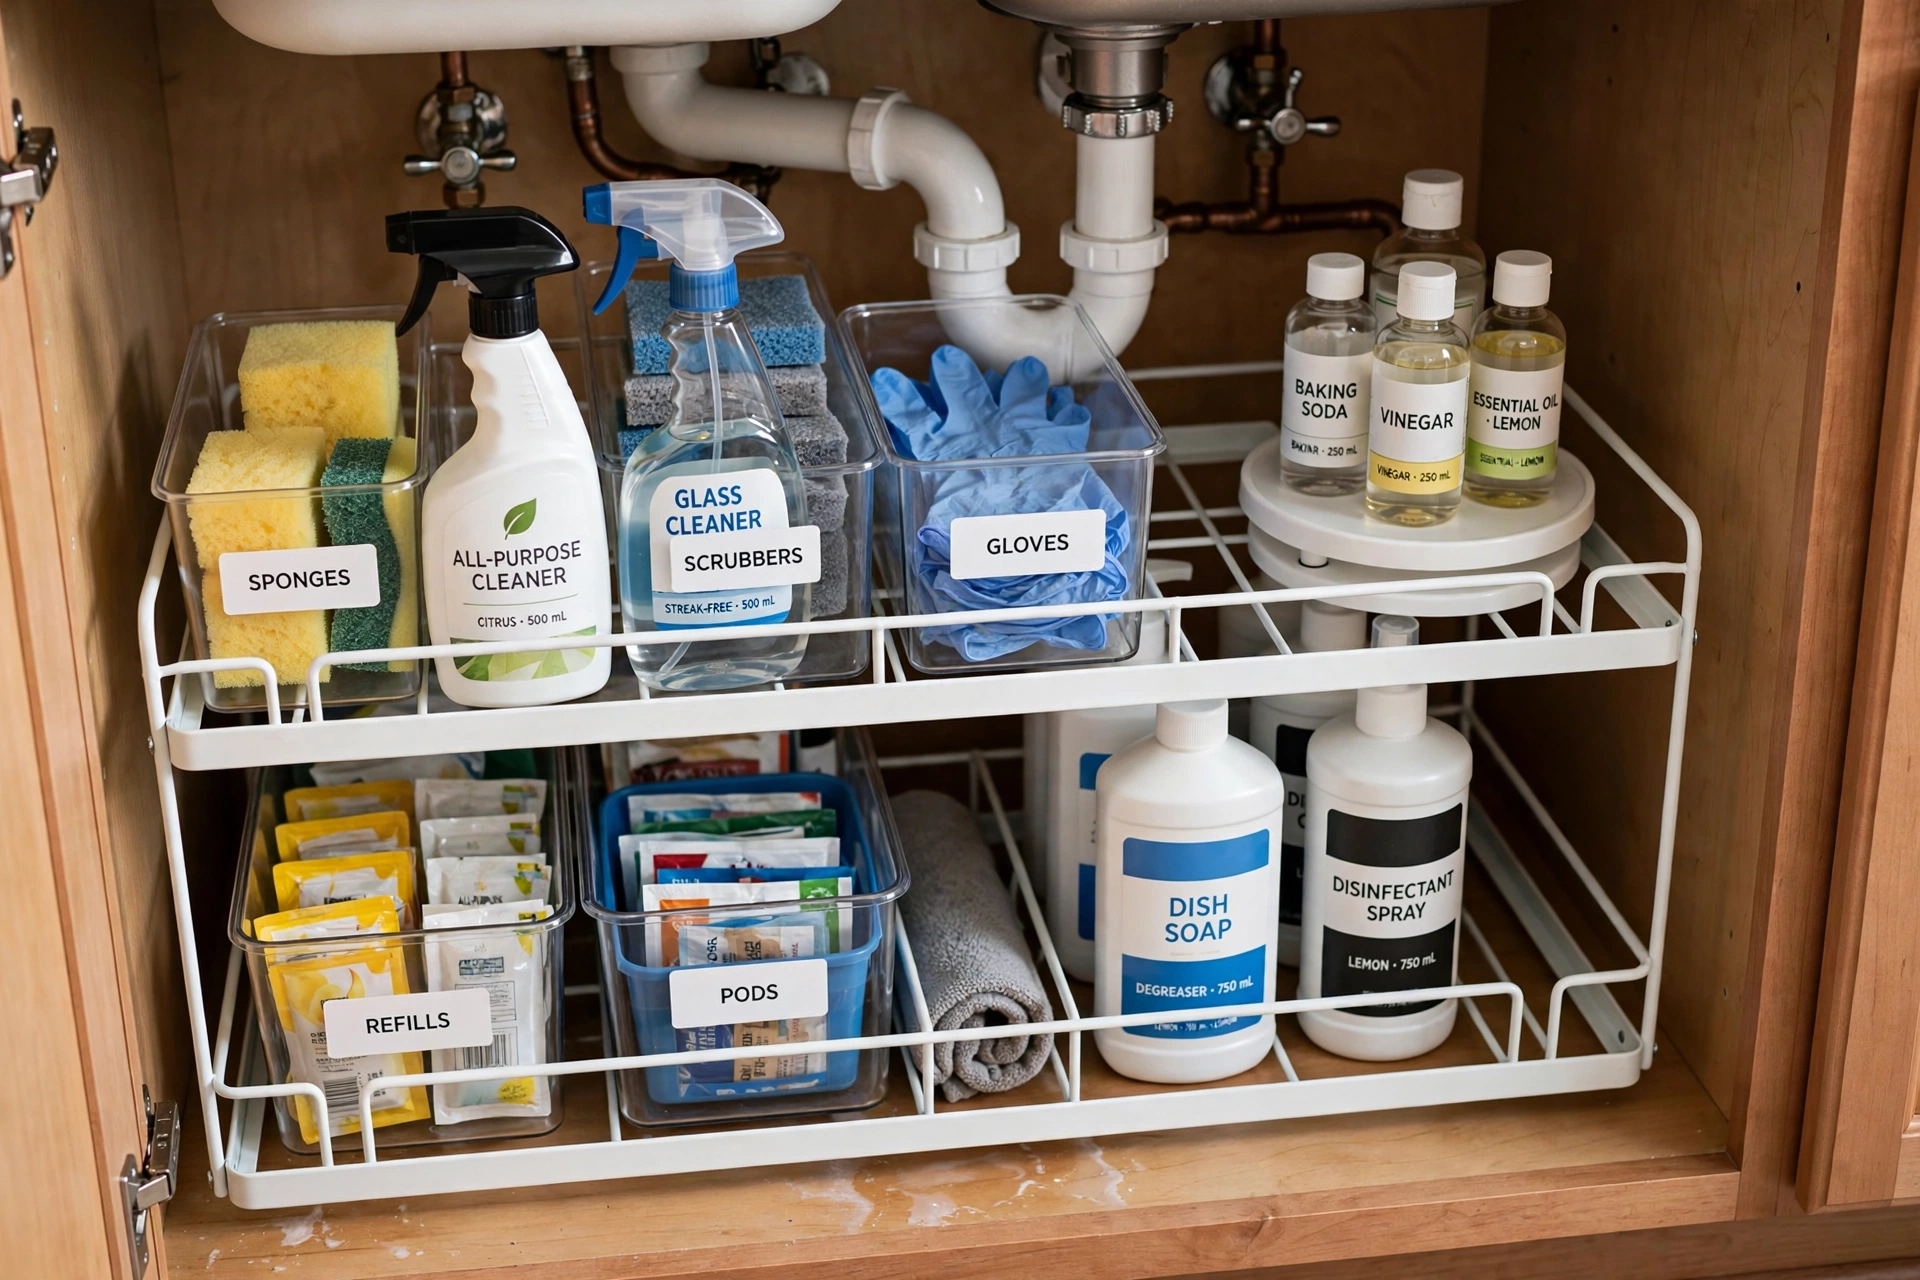
The pipe in the middle ruins every standard shelf — which is why you want an adjustable or L-shaped two-tier organizer designed to fit around plumbing. Two levels instantly double your storage in the same footprint. These run $20 to $35 and they’re the single best dollar-per-inch upgrade for this cabinet.
Put daily cleaners on top, backups and refills below. The stuff you grab every day should never require moving three other things first. That’s the whole philosophy: frequency determines height. Daily at eye/hand level, weekly below, rarely in the back.
Measure twice: every under-sink plumbing layout is different. Measure the pipe’s position (distance from left wall, from the front) and the cabinet’s interior width and depth before ordering. “Adjustable” organizers with sliding panels handle most layouts; fixed L-shaped ones are cheaper but pickier.
5. The Cabinet Door Is Free Real Estate
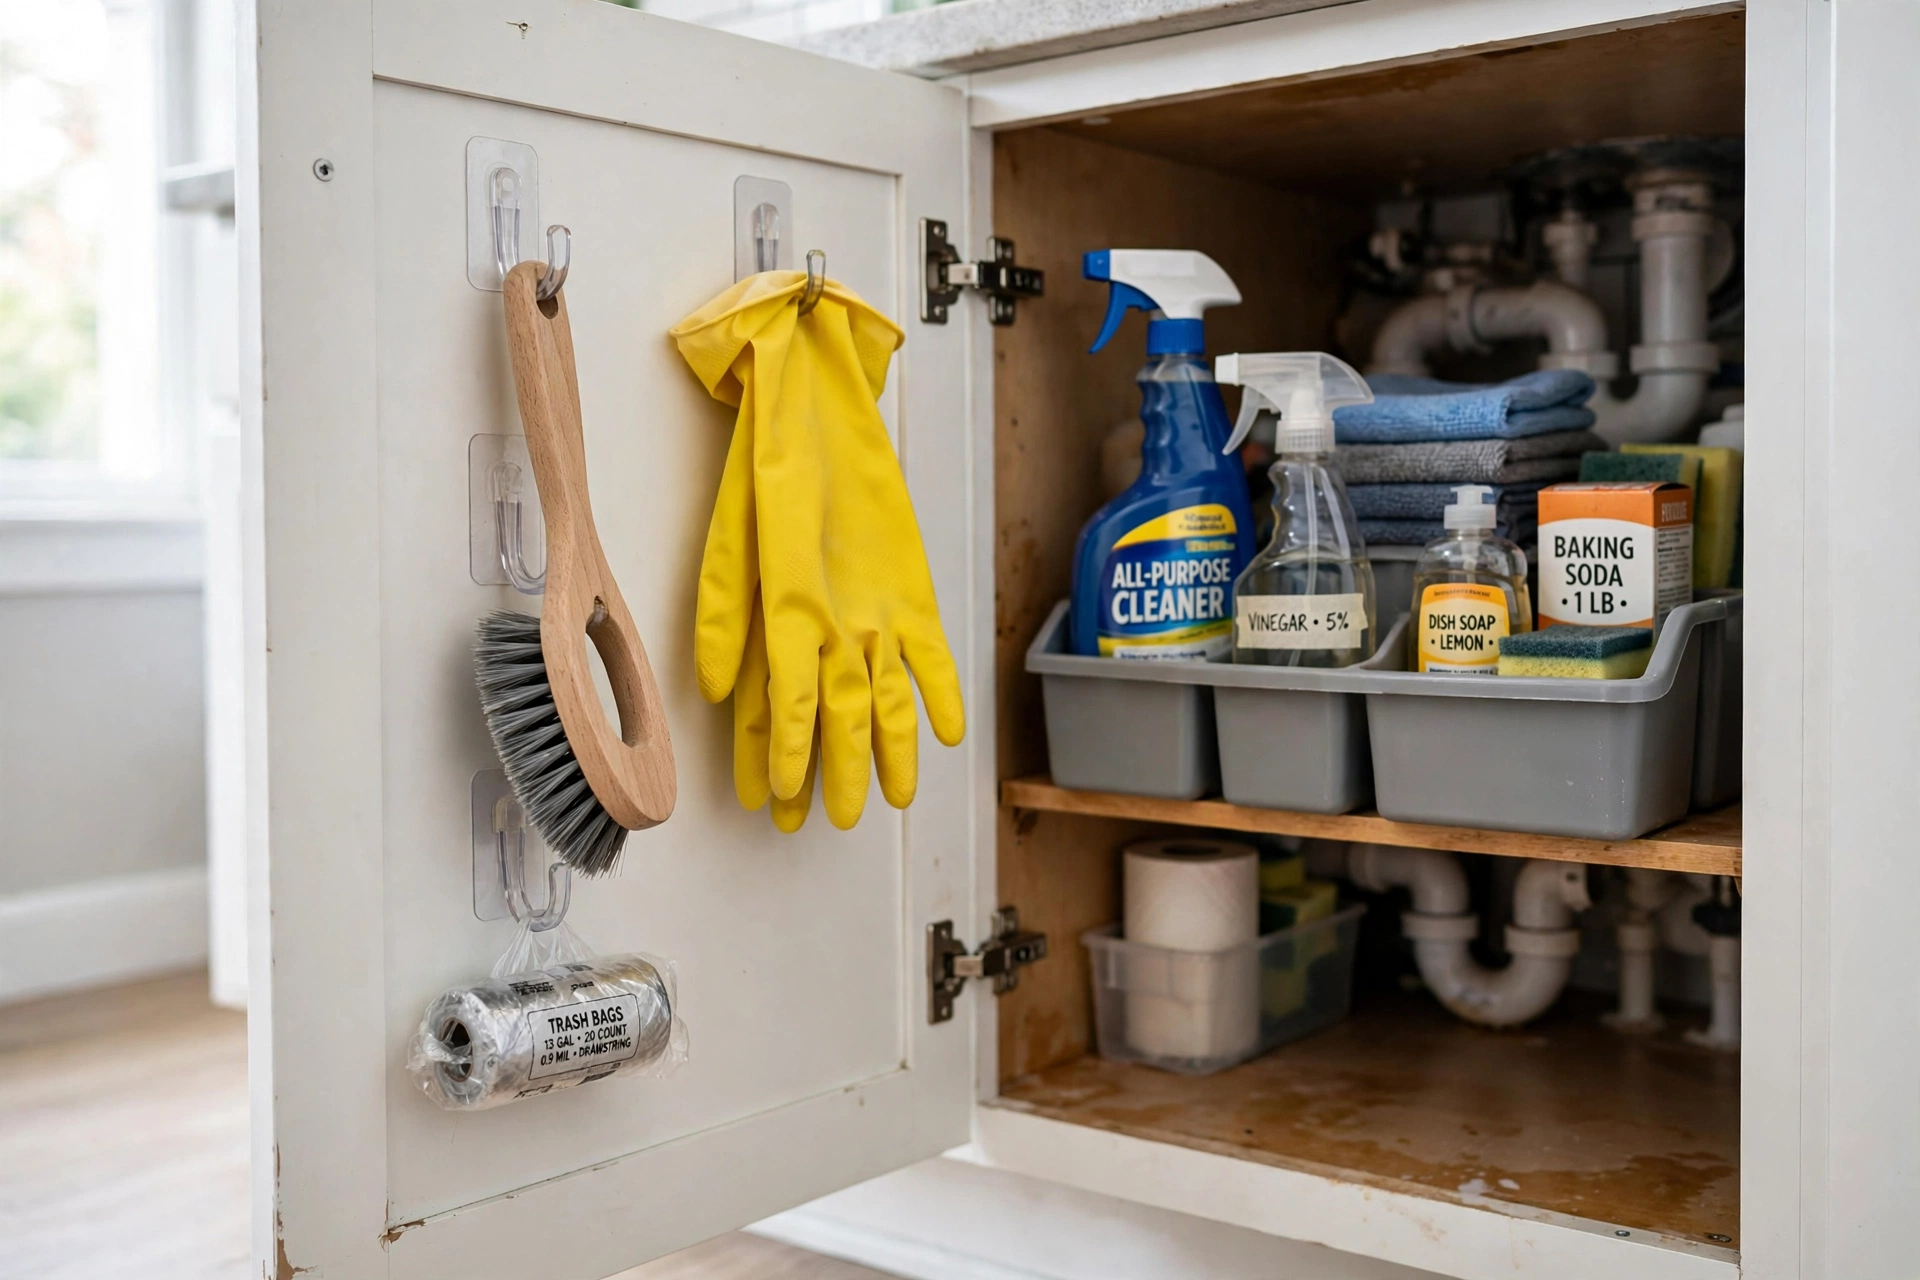
The inside of the cabinet door is wasted space in 90% of kitchens. Stick-on hooks or a slim over-door wire rack on the inside holds: rubber gloves, a small trash bag roll, the sink stopper, and my personal favorite — the scrub brush, hanging where it can actually dry instead of festering in a puddle.
Use removable adhesive hooks, not screws. And check the door still closes fully before you load it up — a rack that’s too deep will stop the door closing, and then you’ve traded organization for a door that won’t shut, which is worse.
What lives on the door: lightweight, flat-ish things you grab often. Gloves, brushes, trash bags, the drain stopper. Not heavy bottles — adhesive hooks have weight limits, and a falling bottle of bleach inside a cabinet is a special kind of disaster.
6. A Lazy Susan for the Deep Corners
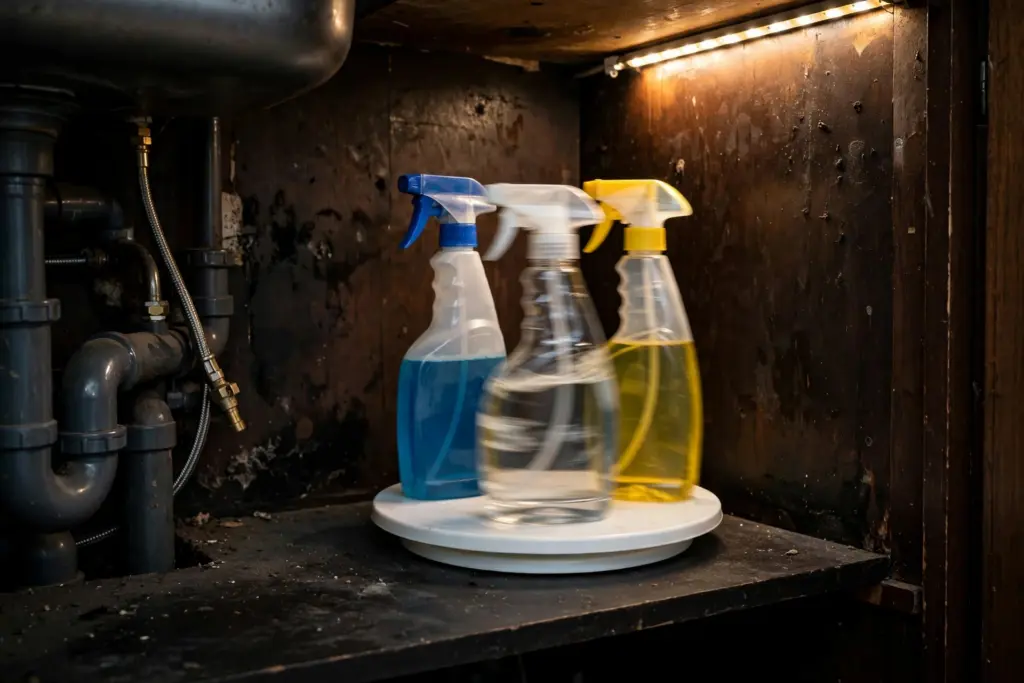
The back corners of an under-sink cabinet are where bottles go to die. A small turntable (lazy Susan) in each back corner means one spin brings everything to you — no more kneeling and reaching into the abyss.
Get one with a raised rim so bottles don’t slide off mid-spin. This sounds minor until you’ve fished a rolling bottle of bleach out from behind the pipe. A 10-inch turntable is about $10; two of them transform the dead corners completely.
What goes on the turntable: the “sometimes” items — wood polish, stainless cleaner, the specialty stuff you use monthly. Daily items stay front and center; the turntable is for the supporting cast.
7. Group by Zone, Not by Size
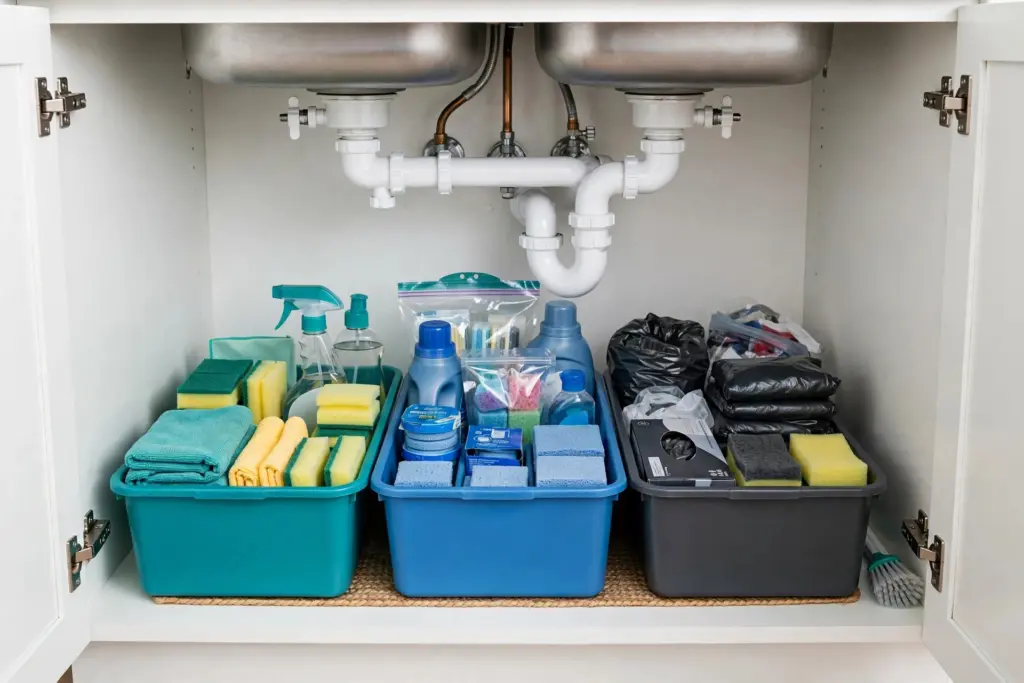
Don’t just line bottles up by height like a weird cleaning-product parade. Create zones: daily dish stuff together, weekly deep-clean supplies together, and “rarely but critically” (drain cleaner, wood polish) in the back.
I labeled my bins with a label maker — “DAILY,” “WEEKLY,” “BACKUP.” It takes ten minutes and it’s the difference between a system and a pile. If you don’t have a label maker, painter’s tape and a marker work fine — and they’re easier to change when your system evolves.
The zone map that works for most people:
- Front-left: daily dish soap, sponge, hand soap refill
- Front-right: all-purpose spray, paper towels
- Back-left (turntable): specialty cleaners
- Back-right: backups and refills
- Door: gloves, brush, trash bags
8. A Drip Tray Under Everything
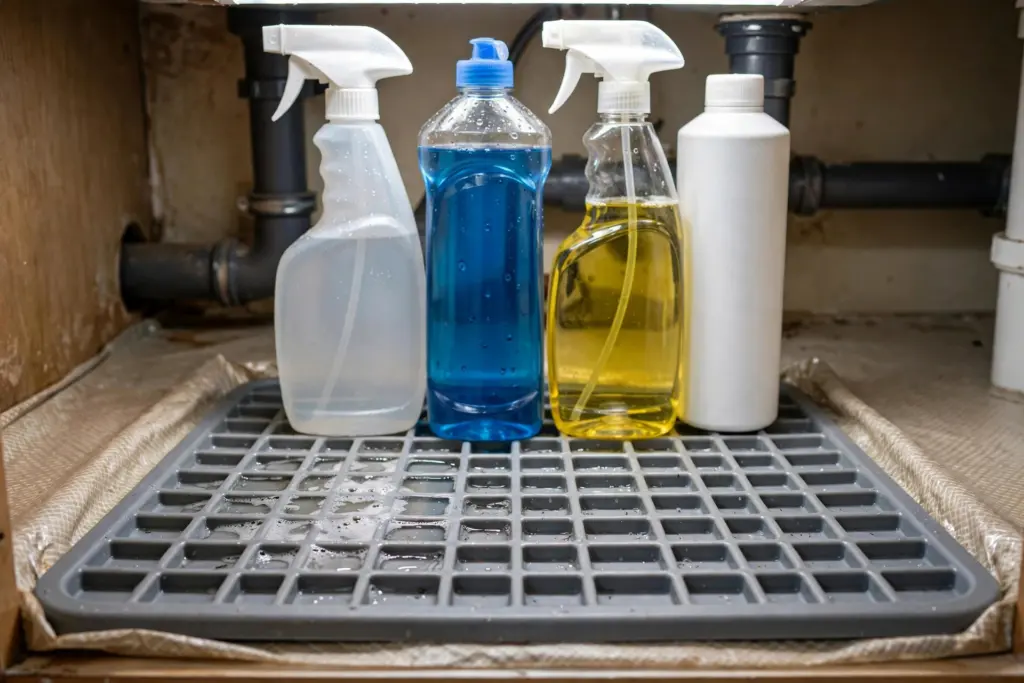
Under-sink cabinets and slow leaks are a classic combo. A shallow plastic drip tray or boot tray under your bins catches drips before they warp the cabinet floor — and warped cabinet floors are exactly the kind of thing landlords deduct from deposits.
It’s a $10 insurance policy. Mine has caught two minor leaks in three years. Both times I felt like a genius. Get one slightly smaller than your cabinet floor so you can lift it out to clean — a tray you can’t remove is just a second floor that also gets gross.
Deposit protection angle: photograph your clean, dry cabinet floor now, and photograph the tray doing its job if it ever catches something. If a leak ever causes damage, you have proof you were the tenant who maintained, not the tenant who ignored.
9. Decant the Bulky Stuff
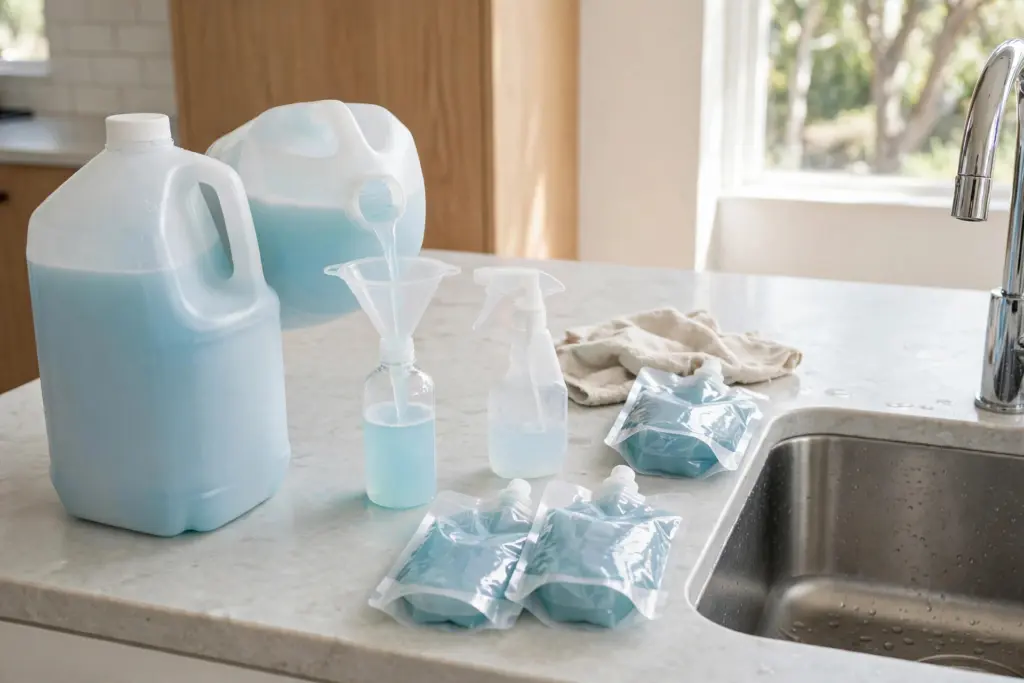
That giant economy-size dish soap bottle eats a third of your cabinet. Decant daily cleaners into smaller, uniform squeeze bottles and store the big refills elsewhere — under the bathroom sink, the hall closet, wherever.
Uniform bottles also just look calmer. There’s actual psychology here: visual uniformity reads as “organized” even when the contents are identical. A row of matching amber bottles looks like a system; a row of random branded bottles looks like a clearance aisle.
Label everything you decant. Unlabeled mystery bottles under a sink are how accidents happen — especially in homes with kids, guests, or anyone who doesn’t know your system. A $10 label maker pays for itself in safety alone.
10. The 5-Minute Monthly Reset
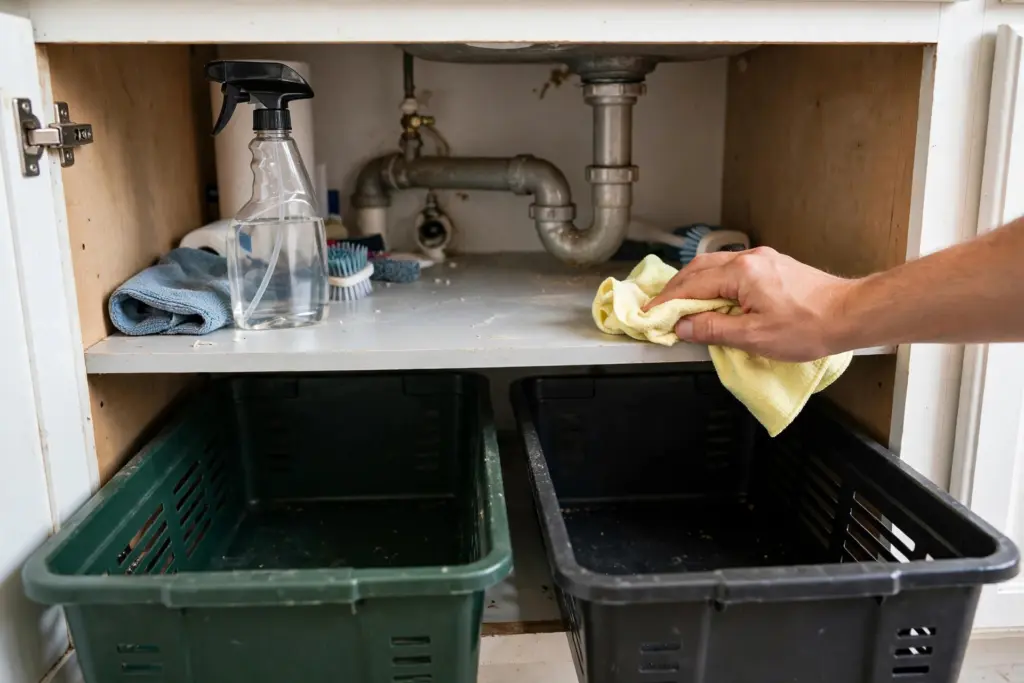
Under-sink cabinets drift back to chaos because nobody looks at them. Put a monthly reminder on your phone: pull the bins out, toss anything empty or expired, wipe the tray, done. Five minutes.
I do mine on the first Sunday of the month with my coffee. It’s weirdly satisfying — like a tiny, contained victory over entropy. Check expiration dates while you’re at it; most cleaners lose effectiveness after a year, and disinfectants after two.
The First 20 Minutes
Before you buy a single organizer: (1) empty the cabinet completely (5 min); (2) wipe it down and do the leak check — feel pipe connections, look for stains (5 min); (3) lay the shelf liner (5 min); (4) put back only what you actually use, grouped roughly by frequency (5 min). You’ll immediately see what doesn’t fit and what you actually need to buy. Most people discover they need two organizers, not five.
How to Measure Your Under-Sink Cabinet (Do This Before Buying Anything)
Every under-sink cabinet is a unique snowflake of plumbing, and guessing is how you end up owning organizers that don’t fit. Grab a tape measure and write down four numbers:
- Interior width — wall to wall, measured at the front of the cabinet.
- Interior depth — front edge to back wall.
- Interior height — cabinet floor to the underside of the sink basin (not the countertop).
- Pipe position — distance from the left wall to the pipe’s center, and from the front edge to the pipe’s center. Note the pipe diameter too (usually 1.5 inches for kitchen drains).
Keep these on your phone. Check every product’s dimensions against YOUR numbers, not the “fits most cabinets” claim on the box. “Fits most” is marketing for “fit the reviewer’s cabinet.”
Garbage disposal? Measure around it separately — disposals eat 6 to 8 inches of side space and rule out most wide organizers. Narrow stackable bins on the disposal-free side are your best bet.
Shelf Liner: The $8 Upgrade
While the cabinet is empty, lay non-adhesive grip liner or a cut-to-fit plastic mat on the cabinet floor. It catches small drips, turns cleanup into a quick wipe, and lifts straight out on move-out day. Ten minutes of work that pays off every time something leaks a little.
When It Smells: Find the Source, Don’t Mask It
If the cabinet smells musty, air freshener is a cover-up, not a fix. Check in this order: (1) the drip tray — pull it out and wash it; (2) the pipe connections — feel for dampness and hand-tighten the slip nuts if they’re weeping; (3) old sponges — replace them monthly, they go funky fast in the dark; (4) under the liner — lift it and check for trapped moisture on the cabinet floor.
Nine times out of ten it’s the tray or a sponge. If a connection is actively dripping and won’t tighten by hand, that’s a landlord call — don’t wrench on plumbing that isn’t yours.
The Quarterly 15-Minute Deep Clean
Four times a year, do the full version: everything out, liner lifted and washed, bins wiped down, expiration dates checked, pipe connections felt for moisture. Fifteen minutes. It’s the difference between a cabinet that stays organized and one that slowly reverts to chaos.
What NOT to Buy
- Single-purpose organizers with fixed dimensions. If it can’t adjust around YOUR pipe layout, it’s a gamble. Adjustable or modular wins every time.
- Over-door racks sized for standard cabinet doors. Most are too deep for sink cabinets — the door won’t close. Measure door clearance first.
- Stacking drawers taller than your interior height. Sounds obvious; happens constantly. Measure first (see above).
- Anything you can’t remove in 5 minutes. If move-out day requires tools or solvents, it’s not renter-friendly no matter what the box says.
Small Kitchen vs Family Kitchen: Scaling the System
Cooking for one or two: you need less. The tension rod + bins + tray starter kit is probably the whole system. Don’t buy the two-tier shelf until you’ve lived with the basics for a month and know what overflow looks like.
Family kitchen: scale up the backup zone. More dishwasher pods, more sponges, bigger refill bottles. Add the second lazy Susan and the full two-tier shelf — the volume justifies it. The zone map stays the same; the bins just get bigger. And when the rest of your kitchen needs the same system thinking, here are 15 renter-friendly kitchen organization ideas that use the same no-drill approach.
Sharing the Cabinet: Roommate Rules
Two cooks, one cabinet. Split it down the middle — left side yours, right side theirs, door hooks shared. Each person gets one bin for daily stuff and shares the tension rod. Label bins with names, not just contents. And agree on one rule: no bulk buying without checking space first. The under-sink has killed more roommate goodwill than the dishes.
Putting It All Together: A Standard 30-Inch Cabinet
Say your cabinet is 30 inches wide, 22 inches deep, with the drain pipe 12 inches from the left wall. Here’s the full layout: tension rod across the top holding 3 spray bottles; left of the pipe, two stackable bins (daily + weekly); right of the pipe, the two-tier shelf with backups below and dish soap above; a lazy Susan in the back-right corner for specialty cleaners; drip tray under the bins and shelf; door hooks holding gloves, brush, and trash bags. Total cost around $60. Everything visible, everything reachable, nothing drilled.
Know the Line: Your Job vs Your Landlord’s
Organizing is your job; fixing plumbing is theirs. Report leaks promptly and in writing (email or text, so there’s a record), document with photos, and don’t attempt repairs beyond hand-tightening a slip nut. Most leases make tenants liable for damage from unreported leaks — reporting fast protects you and your deposit.
The Move-Out Reset
Everything here leaves with you: the tension rod unscrews by hand, adhesive hooks peel off with a little heat, bins and trays lift out, liner pulls up. Wipe the cabinet, photograph the clean empty interior for your deposit records, done. Total repair cost: zero. That’s the whole point of building it this way.
FAQ
How do I organize under the kitchen sink in a rental without drilling?
Use tension rods, stackable bins, adhesive door hooks, and freestanding tiered organizers. Nothing needs screws — everything sits, hangs, or sticks removably, so it’s all deposit-safe.
What should you not store under the kitchen sink?
Avoid anything moisture-sensitive: paper towels in bulk, unsealed food, and electronics. Keep chemicals away from anything a child or pet could reach — add a child lock if little hands visit.
How do you organize around pipes under the sink?
Use L-shaped or adjustable organizers designed to fit around plumbing, or place two narrow units on either side of the pipe. Measure your pipe’s position before buying anything — every cabinet is different.
Why does under the sink always get messy again?
Because it’s a closed door nobody opens deliberately. The monthly 5-minute reset (idea #10) is the actual fix — no organizer survives without maintenance.
How much does it cost to organize under the kitchen sink?
$40 to $60 covers the complete starter kit (see above). The two-tier shelf upgrade adds $20 to $35 later if you want it.
Is it safe to store cleaning products under the sink with kids?
Only with a childproof lock on the cabinet door — they’re $8 for a multi-pack and take 30 seconds to install. Move the most hazardous items (drain cleaner, bleach) to a high shelf regardless.
Can I use shelf liner or contact paper under the sink in a rental?
Yes. Non-adhesive grip liner lifts straight out with zero residue; even the adhesive kind peels off with a little heat from a hair dryer. It protects the cabinet floor from drips, which protects your deposit.
What if I have a garbage disposal under the sink?
Disposals eat 6 to 8 inches of side space and rule out wide organizers. Use narrow stackable bins on the disposal-free side, keep the tension rod in the open area, and don’t store anything touching the disposal unit — vibration and heat shorten its life and rattle your stuff.
How do I keep the area under the sink dry?
The drip tray catches small leaks, but dryness starts with habits: don’t store wet sponges in closed bins, wipe up drips when you see them, and run the disposal with cold water to reduce condensation on pipes. If the cabinet floor is chronically damp with no visible leak, tell your landlord — persistent moisture means something’s wrong behind the wall.
Should I store trash bags under the sink?
A single roll on a door hook is fine and convenient. Don’t stockpile bulk boxes of bags down there — they eat space better used for cleaners, and the bulk box belongs in a closet.
The under-sink cabinet went from my most dreaded door to my most satisfying one. Total spend was under $60, total holes drilled was zero, and now when I open it, everything has a place. Start with the tension rod — it’s the fastest win — and build from there.
Loved this? Pin it so you can find it later.
Pin this post
Zoya Siddiqui
Hi, I'm Zoya Siddiqui, the founder of Shutki. I live in small rental spaces and share practical, renter-friendly storage ideas for tiny kitchens, bedrooms, closets, and bathrooms — no drilling, no renovations, no lost security deposit.
All posts